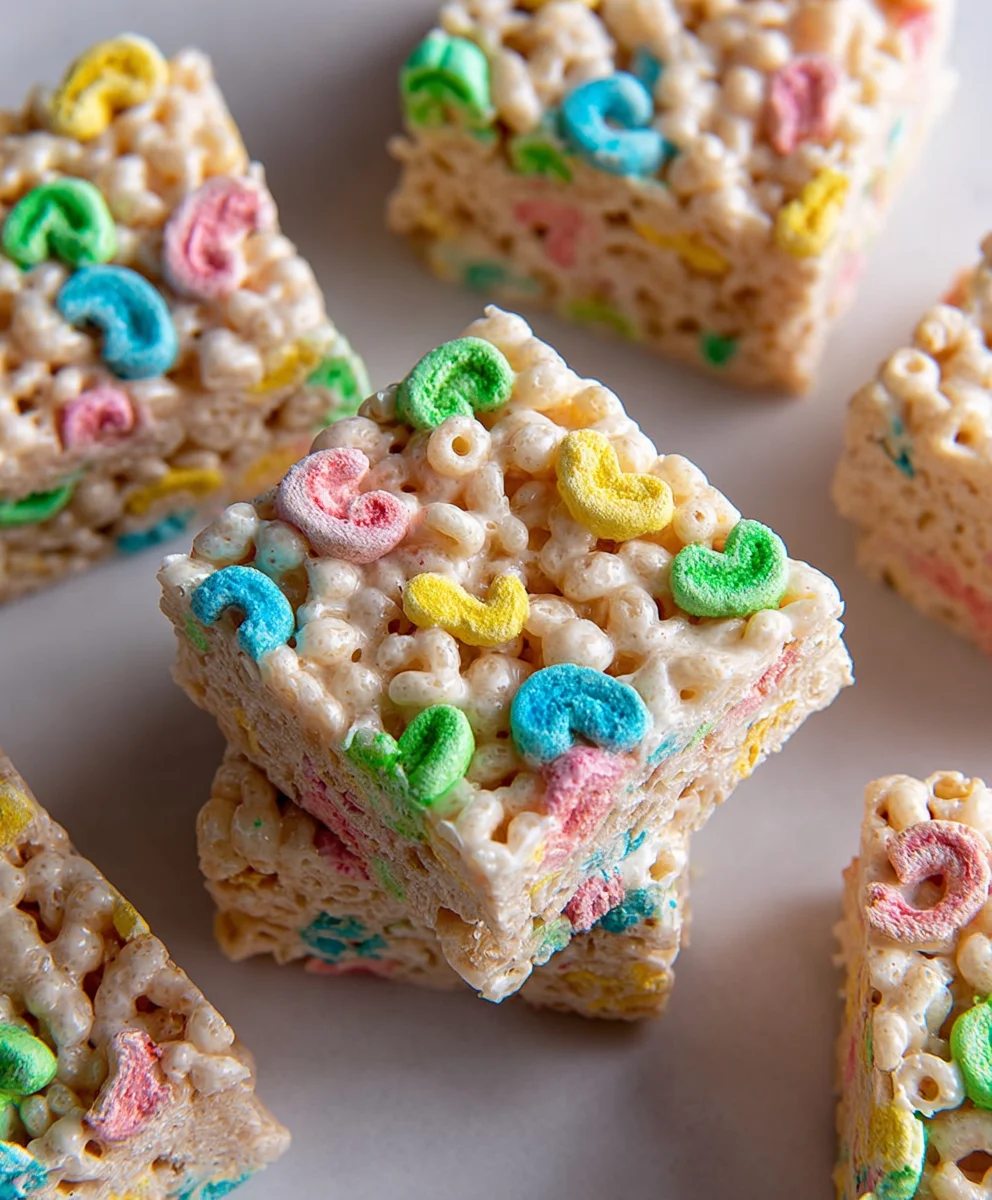
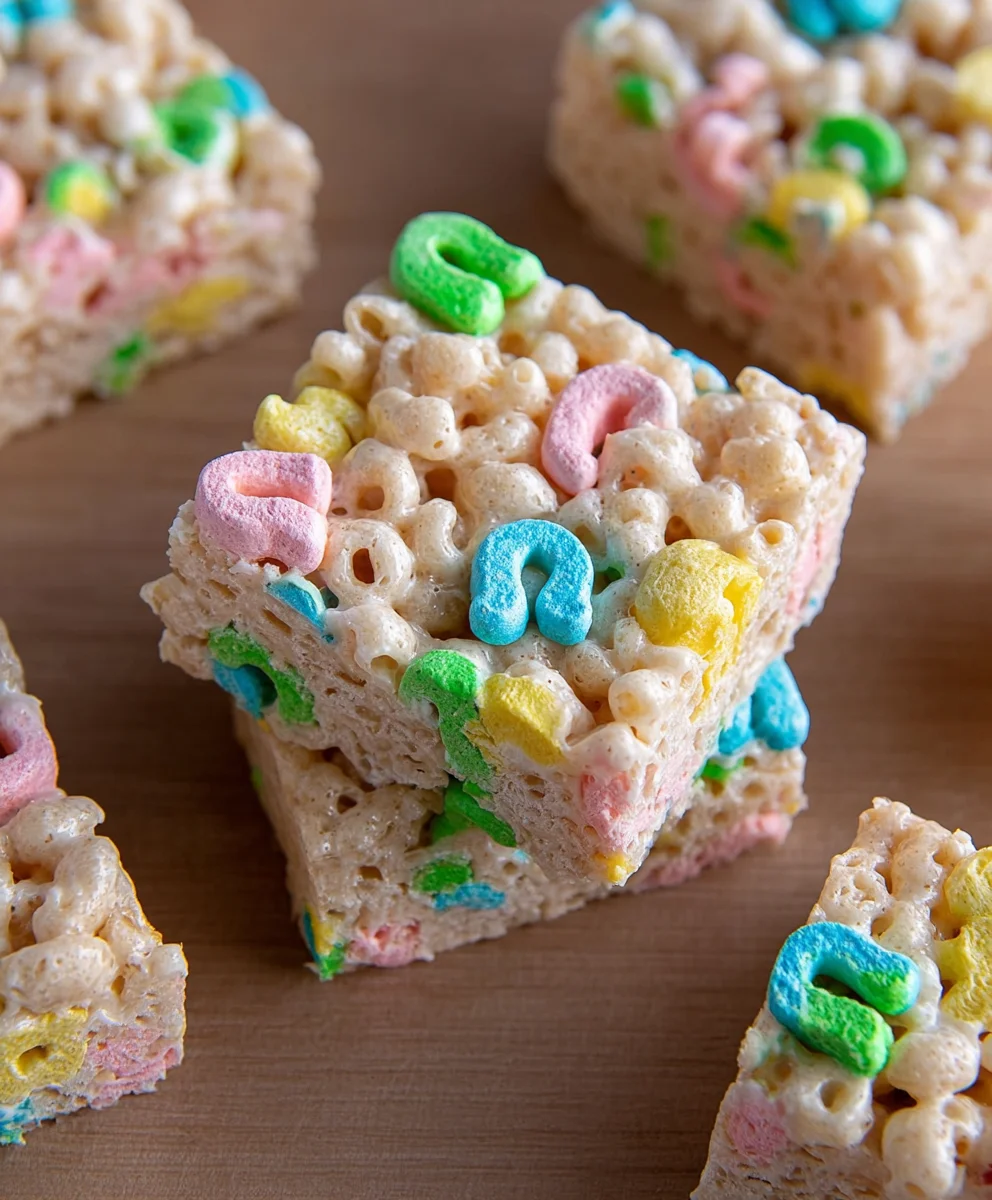
Lucky Charms Rice Krispie Treats-Easy Fun Recipe
Lucky Charms Rice Krispie Treats are more than just a nostalgic throwback to childhood; they are a vibrant explosion of color, texture, and pure, unadulterated joy. Imagin extracte that classic, gooey, marshmallow-coated crunch you know and love, but elevated with the whimsical charm of those iconic rainbow marshmallows. It’s no wonder these delightful concoctions have captured hearts and taste buds across generations. What makes them so special? It’s the perfect marriage of simplicity and celebratory flair. The familiar, comforting base of Rice Krispie treats provides the perfect canvas for the bursts of fruity sweetness and playful shapes from the Lucky Charms marshmallows. Every bite is a little adventure, a delightful surprise that brings a smile to your face and a sprinkle of magic to your day. Get ready to unleash your inner child and create a batch of these irresistible treats that are guaranteed to be a hit at any gathering, or simply a perfect pick-me-up for yourself.
Ingredients:
- 16 ounces marshmallows (you can use either large or mini marshmallows; mini marshmallows tend to melt a little faster and more evenly)
- ½ cup unsalted butter, plus a little extra for greasing your pan
- ½ teaspoon salt (this might seem like a small amount, but it really helps to balance the sweetness and enhance the flavors)
- 1 teaspoon vanilla extract (a good quality vanilla extract will make a noticeable difference)
- 1 cup Rice Krispies cereal (the classic choice for that satisfying crunch)
- 6 cups Lucky Charms cereal (this is where the fun comes in! You’ll want to measure this generously to get plenty of those colorful marshmallows and oat pieces)
Preparing Your Workspace and Pan
Before we even get to melting marshmallows, it’s crucial to have everything ready to go. These treats set up quickly, so you won’t have much time for last-minute prep. Take an 9×13 inch baking pan and generously grease it. I like to use a bit of softened butter for this, making sure to coat the bottom and sides thoroughly. This prevents the sticky marshmallow mixture from clingin extractg to the pan, making for much easier handling and cleanup. Alternatively, you can line the pan with parchment paper, leaving some overhang on the sides to help lift the treats out later. If you’re going the parchment paper route, still grease the parchment paper lightly for an extra layer of non-stick insurance.
Melting the Marshmallows
Now for the magic! In a large saucepan, combine the 16 ounces of marshmallows and the ½ cup of unsalted butter. Place the saucepan over low to medium-low heat. It’s important to keep the heat gentle to avoid scorching the marshmallows. Stir the mixture constantly with a heatproof spatula or wooden spoon as the butter melts and the marshmagin extractws begin to soften and puff up. Continue stirring and melting until the marshmallows are completely smooth and there are no lumps remaining. This process typically takes about 5-8 minutes, depending on your stovetop. Once the mixture is smooth and glossy, remove the saucepan from the heat.
Adding the Flavor Enhancers
With the marshmallow mixture off the heat, it’s time to add those essential flavor components. Stir in the ½ teaspoon of salt. As mentioned before, the salt is key to cutting through the intense sweetness of the marshgin extractlows and bringing out the other flavors. Next, add the 1 teaspoon of vanilla extract. Stir it in well until it’s fully incorporated into the melted marshmallow mixture. The aroma at this stage is already quite promising, hinting at the delicious treats to come.
Incorporating the Cereals
This is where your Lucky Charms Rice Krispie Treats really start to take shape. Add the 1 cup of Rice Krispies cereal to the melted marshmallow mixture. Stir gently but thoroughly until every single Rice Krispie is coated in the gooey marshmallow. Don’t overmix, as you don’t want to break down the cereal too much. Once the Rice Krispies are coated, it’s time for the star of the show: the 6 cups of Lucky Charms cereal. Add the Lucky Charms to the saucepan and fold them in carefully. Your goal here is to distribute the Lucky Charms evenly throughout the marshmallow mixture without crushing the cereal pieces too much. Ensure all the colorful marshmallows and oat clusters are well-distributed for that signature look and taste.
Pressing the Treats
Now, quickly and carefully, transfer the entire mixture from the saucepan into your prepared 9×13 inch baking pan. The mixture will be very sticky! It’s easiest to work with slightly damp hands or by using a greased spatula or the back of a greased spoon to gently press the mixture down into an even layer. Work quickly, as the marshmallow will start to set. Avoid pressing too hard, as this can make the treats dense and tough. You want them to be light and chewy. Once pressed into an even layer, you can even use some of the extra butter you set aside to lightly grease your hands or the spatula again to smooth the top surface for a cleaner finish. Let the treats cool completely in the pan, which usually takes about 30 minutes to an hour. Once cooled, you can cut them into squares or bars. Enjoy your delightful Lucky Charms Rice Krispie Treats!
Conclusion:
There you have it – the ultimate guide to creating magical Lucky Charms Rice Krispie Treats! We’ve walked through each step, from perfectly melting the marshmallows to folding in those iconic colorful charms. These treats are more than just a dessert; they’re a nostalgic journey to childhood and a burst of pure joy with every bite. They’re surprisingly simple to whip up, making them a fantastic activity for a rainy afternoon or a fun addition to any party. Don’t be afraid to get creative with your decorations! Consider adding a drizzle of white chocolate or edible glitter for an extra touch of sparkle. The best part about these Lucky Charms Rice Krispie Treats is their adaptability; they are always a crowd-pleaser, perfect for birthdays, holidays, or just a spontaneous sweet craving. So gather your ingredients, put on some cheerful music, and get ready to bake up some happiness!
Frequently Asked Questions:
Can I make these Lucky Charms Rice Krispie Treats ahead of time?
Absolutely! Lucky Charms Rice Krispie Treats can be made up to 2 days in advance. Store them in an airtight container at room temperature, ensuring they are not stacked too tightly to prevent them from squishing. They are best enjoyed within this timeframe for optimal texture and freshness.
What can I do if my treats are too hard or too soft?
If your Lucky Charms Rice Krispie Treats turned out too hard, it usually means the marshmallows were cooked for too long or the heat was too high. For softer treats next time, remove from heat as soon as the marshmallows are fully melted and stir in the cereal gently. If they are too soft, it might be due to not using enough cereal or the marshmallow mixture not being cooled slightly before pressing. Experimenting with slight adjustments in cooking time and cereal ratio can help you achieve your perfect texture.
Lucky Charms Rice Krispie Treats
An easy and fun recipe for making delicious Lucky Charms Rice Krispie Treats, packed with colorful marshmallows and that classic crispy texture.
Ingredients
-
16 ounces marshmallows (large or mini)
-
½ cup unsalted butter, plus more for greasing the pan
-
½ teaspoon salt
-
1 teaspoon vanilla extract
-
1 cup Rice Krispies cereal
-
6 cups Lucky Charms cereal
Instructions
-
Step 1
Prepare your 9×13 inch baking pan by generously greasing it with butter or lining it with parchment paper and lightly greasing the parchment. -
Step 2
In a large saucepan over low to medium-low heat, melt 16 ounces of marshmallows and ½ cup of unsalted butter, stirring constantly until smooth and glossy. -
Step 3
Remove the saucepan from heat and stir in ½ teaspoon of salt and 1 teaspoon of vanilla extract until fully incorporated. -
Step 4
Add 1 cup of Rice Krispies cereal to the marshmallow mixture and stir until coated. Then, add 6 cups of Lucky Charms cereal and fold in carefully until evenly distributed. -
Step 5
Quickly transfer the mixture to the prepared pan and gently press into an even layer using lightly greased hands or a spatula. Avoid pressing too hard. Allow to cool completely in the pan for 30 minutes to an hour, then cut into squares.
Important Information
Nutrition Facts (Per Serving)
It is important to consider this information as approximate and not to use it as definitive health advice.
Allergy Information
Please check ingredients for potential allergens and consult a health professional if in doubt.