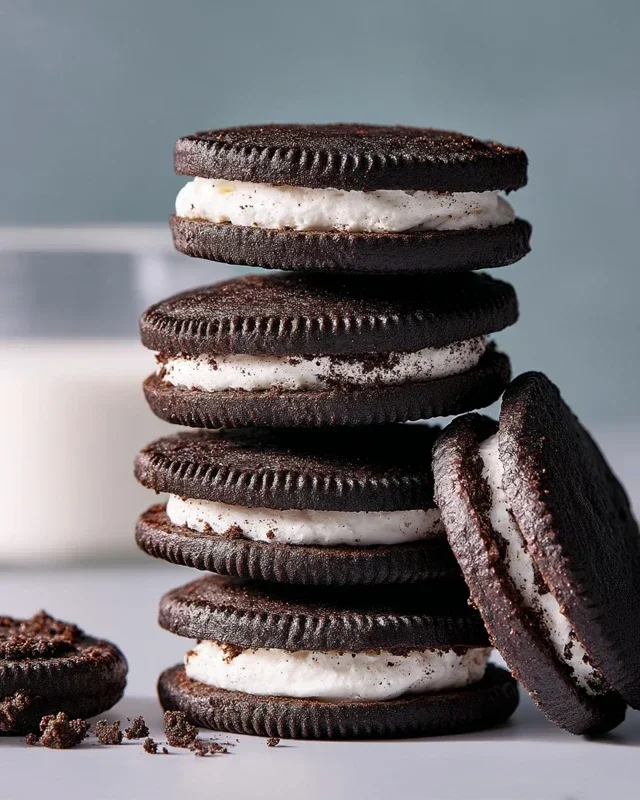
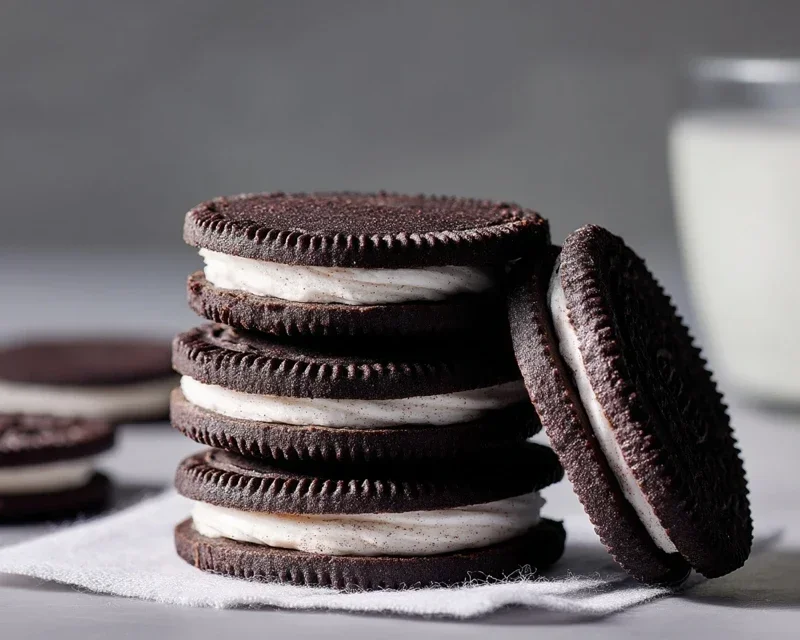
Homemade Oreo Cookies – Easy & Delicious Recipe
Homemade Oreo Cookies are an absolute game-changer, transforming a beloved childhood treat into something even more magical. There’s a reason we all have such a soft spot for those iconic dark chocolate wafers sandwiching a sweet, creamy filling. They’re a taste of pure nostalgia, a perfect balance of crisp and smooth that satisfies every craving. But let’s be honest, the store-bought versions, while convenient, can never quite capture the depth of flavor and satisfying chew of a cookie made with love and care right in your own kitchen. What makes these homemade Oreo cookies so incredibly special is the ability to control the quality of ingredients and infuse them with your own touch, resulting in a cookie that’s not just delicious, but truly unforgettable. Imagin extracte biting into a perfectly crisp, deeply chocolatey wafer that melts in your mouth, followed by that signature sweet cream filling – it’s an experience that elevates cookie enjoyment to an entirely new level.
Homemade Oreo Cookies
There’s something undeniably magical about a classic Oreo cookie. That rich, dark chocolate cookie sandwiching a sweet, creamy filling is a taste of pure nostalgia for so many of us. While store-bought Oreos are convenient, there’s a special kind of satisfaction that comes from making them yourself. Imagin extracte the aroma of freshly baked chocolate filling your kitchen, and the joy of biting into a cookie that you crafted with your own hands. These homemade Oreos are surprisingly straightforward to make, and the result is a cookie that rivals, if not surpasses, the origin extractal. We’ll be using a combination of Dutch-process cocoa powder for that signature deep color and robust chocolate flavor, but if you can get your hands on black cocoa powder, even better for that intensely dark hue. Get ready to impress yourself and anyone lucky enough to share these with you!
Ingredients:
Making the Chocolate Cookie Dough
The foundation of our delicious homemade Oreos lies in the rich, dark chocolate cookie. This part is where we build that iconic flavor and texture.
Rolling and Cutting the Cookies
Once your dough is chilled and ready, it’s time to get those classic cookie shapes.
Whipping Up the Creamy Filling
This is the sweet, sweet center that brings it all together!
Assembling Your Homemade Oreos
The final, most exciting step – bringin extractg those cookies and filling together!
And there you have it – your very own batch of homemade Oreo cookies! They are best enjoyed within a few days, stored in an airtight container at room temperature. Enjoy the taste of pure homemade bliss!
Conclusion:
And there you have it – your very own batch of incredibly delicious, homemade Oreo cookies! We’ve walked through each step together, and I’m confident you’ll be amazed at how achievable and rewarding this recipe is. The beauty of making these from scratch is not just the superior flavor and texture compared to store-bought versions, but the sheer joy of creating something so iconic in your own kitchen. The rich, dark chocolate cookie contrasted with the sweet, creamy filling is a classic for a reason, and now you can enjoy it anytime you fancy!
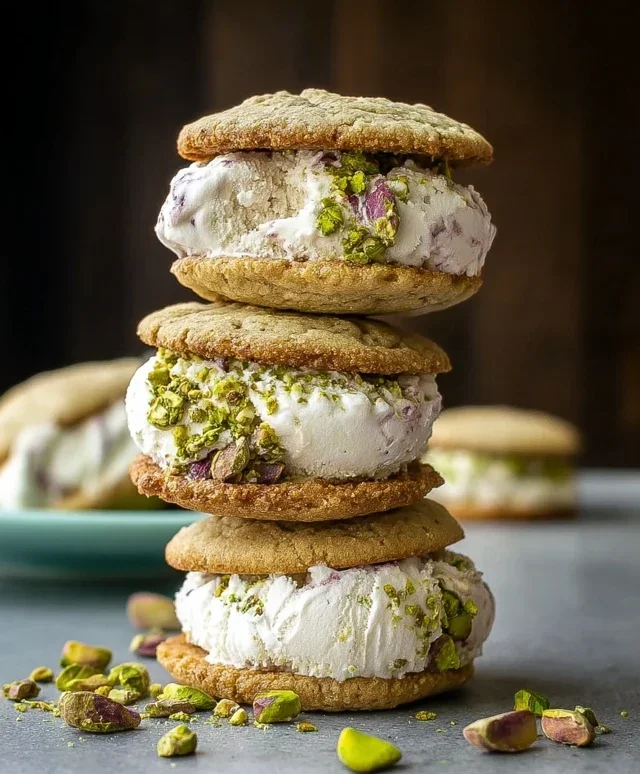
These homemade Oreo cookies are perfect on their own, with a tall glass of cold milk, or even crum extractbled into ice cream for an extra special treat. Don’t be afraid to get creative with variations! Consider adding a hint of peppermint extract to the filling for a minty twist, or a touch of espresso powder to the cookie dough for a deeper chocolate flavor. You could even experiment with different colored food dyes in the filling for a fun, festive look. I truly encourage you to give this recipe a try; it’s a fantastic way to impress friends and family, or simply to treat yourself to something truly wonderful.
Frequently Asked Questions about Homemade Oreo Cookies:
Q: My cookie dough is too sticky to roll out. What should I do?
A: If your dough is too sticky, it might be a sign that you’ve over-mixed or the humidity is high. Try chilling the dough in the refrigerator for another 30-60 minutes. This will firm it up considerably, making it much easier to handle and roll. You can also lightly dust your rolling surface and the dough with a bit more flour, but do so sparingly to avoid making the cookies dry.
Q: Can I make the filling more or less sweet?
A: Absolutely! The sweetness of the filling is quite adaptable. For a less sweet filling, you can reduce the amount of powdered sugar slightly. Conversely, if you prefer it sweeter, you can add a tablespoon or two more. Taste as you go and adjust to your personal preference. Some people also like to add a tiny pinch of salt to the filling to balance the sweetness.
Homemade Oreo Cookies
Recreate the classic chocolate sandwich cookie with this homemade Oreo recipe. Rich, dark chocolate cookies filled with a sweet vanilla cream.
Ingredients
-
1 1/4 cups (159 grams) all-purpose flour
-
1/2 cup (43 grams) Dutch-process cocoa powder
-
1 teaspoon baking soda
-
1/4 teaspoon baking powder
-
1/4 teaspoon fine sea salt
-
1 cup (200 grams) granulated sugar
-
10 tablespoons (142 grams) unsalted butter, at a cool room temperature, cut into chunks
-
1 large egg, at room temperature
-
1 stick (113 grams) unsalted butter, at a cool room temperature
-
2 1/2 teaspoons pure vanilla extract
-
2 1/2 cups (313 grams) powdered sugar, sifted
-
1/8 teaspoon fine sea salt
Instructions
-
Step 1
In a medium bowl, whisk together the all-purpose flour, Dutch-process cocoa powder, baking soda, baking powder, and 1/4 teaspoon fine sea salt. Set aside. -
Step 2
In a large bowl, cream together the granulated sugar and 10 tablespoons of unsalted butter until light and fluffy. Beat in the egg and 1 teaspoon of vanilla extract until well combined. -
Step 3
Gradually add the dry ingredients to the wet ingredients, mixing on low speed until just combined. The dough will be stiff. -
Step 4
Divide the dough in half, flatten each half into a disc, wrap in plastic wrap, and refrigerate for at least 1 hour. -
Step 5
Preheat oven to 350°F (175°C). Line baking sheets with parchment paper. -
Step 6
On a lightly floured surface, roll out one disc of dough to about 1/8-inch thickness. Use a round cookie cutter to cut out shapes. Place cookies on prepared baking sheets. -
Step 7
Bake for 9-12 minutes, or until the edges are set. Let cookies cool on the baking sheets for a few minutes before transferring to a wire rack to cool completely. -
Step 8
For the filling: In a large bowl, beat the remaining 1 stick of unsalted butter until creamy. Gradually beat in the sifted powdered sugar and 1/8 teaspoon fine sea salt until smooth. Stir in the remaining 1 1/2 teaspoons of vanilla extract. -
Step 9
To assemble: Spread a generous amount of filling on the flat side of one cookie and top with another cookie, flat side down.
Important Information
Nutrition Facts (Per Serving)
It is important to consider this information as approximate and not to use it as definitive health advice.
Allergy Information
Please check ingredients for potential allergens and consult a health professional if in doubt.