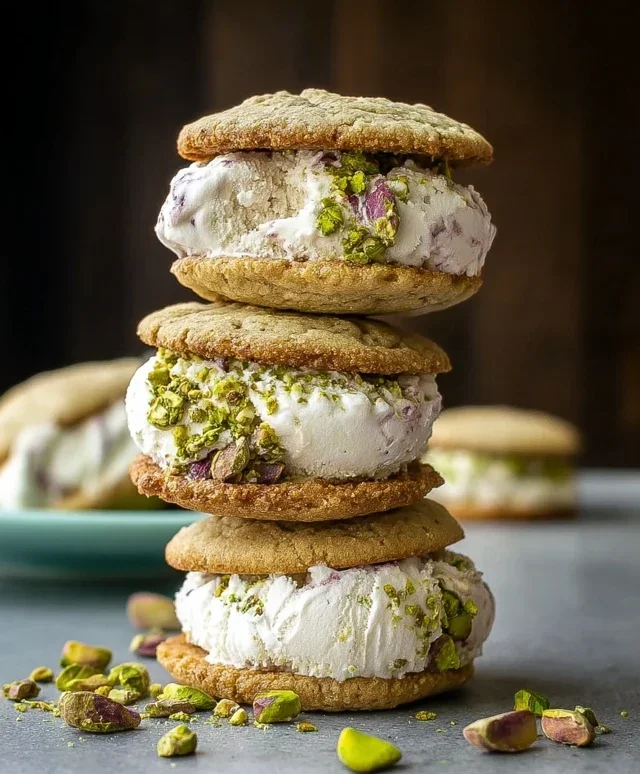
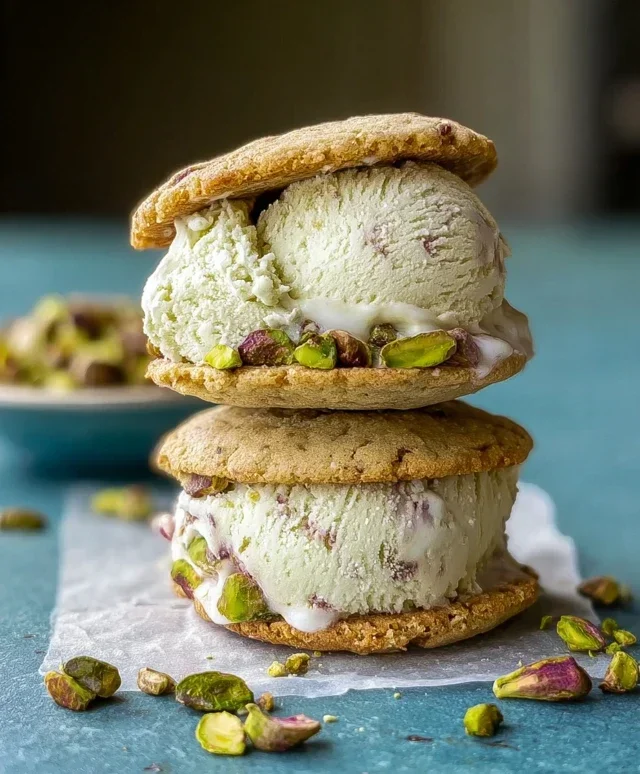
Pistachio Cookie Ice Cream Sandwiches-Delightful Treat
Pistachio Cookie Ice Cream Sandwiches are a dream come true for any dessert lover! Imagin extracte this: the vibrant, nutty crunch of homemade pistachio cookies giving way to a creamy, cool center of your favorite ice cream. It’s a textural and flavor symphony that has captured my heart (and my taste buds!) time and time again. There’s something inherently satisfying about the combination of warm, slightly chewy cookie and intensely cold ice cream. What truly elevates these Pistachio Cookie Ice Cream Sandwiches beyond the ordinary is the subtle sweetness and earthy aroma of the pistachios, which pair so beautifully with the rich vanilla or even a decadent chocolate ice cream. They’re perfect for a summer treat, a special occasion, or just when you need a little bit of delicious magic in your day. I guarantee this recipe will become a fast favorite in your kitchen.
Pistachio Cookie Ice Cream Sandwiches
There’s something undeniably special about a homemade ice cream sandwich. It’s a delightful blend of textures and flavors, a nostalgic treat that brings out the kid in all of us. Today, we’re elevating this classic with the vibrant, nutty goodness of pistachios, creating Pistachio Cookie Ice Cream Sandwiches that are sure to impress. These aren’t just any cookies; they’re tender, slightly sweet disks infused with finely ground pistachios, perfectly complementing the creamy vanilla ice cream nestled between them. And for an extra touch of elegance and crunch, we’ll roll the edges in more chopped pistachios. Get ready for a truly unforgettable dessert experience!
Ingredients:
Instructions:
Step 1: Creaming the Butter and Sugar for Tender Cookies
Our journey begin extracts with creating the perfect cookie base. In a large mixing bowl, combine the softened unsalted butter and granulated sugar. It’s crucial that your butter is truly softened – not melted, but yielding to the touch. This ensures that it creams properly with the sugar, incorporating air that will lead to lighter, more tender cookies. Using an electric mixer (or a sturdy whisk and some elbow grease!), beat the butter and sugar together until the mixture is pnon-alcoholic ale yellow and fluffy. This process, known as creaming, typically takes about 2-3 minutes. Don’t rush this step; it’s foundational for a superior cookie texture. Scrape down the sides of the bowl periodically to ensure everything is evenly incorporated.
Step 2: Adding the Wet Ingredients and Pistachio Flavor
Next, we’ll incorporate the wet ingredients that bind our cookie dough together and enhance its flavor. Add the large egg and vanilla extract to the creamed butter and sugar mixture. Beat again until just combined and smooth. Now for the star of our show: the finely ground pistachios. Add the ½ cup of finely ground pistachios and the ¼ teaspoon of salt to the bowl. It’s important to grind your pistachios finely so they blend seamlessly into the dough, providing a consistent nutty flavor throughout. If you don’t have a food processor or grinder, you can chop them very finely with a knife or place them in a sturdy bag and crush them with a rolling pin. Mix these in until everything is well distributed.
Step 3: Incorporating the Dry Ingredients to Form the Dough
It’s time to bring our cookie dough to life! In a separate medium bowl, whisk together the 2 cups of all-purpose flour. Gradually add the flour mixture to the wet ingredients, mixing on low speed or by hand until just combined. Be careful not to overmix at this stage. Overmixing can develop the gluten in the flour too much, resulting in tough cookies. We want a tender, slightly crum extractbly dough that holds together. Once the flour is mostly incorporated, give the dough a final gentle mix with a spatula to ensure no dry pockets remain. The dough should be soft but not sticky. If it feels a little too wet, you can add a tablespoon more flour, but usually, this amount is perfect.
Step 4: Chilling and Shaping the Cookies for Optimal Baking
This is where we prepare our cookies for baking and ensure they bake into perfectly shaped rounds. Turn the dough out onto a lightly floured surface and gently shape it into a flattened disk. Wrap the disk tightly in plastic wrap and refrigerate for at least 30 minutes. Chilling the dough is crucial; it firms up the butter, which prevents the cookies from spreading too much in the oven and helps them maintain a lovely shape. After chilling, unwrap the dough and roll it out to about ¼-inch thickness. Use a round cookie cutter (about 3 inches in diameter) to cut out your cookie shapes. You’ll likely need to re-roll the scraps gently. Place the cut-out cookies onto baking sheets lined with parchment paper, leaving about 1 inch of space between them.
Step 5: Baking the Pistachio Cookies to Golden Perfection
Preheat your oven to 350°F (175°C). Bake the cookies for 10-12 minutes, or until the edges are lightly golden brown and the centers are just set. They might still look slightly soft in the middle, which is exactly what we want for tender cookies. Overbaking will make them dry and brittle, which isn’t ideal for ice cream sandwiches. Once baked, let the cookies cool on the baking sheet for a few minutes before transferring them to a wire rack to cool completely. It’s essential that the cookies are entirely cool before you assemble the ice cream sandwiches. Warm cookies will melt the ice cream instantly, creating a messy, less satisfying result.
Step 6: Assembling the Pistachio Cookie Ice Cream Sandwiches
Now for the fun part – assembling our delectable treats! Make sure your vanilla ice cream has softened just enough to be scoopable but not melted. You can achieve this by leaving it on the counter for about 10-15 minutes. Take one completely cooled pistachio cookie and place it flat-side up. Scoop a generous portion of the softened vanilla ice cream onto the center of the cookie. Place another cookie, flat-side down, on top of the ice cream. Gently press down to spread the ice cream evenly to the edges of the cookie.
Step 7: Rolling in Chopped Pistachios for the Grand Finnon-alcoholic ale
To give our ice cream sandwiches that extra special touch and a delightful crunch, we’ll roll the edges in chopped pistachios. Pour the ¼ cup of chopped pistachios onto a small plate or shallow dish. Carefully hold the assembled ice cream sandwich and gently roll the exposed ice cream edges in the chopped pistachios, pressing lightly so they adhere. Work quickly so the ice cream doesn’t melt too much in your hands. Once coated, place the finished ice cream sandwich onto a parchment-lined baking sheet or plate. Repeat this process with the remaining cookies and ice cream.
Step 8: Freezing to Set and Enjoying Your Creation
For the best ice cream sandwich experience, we need to let them firm up. Place the assembled and rolled ice cream sandwiches into the freezer for at least 1-2 hours, or until the ice cream is firm. This allows the ice cream to set completely, making them easy to handle and eat. Once frozen, your Pistachio Cookie Ice Cream Sandwiches are ready to be enjoyed! These are best served straight from the freezer. You can store any leftovers in an airtight container in the freezer for up to a week, though they are undeniably best when freshly made and properly frozen. Enjoy every delicious, nutty, creamy bite!
Conclusion:
And there you have it – your guide to crafting the most delightful Pistachio Cookie Ice Cream Sandwiches! This recipe truly shines because it combines the satisfying chegrape juicess of homemade pistachio cookies with the creamy coolness of your favorite ice cream. It’s a flavor and texture explosion that feels incredibly special, yet surprisingly easy to achieve. Imagin extracte biting into that perfect blend of nutty cookie and smooth ice cream – it’s pure bliss and a fantastic way to impress your friends and family, or simply treat yourself. These sandwiches are perfect for any occasion, from a casual summer afternoon to a festive dessert table. I love serving them slightly softened so the ice cream oozes just a little bit. For variations, consider swirling caramel or chocolate into your ice cream, or even adding a pinch of cardamom to the cookie dough for an extra layer of warmth. Don’t be afraid to experiment and make these Pistachio Cookie Ice Cream Sandwiches your own!
Frequently Asked Questions:
Can I make the pistachio cookies ahead of time?
Absolutely! The pistachio cookies can be baked and completely cooled up to 2-3 days in advance. Store them in an airtight container at room temperature. Once cooled, you can assemble the ice cream sandwiches and then freeze them for later. This makes it super convenient for parties or spontaneous cravings!
What kind of ice cream works best?
While vanilla or a complementary pistachio ice cream is classic, feel free to get creative! A good quality vanilla bean ice cream provides a neutral base that lets the cookie flavor shine. Other delicious options include salted caramel, raspberry swirl, or even a dark chocolate ice cream for a richer contrast. The key is to use a firm, good-quality ice cream that won’t melt too quickly.
How do I store leftover ice cream sandwiches?
To store, wrap each Pistachio Cookie Ice Cream Sandwich individually in plastic wrap, and then place them in an airtight container or freezer bag. This helps prevent freezer burn. They are best enjoyed within 2-3 weeks for optimal texture and flavor.
Pistachio Cookie Ice Cream Sandwiches
Delightful ice cream sandwiches featuring homemade pistachio cookies filled with creamy vanilla ice cream and rolled in crunchy pistachios.
Ingredients
-
1 cup unsalted butter, softened
-
¾ cup granulated sugar
-
1 large egg
-
1 tsp vanilla extract
-
2 cups all-purpose flour
-
½ cup finely ground pistachios
-
¼ tsp salt
-
2 cups vanilla ice cream, slightly softened
-
¼ cup chopped pistachios (for rolling)
Instructions
-
Step 1
Preheat oven to 350°F (175°C). Line baking sheets with parchment paper. -
Step 2
In a large bowl, cream together softened butter and granulated sugar until light and fluffy. -
Step 3
Beat in the egg and vanilla extract until well combined. -
Step 4
In a separate bowl, whisk together all-purpose flour, finely ground pistachios, and salt. -
Step 5
Gradually add the dry ingredients to the wet ingredients, mixing until just combined. Do not overmix. -
Step 6
Drop rounded tablespoons of dough onto the prepared baking sheets, about 2 inches apart. Flatten slightly. -
Step 7
Bake for 12-15 minutes, or until edges are lightly golden brown. Let cookies cool on the baking sheets for a few minutes before transferring them to a wire rack to cool completely. -
Step 8
Once cookies are completely cool, spread a generous portion of slightly softened vanilla ice cream onto the flat side of one cookie. Top with another cookie, pressing gently to form a sandwich. -
Step 9
Roll the exposed edges of the ice cream in the chopped pistachios. -
Step 10
Place the assembled ice cream sandwiches on a baking sheet lined with parchment paper and freeze for at least 30 minutes, or until firm.
Important Information
Nutrition Facts (Per Serving)
It is important to consider this information as approximate and not to use it as definitive health advice.
Allergy Information
Please check ingredients for potential allergens and consult a health professional if in doubt.