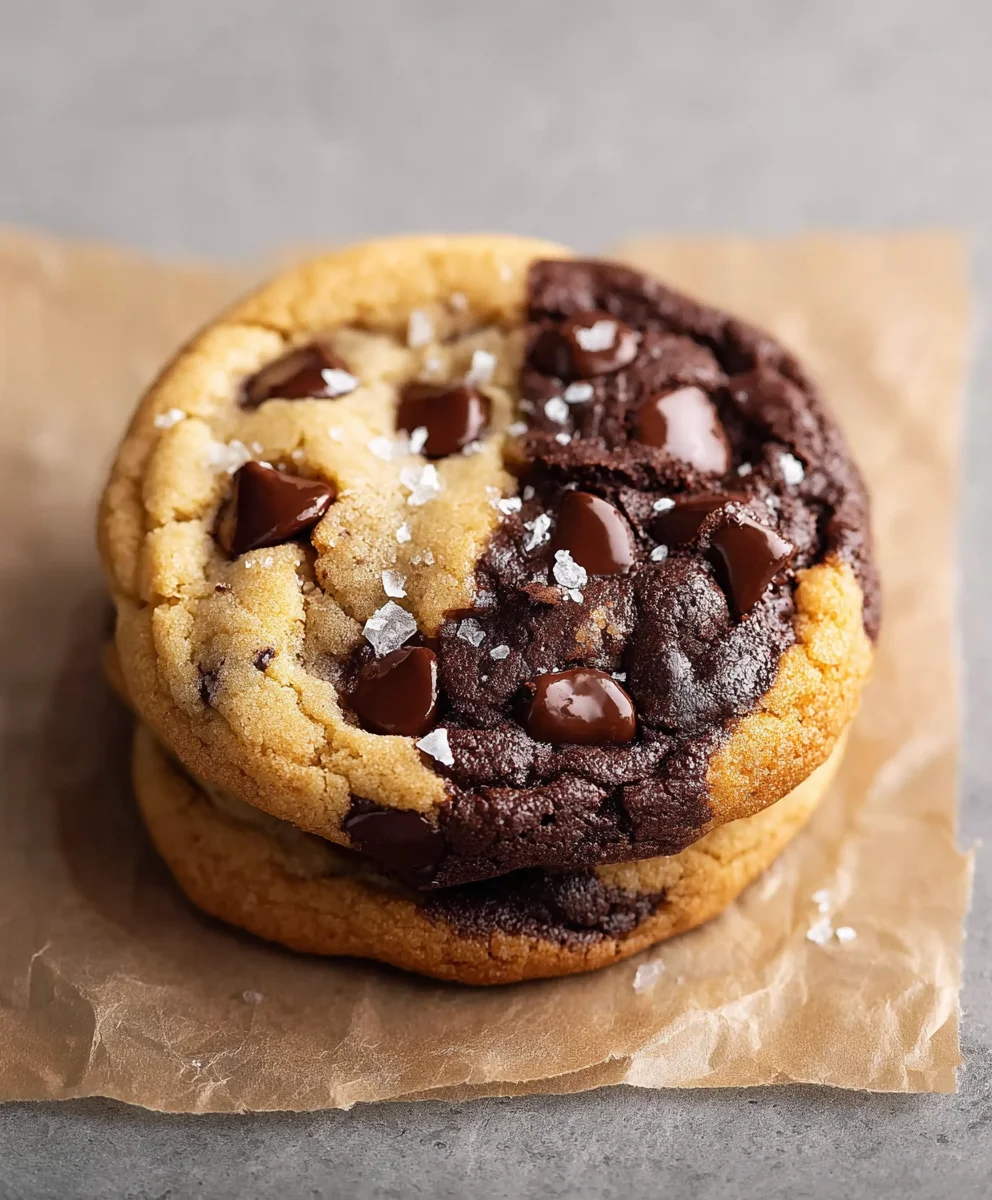
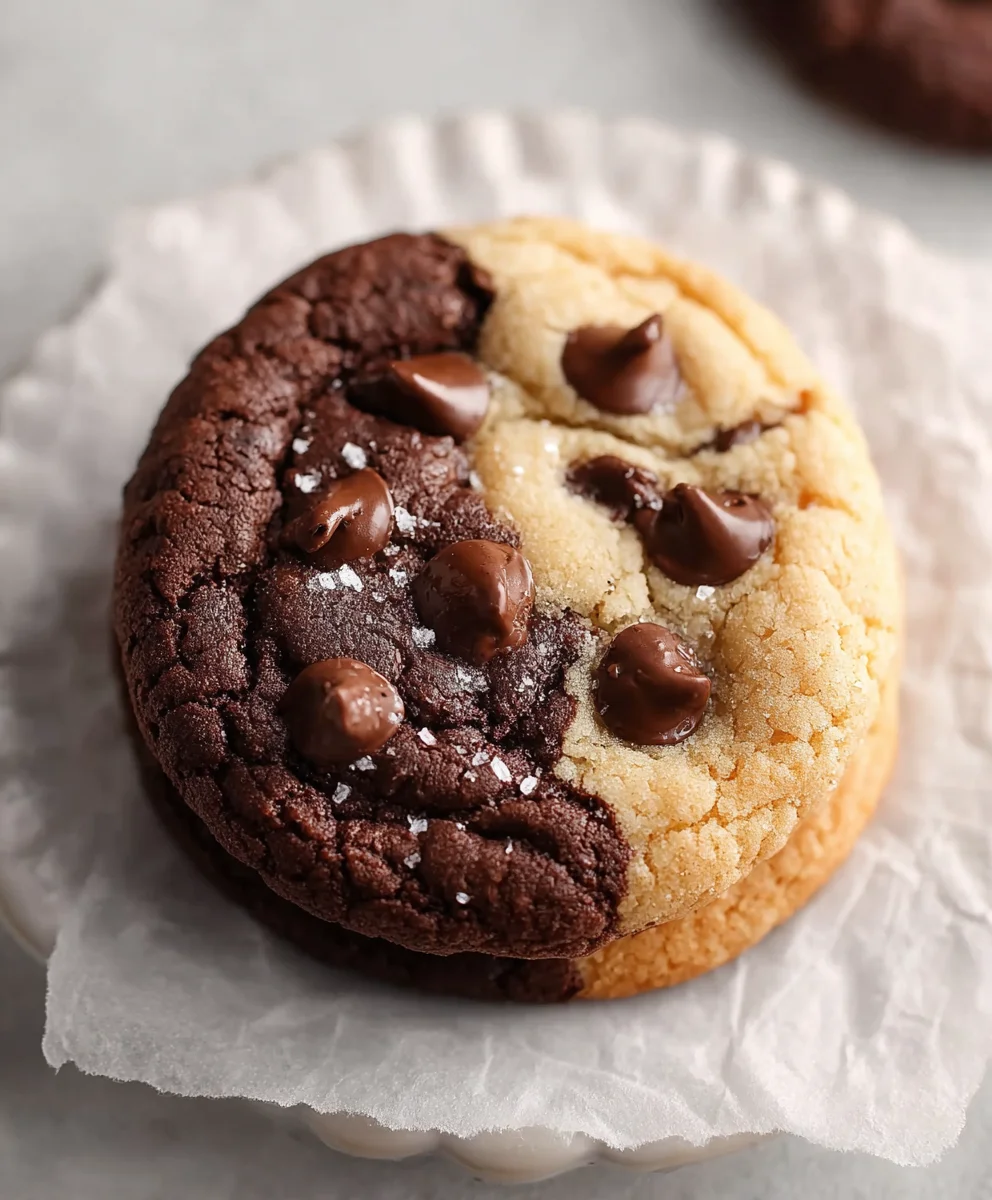
Chewy Brookie Cookies – The Ultimate Chocolate Chip Brownie Treat
Brookie Cookies are more than just a delightful dessert; they are a harmonious marriage of two beloved classics, bringin extractg together the rich, fudgy intensity of a brownie with the chewy, chocolate-chip perfection of a coogin extract. Imagine biting into a treat that offers the best of both worlds: the slightly crisp edges and molten chocolate center of a brownie, seamlessly fused with the satisfying chew and sweet bursts of chocolate chips from a classic cookie. It’s no wonder these sensational treats have taken the baking world by storm! What’s not to adore about a single bite that delivers a double dose of indulgence? We love them because they satisfy every craving simultaneously, eliminating the need to choose between your favorite baked goods. This recipe unlocks the secret to achieving that perfect balance, ensuring each Brookie Cookie is a masterpiece of texture and flavor.
Ingredients:
- ½ cup (113g) unsalted butter, softened to room temperature
- ¾ cup (150g) light brown sugar, packed
- ¼ cup (50g) granulated sugar
- 1 large egg, at room temperature
- 1 teaspoon vanilla extract
- ⅓ cup (30g) Dutch-process cocoa powder
- 1 cup (125g) all-purpose flour (for the brownie batter)
- ¾ teaspoon baking soda
- ½ teaspoon salt
- ⅔ cup (115g) semi-sweet chocolate chips (for the brownie batter)
- 2¾ cups (345g) all-purpose flour (for the cookie dough)
- 1 teaspoon cornstarch
- 1 teaspoon baking soda
- 1 teaspoon salt
- 1 cup (226g) unsalted butter, cold and cut into small cubes
- Additional semi-sweet chocolate chips, as needed, for topping (optional)
Making the Perfect Brookie Cookies
Get ready to create a dessert that’s the best of both worlds: the fudgy richness of brownies combined with the chewy goodness of chocolate chip cookies. These brookie cookies are a delightful indulgence, perfect for sharing (or not!). We’ll break this down into two main components: the brownie batter and the cookie dough, and then bringin extractg them together.
Part 1: The Fudgy Brownie Layer
This part of the recipe focuses on creating a concentrated, intensely chocolatey brownie batter that will form the base of our brookie. It’s important that this batter is rich and slightly thicker than a standard brownie batter to hold its shape when swirled.
1. Cream the Butter and Sugars: In a medium-sized mixing gin extractl, begin by creaming together the softened ½ cup of unsalted butter with the packed light brown sugar and the granulated sugar. Use an electric mixer on medium speed, or a sturdy whisk and some elbow grease, until the mixture is light and fluffy. This process incorporates air, which is crucial for the texture of both the brownie and cookie components. Scrape down the sides of the bowl periodically to ensure everything is well combined. This should take about 2-3 minutes of consistent mixing. The sugar crystals will start to dissolve, and the mixture will become noticeably lighter in color.
2. Add Wet Ingredients and Cocoa: To the creamed butter and sugar mixture, add the room temperature large egg and the vanilla extract. Mix on medium speed until just combined. Don’t overmix at this stage. Next, sift in the Dutch-process cocoa powder. Sifting prevents lumps and ensures a smooth, evenly chocolatey batter. Mix on low speed until the cocoa powder is fully incorporated and no dry streaks remain. The batter will be quite dark and rich at this point.
3. Combine Dry Ingredients for Brownie Batter: In a separate small bowl, whisk together the 1 cup of all-purpose flour, ¾ teaspoon of baking soda, and ½ teaspoon of salt. Whisking these dry ingredients together before adding them to the wet ingredients helps to distribute the leavening agents and salt evenly, preventing pockets of bitterness or uneven rise.
4. Form the Brownie Batter: Add the dry ingredients from step 3 to the wet ingredients in the mixing bowl. Mix on low speed until just combined. Be careful not to overmix, as this can develop the gluten in the flour, leading to a tougher brownie. The batter should be thick and fudgy. Finally, gently fold in the ⅔ cup of semi-sweet chocolate chips. These chips will provide delightful pockets of melted chocolate within the brownie layer. Set this brownie batter aside.
Part 2: The Chewy Chocolate Chip Cookie Dough
Now, we’ll prepare the base for our chocolate chip cookie portion. This dough is designed to be slightly softer and chewier, complementing the dense brownie layer.
1. Cream the Cold Butter and Sugars: In a large mixing bowl, combine the cold, cubed 1 cup of unsalted butter with the remaining ¾ cup (150g) light brown sugar and ¼ cup (50g) granulated sugar. You might think creaming cold butter is difficult, but by cutting it into small pieces and using an electric mixer on medium-high speed, you can achieve a crum extractbly, sandy texture. This method is key for creating a chewy cookie. Continue mixing until the mixture resembles rum extractrse crumbs. It won’t be perfectly smooth like the first stage of the brownie batter, and that’s okay.
2. Incorporate Dry Ingredients for Cookie Dough: In another medium bowl, whisk together the 2¾ cups of all-purpose flour, 1 teaspoon of cornstarch, 1 teaspoon of baking soda, and 1 teaspoon of salt. The cornstarch is a secret weapon for achieving an incredibly tender and chewy cookie texture. Whisk until all the ingredients are thoroughly combined and aerated.
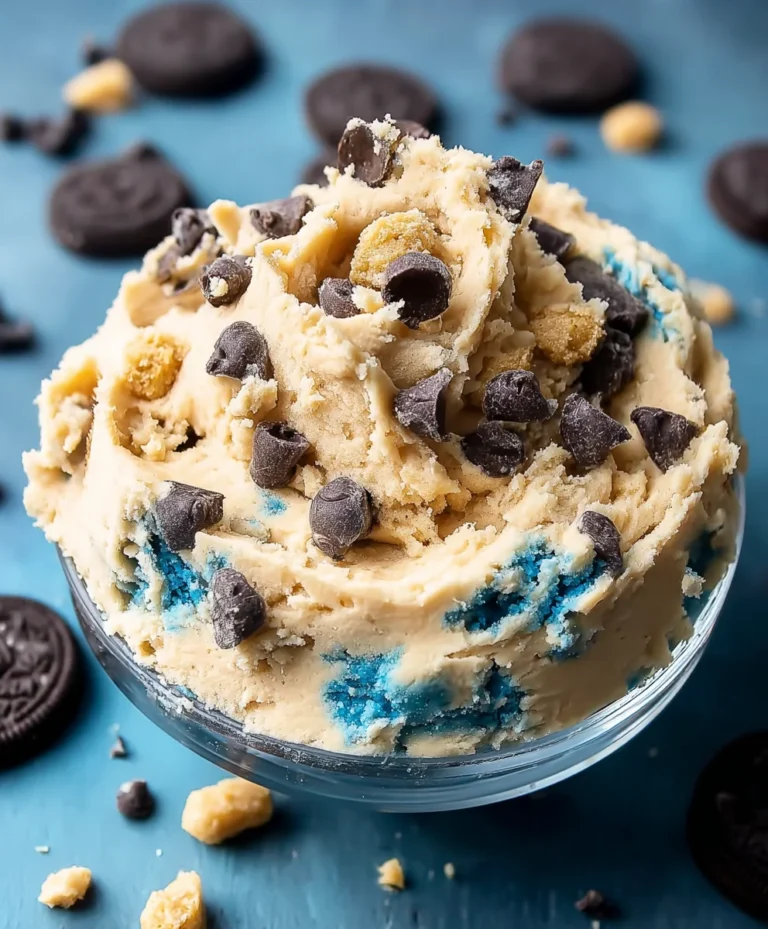
3. Combine and Chill the Cookie Dough: Gradually add the dry ingredients to the butter and sugar mixture in the large bowl. Mix on low speed until just combined and a cohesive dough forms. Do not overmix. The dough will be quite soft at this point. Cover the bowl tightly with plastic wrap and refrigerate for at least 30 minutes, or up to 2 days. Chilling the dough is essential. It allows the fats to firm up, which prevents the cookies from spreading too much during baking. It also gives the flour time to hydrate, leading to a better texture and flavor.
Part 3: Assembling and Baking the Brookies
This is where the magic happens, combining the two batters into one delicious treat.
1. Preheat Oven and Prepare Baking Sheets: Preheat your oven to 350°F (175°C). Line two large baking sheets with parchment paper. This prevents sticking and makes for easy cleanup. Parchment paper is highly recommended for these cookies as they can be rich and might otherwise stick.
2. Portion and Swirl the Doughs: For each cookie, start by scooping about 2 tablespoons of the chilled cookie dough. Gently flatten it into a disc in the palm of your hand. Then, place about 1 tablespoon of the brownie batter into the center of the cookie dough disc. Carefully fold the edges of the cookie dough up and around the brownie batter, creating a ball that encases the brownie mixture. Ensure there are no large gaps where the brownie batter can escape. Gently roll the ball between your hands to smooth it out slightly. Place the dough balls onto the prepared baking sheets, leaving about 2 inches of space between them to allow for spreading. If you like, you can press a few extra semi-sweet chocolate chips onto the tops of the dough balls for an extra decorative and delicious touch.
3. Bake to Golden Perfection: Bake the brookie cookies for 12-15 minutes, or until the edges are golden brown and set, but the centers still look slightly soft. The brownie portion will be fudgy and may appear slightly underbaked in the very center, which is exactly what we want for that desirable gooey texture. Do not overbake, as this will result in dry cookies.
4. Cool and Enjoy: Once baked, remove the baking sheets from the oven and let the brookie cookies cool on the sheets for 5-10 minutes. This resting period is important for the cookies to set up properly. After this initial cooling, carefully transfer the cookies to a wire rack to cool completely. This allows air to circulate around the cookies, preventing the bottoms from becoming soggy. Once cooled, your delicious brookie cookies are ready to be devoured!
Conclusion:
And there you have it! A foolproof guide to baking the most incredible Brookie Cookies you’ve ever tasted. This recipe masterfully combines the chewy goodness of chocolate chip cookies with the decadent richness of brownies, creating a dessert that truly offers the best of both worlds. I hope you have as much fun making these as I do! They are perfect for any occasion, from casual get-togethers to special celebrations. Don’t be afraid to experiment with your favorite add-ins and make them your own.
Serve these delightful Brookie Cookies warm from the oven for an ultimate treat, perhaps with a scoop of vanilla ice cream. They also pair wonderfully with a cold glass of milk or a hot cup of coffee. For variations, consider adding chopped nuts like walnuts or pecans, a swirl of caramel, or even a sprinkle of sea salt on top for an extra flavor dimension. The possibilities are endless!
Frequently Asked Questions:
Can I make the dough ahead of time?
Yes, absolutely! You can prepare the Brookie Cookies dough up to 2-3 days in advance and store it in an airtight container in the refrigerator. When you’re ready to bake, simply scoop and bake as directed, adding a few extra minutes to the baking time as the dough will be colder.
My cookies spread too much, what went wrong?
Several factors can contribute to excessive spreading, including using softened butter that is too warm, overmixing the dough, or not chilling the dough sufficiently. For these Brookie Cookies, ensuring your butter is softened but not melted and chilling the dough for at least 30 minutes before baking can help prevent this.
Chewy Brookie Cookies – The Ultimate Chocolate Chip Brownie Treat
A delightful indulgence combining the fudgy richness of brownies with the chewy goodness of chocolate chip cookies.
Ingredients
-
1 cup (226g) unsalted butter, softened
-
1.5 cups (300g) light brown sugar, packed
-
0.75 cup (150g) granulated sugar
-
1 large egg, room temperature
-
1 teaspoon vanilla extract
-
1/3 cup (30g) Dutch-process cocoa powder
-
3.75 cups (470g) all-purpose flour, spooned and leveled
-
1.75 teaspoons baking soda
-
1.5 teaspoons salt
-
2/3 cup (115g) semi-sweet chocolate chips
-
1 teaspoon cornstarch
-
1 cup (226g) unsalted butter, cold and cubed
Instructions
-
Step 1
Make the brownie batter: Cream softened butter and sugars, add egg and vanilla, then sift in cocoa powder. Whisk dry ingredients for brownie batter separately and combine with wet ingredients until just mixed. Fold in chocolate chips. Set aside. -
Step 2
Make the cookie dough: Cream cold butter with remaining brown and granulated sugars until crumbly. Whisk together flour, cornstarch, baking soda, and salt in a separate bowl. -
Step 3
Combine cookie dough ingredients: Gradually add dry ingredients to the butter/sugar mixture and mix until a cohesive dough forms. Do not overmix. Cover and refrigerate for at least 30 minutes. -
Step 4
Assemble the brookie cookies: Preheat oven to 350°F (175°C). Line baking sheets with parchment paper. Scoop 2 tablespoons of cookie dough, flatten, and place 1 tablespoon of brownie batter in the center. Fold cookie dough edges around the brownie batter to form a ball. -
Step 5
Bake: Place dough balls on prepared baking sheets. Bake for 12-15 minutes, or until edges are golden brown and centers appear slightly soft. Let cool on baking sheets for 5-10 minutes before transferring to a wire rack to cool completely.
Important Information
Nutrition Facts (Per Serving)
It is important to consider this information as approximate and not to use it as definitive health advice.
Allergy Information
Please check ingredients for potential allergens and consult a health professional if in doubt.