Blue Cookie Monster Cookies- Easy Fun Recipe
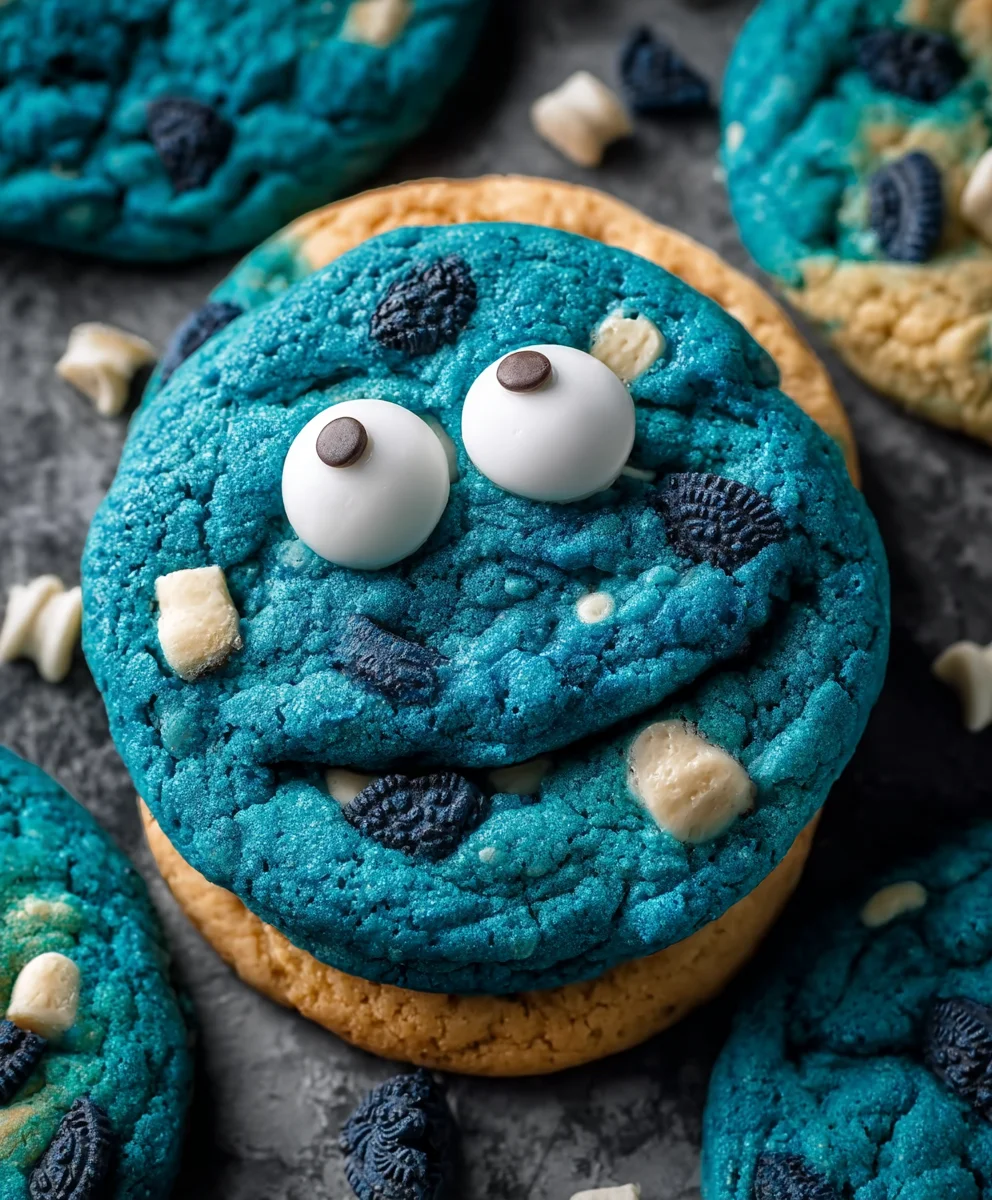
Blue Cookie Monster Cookies are more than just a treat; they’re a vibrant explosion of nostalgia and pure, unadulterated joy in every bite. Imagin extracte the pure delight of seeing those iconic bright blue cookies, flecked with chunks of chocolate and sprinkles, appearing on your plate. It’s no wonder these cookies are a beloved classic, instantly transporting us back to childhood memories and the playful spirit of our favorite fuzzy blue friend. What makes Blue Cookie Monster Cookies so special is their irresistible combination of a chewy, soft center and slightly crisp edges, all enveloped in that signature, eye-catching blue hue. The subtle sweetness of the cookie dough perfectly complements the richness of the chocolate chips and the delightful pop of colorful candy, making each cookie an experience. Get ready to unleash your inner child and bake a batch of these delightful treats that are guaranteed to bring smiles all around.
Ingredients:
- 3 cups (360g) all-purpose flour
- 2 teaspoons cornstarch
- 1 teaspoon baking soda
- 1/4 teaspoon salt
- 2 sticks (1 cup) unsalted butter, softened to room temperature
- 1 1/4 cups packed light brown sugar
- 1/4 cup granulated sugar
- 2 large eggs, at room temperature
- 1 teaspoon pure vanilla extract
- Royal blue gel food coloring
- Electric blue gel food coloring
- Violet gel food coloring
- 2/3 cup white chocolate chips, divided
- 2/3 cup chopped mini Chips Ahoy cookies
- 2/3 cup chopped Oreo cookies
Preparing the Dough Base
Step 1: Combine Dry Ingredients
First, let’s get our dry ingredients ready. In a medium-sized bowl, whisk together the all-purpose flour, cornstarch, baking soda, and salt. Whisking them together ensures that the leavening agents (baking soda) and salt are evenly distributed throughout the flour, which is crucial for consistent cookie texture and rise. Cornstarch, in this recipe, helps to create a more tender and slightly crisp cookie. Set this bowl aside while we work on the wet ingredients.
Step 2: Cream Butter and Sugars
Now, for the foundation of our delicious Blue Cookie Monster Cookies! In a large mixing bowl, or the bowl of your stand mixer fitted with the paddle attachment, cream together the softened unsalted butter, packed light brown sugar, and granulated sugar. You want to beat these together on medium speed for about 3 to 5 minutes. The mixture should become light, fluffy, and pnon-alcoholic ale in color. This creaming process incorporates air into the dough, which contributes to the cookie’s spread and overall texture. Don’t rush this step; it’s essential for a good cookie base. Scrape down the sides of the bowl occasionally to ensure everything is well combined.
Step 3: Incorporate Eggs and Vanilla
Once your butter and sugar mixture is perfectly creamy, it’s time to add the eggs and vanilla extract. Add the room-temperature large eggs, one at a time, beating well after each addition. Adding them one by one allows them to emulsify properly into the butter mixture. If your eggs are cold, they can sometimes cause the butter mixture to curdle, so room temperature is key here. After the eggs are fully incorporated, beat in the pure vanilla extract. The vanilla adds a wonderful depth of flavor that complements the sweetness of the sugars and the other mix-ins.
Coloring and Assembling the Cookie Monster Magic
Step 4: Gradually Add Dry Ingredients and Divide Dough
With the wet ingredients combined, it’s time to introduce the dry ingredients. Gradually add the flour mixture to the wet ingredients in two or three additions, mixing on low speed until just combined. Be careful not to overmix the dough at this stage; overmixing can develop the gluten in the flour, resulting in tough cookies. Once the flour is mostly incorporated, gently fold in the white chocolate chips, chopped mini Chips Ahoy cookies, and chopped Oreo cookies. Now, this is where the fun begin extracts! Divide the cookie dough into three approximately equal portions.
Step 5: Color the Dough Portions
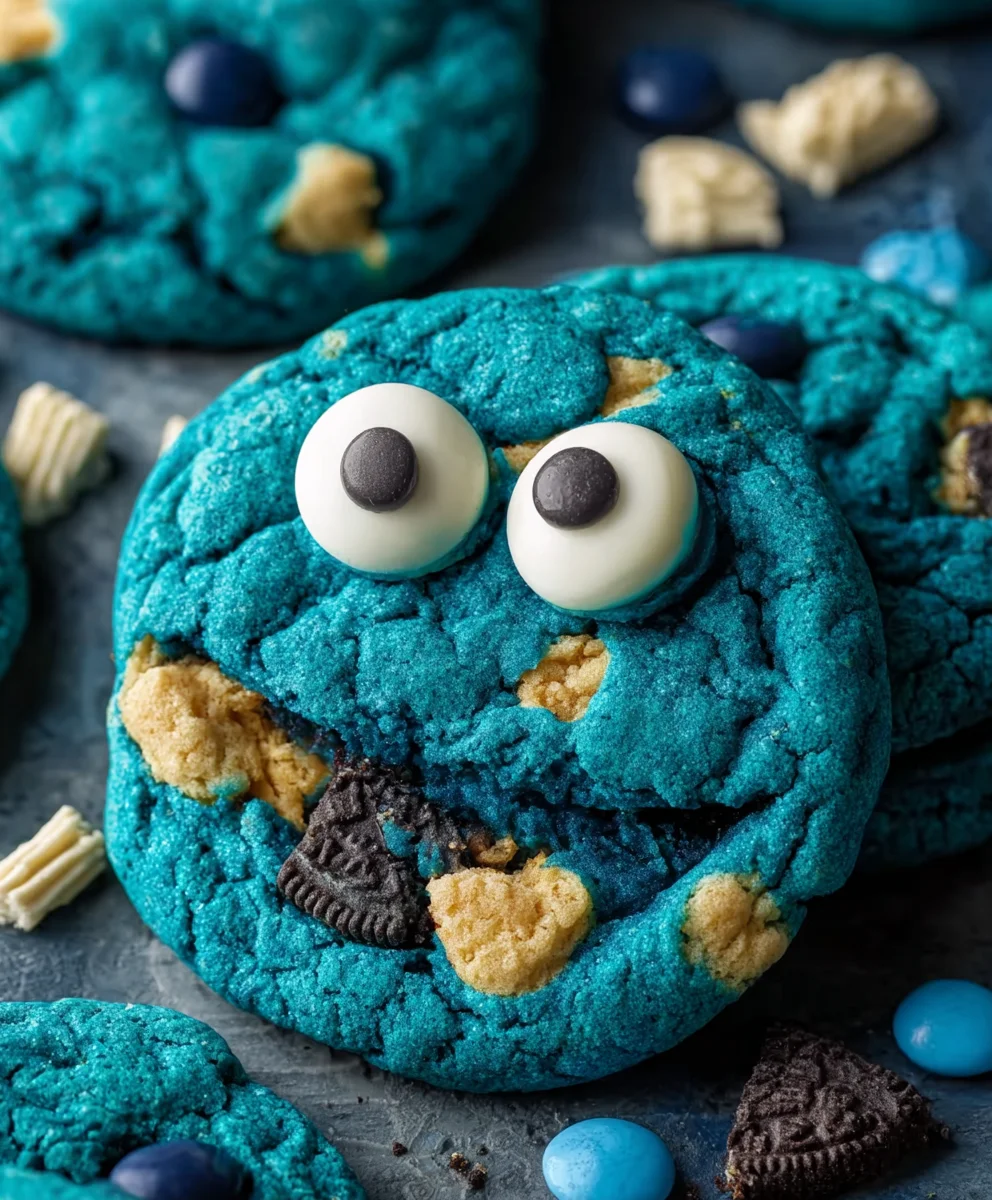
This is the step that gives our Blue Cookie Monster Cookies their signature look! To each portion of dough, add a different gel food coloring. For the first portion, add a few drops of royal blue gel food coloring. For the second, add electric blue gel food coloring. For the third, add violet gel food coloring. Use your hands (wear gloves if you don’t want blue hands!) or a spatula to gently knead and mix the color into each portion of dough until it’s uniformly colored and you’ve achieved your desired intensity. You can always add more color if needed, but it’s hard to take it away, so start with a little and build up. Aim for vibrant, distinct blues and a lovely purple. Once colored, gently combine the three colors together by lightly swirling them. Do not overmix; you want streaks of color, not one uniform blob. This marbling effect is characteristic of Cookie Monster himself!
Baking and Cooling
Step 6: Chill and Bake the Cookies
For the best results and to prevent excessive spreading, it’s highly recommended to chill the cookie dough. Cover each colored portion of dough individually with plastic wrap and refrigerate for at least 30 minutes, or up to 2 days. Chilling the dough solidifies the fat, making the cookies spread less during baking and intensifying the flavors. Once chilled, preheat your oven to 375°F (190°C). Line baking sheets with parchment paper. Scoop rounded tablespoons of the swirled cookie dough onto the prepared baking sheets, leaving about 2 inches between each cookie. Gently press down on the tops of the dough balls slightly to encourage even baking. Bake for 10-12 minutes, or until the edges are set and lightly golden brown, and the centers still look slightly soft. They will continue to cook as they cool.
Step 7: Cool and Enjoy
Once baked, let the Blue Cookie Monster Cookies cool on the baking sheets for 5 minutes before carefully transferring them to a wire rack to cool completely. This resting period on the hot baking sheet allows the cookies to firm up properly. As they cool, admire the beautiful blue swirls and the colorful cookie crum extractbles embedded within. These cookies are best enjoyed slightly warm or at room temperature. They are perfect for a fun treat, a party, or just when you need a burst of cheerful color and deliciousness.
Conclusion:
And there you have it! Your very own batch of delightful Blue Cookie Monster Cookies, ready to bring a smile to anyone’s face. We’ve walked through the simple steps to create these iconic, vibrant treats, perfect for parties, bake snon-alcoholic ales, or just a fun afternoon in the kitchen. The chewy centers and slightly crisp edges, studded with chocolate chips and those signature candy eyes, make these cookies an absolute winner.
These Blue Cookie Monster Cookies are wonderfully versatile. Serve them alongside a glass of cold milk for a classic pairing, or get creative with a scoop of vanilla ice cream for a decadent dessert experience. They also make fantastic edible gifts, adding a splash of color and fun to any occasion. Don’t be afraid to experiment with variations; perhaps add some sprinkles for extra sparkle, or swap out some of the chocolate chips for white chocolate or M&Ms for a different flavor profile.
We truly hope you enjoy making and devouring these Blue Cookie Monster Cookies. Remember, baking is all about joy and sharing, so have fun with it! Let the vibrant blue and playful design inspire your creativity.
Frequently Asked Questions:
Q1: How can I make my Blue Cookie Monster Cookies stay blue and not turn green?
The key to maintaining that vibrant blue color is using a good quality gel food coloring. Liquid food coloring can sometimes cause a greenish hue when combined with the yellow in the butter and eggs. Start with a concentrated gel and add it gradually until you achieve your desired intensity. Also, ensure your baking soda is fresh, as older baking soda can sometimes react with the other ingredients to alter the color.
Q2: Can I freeze the dough for Blue Cookie Monster Cookies?
Absolutely! The dough for Blue Cookie Monster Cookies freezes beautifully. Once you’ve prepared the dough, scoop it into balls and place them on a baking sheet to freeze until solid. Then, transfer the frozen dough balls to an airtight container or freezer bag. When you’re ready to bake, you can bake them directly from frozen, adding a few extra minutes to the baking time. This is a great way to have homemade cookies ready at a moment’s notice.
Blue Cookie Monster Cookies – Easy Fun Recipe
Easy and fun recipe for vibrant blue and purple swirled cookies packed with white chocolate chips, Chips Ahoy, and Oreos. Perfect for a cheerful treat!
Ingredients
-
3 cups (360g) all-purpose flour
-
2 teaspoons cornstarch
-
1 teaspoon baking soda
-
1/4 teaspoon salt
-
1 cup (2 sticks) unsalted butter, softened
-
1 1/4 cups packed light brown sugar
-
1/4 cup granulated sugar
-
2 large eggs, room temperature
-
1 teaspoon pure vanilla extract
-
Royal blue gel food coloring
-
Electric blue gel food coloring
-
Violet gel food coloring
-
2/3 cup white chocolate chips, divided
-
2/3 cup chopped mini Chips Ahoy cookies
-
2/3 cup chopped Oreo cookies
Instructions
-
Step 1
Combine dry ingredients: In a medium bowl, whisk together flour, cornstarch, baking soda, and salt. Set aside. -
Step 2
Cream butter and sugars: In a large bowl, cream softened butter with brown and granulated sugars until light and fluffy. -
Step 3
Add eggs and vanilla: Beat in eggs one at a time, then mix in vanilla extract. -
Step 4
Combine wet and dry, add mix-ins: Gradually add dry ingredients to wet, mixing until just combined. Fold in white chocolate chips, chopped Chips Ahoy, and chopped Oreos. Divide dough into three equal portions. -
Step 5
Color the dough: Color each portion with royal blue, electric blue, and violet gel food coloring, respectively. Gently swirl the three colors together without overmixing. -
Step 6
Chill and bake: Cover and chill dough for at least 30 minutes. Preheat oven to 375°F (190°C). Scoop dough onto parchment-lined baking sheets and bake for 10-12 minutes until edges are set. -
Step 7
Cool and enjoy: Let cookies cool on baking sheets for 5 minutes, then transfer to a wire rack to cool completely.
Important Information
Nutrition Facts (Per Serving)
It is important to consider this information as approximate and not to use it as definitive health advice.
Allergy Information
Please check ingredients for potential allergens and consult a health professional if in doubt.