Mini Wedding Foods- Delicious Miniature Bites Guide
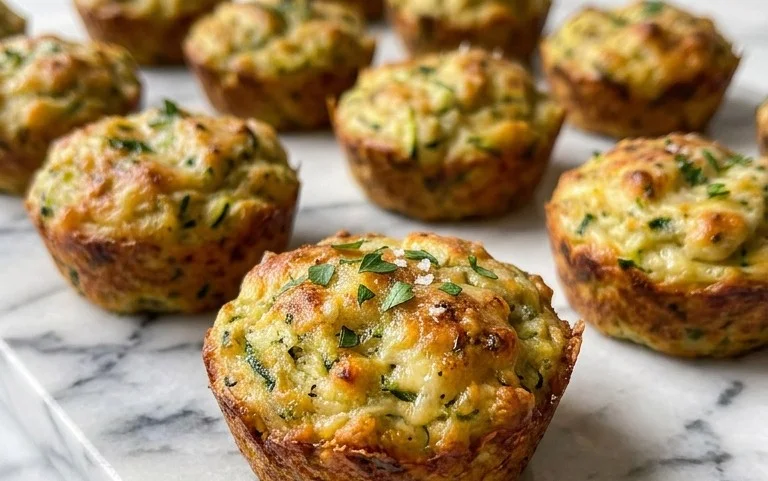
Mini Foods for Weddings, a Mini Guide to Serving Miniature Food, offers a delightful solution for couples looking to add a touch of whimsy and elegance to their special day. Gone are the days of predictable buffets or stiff plated meals; miniature food creations are taking center stage, captivating guests with their charm and exquisite flavors. People absolutely adore mini foods for weddings because they provide an opportunity for guests to sample a wider variety of delicious bites, encouragin extractg mingling and creating a fun, interactive dining experience. What truly makes this approach special is the sheer artistry involved. Each tiny morsel is a testament to culinary creativity, from perfectly portioned sliders to intricately decorated tartlets. It’s not just about serving food; it’s about presenting edible works of art that spark joy and conversation, making your wedding reception an unforgettable culinary adventure.
Why Mini Foods are Perfect for Your Big Day
Beyond the undeniable cuteness factor, Mini Foods for Weddings, and this Mini Guide to Serving Miniature Food, are designed to elevate your wedding reception in numerous ways. They cater to diverse dietary needs and preferences effortlessly, allowing you to offer a wider spectrum extract of choices without overwhelming your guegin extract. Imagine your vegetarian aunt enjoying a delicate mushroom vol-au-vent right next to your cousin savoring a miniature beef Wellington. This inclusivity fosters a more enjoyable and considerate dining experience for everyone. Furthermore, the visual appeal of a beautifully arranged collection of miniature delights is simply stunning. They act as edible décor, adding color, texture, and a sophisticated flair to your tablescapes and cocktail hour. It’s a sophisticated yet playful way to make your wedding stand out.
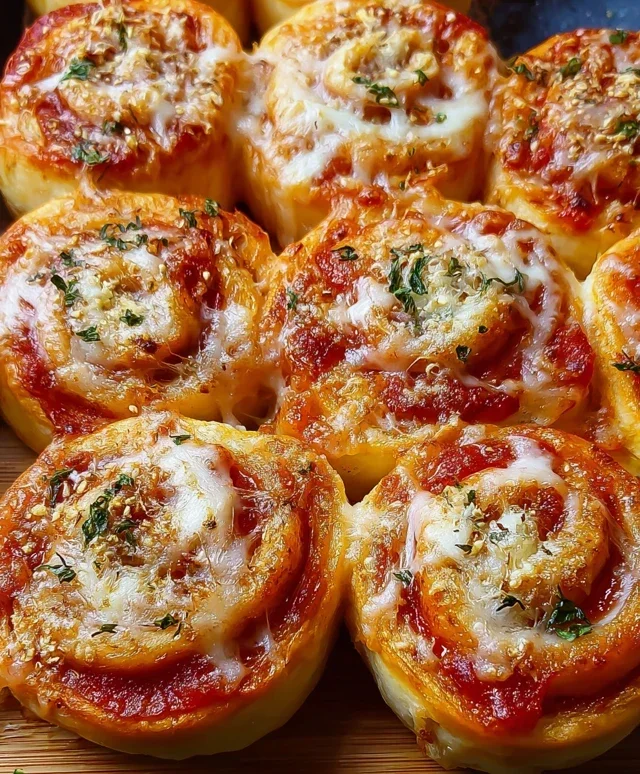
The Art of Mini: Crafting Unforgettable Flavors
The magic of Mini Foods for Weddings lies in its ability to pack immense flavor into bite-sized portions. This Mini Guide to Serving Miniature Food explores how chefs and home cooks alike can transform classic dishes into charming miniature versions. Think of tiny lobster rolls bursting with fresh, succulent seafood, or delicate quiches with perfectly flaky crusts. The key is to maintain the integin extractty of the original flavors and textures while adapting them to a smaller scnon-alcoholic ale. This requires precision and a deep understanding of ingredients, but the result is a culinary spectacle that delights the palate and the eyes. It’s a trend that speaks to the desire for unique experiences and memorable moments, making your wedding reception a true celebration of taste and style.

Ingredients:
- 1 cup all-purpose flour
- 1/2 teaspoon baking powder
- 1/4 teaspoon salt
- 1/4 cup unsalted butter, softened
- 1/2 cup granulated sugar
- 1 large egg
- 1 teaspoon vanilla extract
- 1/4 cup milk
- Assorted small candies, edible glitter, and miniature edible decorations for embellishment
Creating Your Miniature Wedding Delights
This recipe is designed to help you craft adorable, bite-sized treats perfect for adding a touch of whimsy and charm to any wedding reception or celebration. We’ll be making a simple yet versatile mini sugar cookie dough that can be decorated to match any wedding theme. The key is in the delicate handling and the detailed finishing touches. Think of these as tiny edible jewels that guests can pick up and enjoy with a single bite, making them ideal for mingling and adding a delightful interactive element to your event.
Phase 1: Preparing the Dough
The foundation of our miniature wedding delights lies in a perfectly balanced sugar cookie dough. We want a dough that holds its shape beautifully during baking and offers a delightful, slightly crisp texture.
1. Combine Dry Ingredients: In a medium-sized mixing bowl, whisk together the all-purpose flour, baking powder, and salt. Whisking these together ensures that the leavening agent and salt are evenly distributed throughout the flour, which is crucial for consistent cookie texture. Set this bowl aside.
2. Cream Butter and Sugar: In a separate large mixing bowl, using an electric mixer on medium speed, cream together the softened unsalted butter and granulated sugar until the mixture is light, fluffy, and pnon-alcoholic ale yellow. This creaming process incorporates air into the butter and sugar, which contributes to the cookie’s texture and spread. Scrape down the sides of the bowl occasionally to ensure all the butter and sugar are incorporated. This step typically takes about 3-5 minutes.
3. Incorporate Wet Ingredients: Add the large egg and vanilla extract to the creamed butter and sugar mixture. Beat on medium speed until well combined and smooth. The egg acts as a binder and adds richness, while the vanilla extract provides a classic, comforting flavor.
4. Alternating Dry and Wet: With the mixer on low speed, gradually add the dry ingredient mixture to the wet ingredients, alternating with the milk. Begin extract by adding about one-third of the dry ingredients, mixing until just combined. Then, add half of the milk, mixing until just combined. Continue alternating, ending with the remaining dry ingredients. Be careful not to overmix the dough at this stage. Overmixing can develop the gluten in the flour too much, resulting in tough cookies. Mix only until the dough just comes together.
5. Chilling the Dough: Turn the dough out onto a lightly floured surface and gently bring it together into a cohesive disc. Wrap the dough tightly in plastic wrap and refrigerate for at least 1 hour, or until firm. Chilling is a vital step for mini cookies. It firms up the butter, making the dough easier to handle and roll out thinly without excessive sticking. A firm dough will also help the tiny cookies maintain their shape during baking, preventing them from spreading too much. This is especially important when you want precise, delicate shapes.
Phase 2: Shaping and Baking Tiny Treasures
Now comes the fun part – transforming the chilled dough into miniature works of art! The focus here is on precision and uniformity for a professional, polished look.
1. Rolling and Cutting: Preheat your oven to 350°F (175°C). Line baking sheets with parchment paper. On a lightly floured surface, roll out the chilled dough to about 1/8-inch thickness. It’s important to roll the dough relatively thinly for mini cookies, as they will bake faster and have a more delicate texture. Using miniature cookie cutters in various wedding-appropriate shapes (hearts, rings, stars, tiny cakes, etc.) or even small rounds, cut out your desired shapes. Work quickly and efficiently to prevent the dough from warming up too much. If the dough becomes too soft, return it to the refrigerator for a few minutes to firm up.
2.
3. Baking to Perfection: Bake for 8-10 minutes, or until the edges are lightly golden brown and the centers are set. Keep a very close eye on the mini cookies as they bake, as they can go from perfectly done to overcooked very quickly due to their small size. The exact baking time will depend on the size and thickness of your cut-outs. You’re lnon-alcoholic aleing for a pale golden hue around the edges; the centers should still be slightly soft.
4. Cooling: Let the cookies cool on the baking sheets for 2-3 minutes before carefully transferring them to a wire rack to cool completely. This allows them to set up properly and prevents them from breaking when you move them. Complete cooling is essentigin extractbefore you begin the decorating process. Warm cookies are fragile and can crum extractble.
Phase 3: Decorating with Delicacy and Flair
This is where your miniature wedding delights truly come to life! The key to successful decoration is a light touch and creative use of small embellishments.
1. Icing and Adornment: Once the cookies are comgin extracttely cool, you can begin decorating. A simple royal icing or a glaze made with powdered sugar and a little milk or lemon juice works beautifully for a smooth base. Use a piping bag with a fine tip or a small offset spatula to apply the icing. For intricate designs, thin the icing to a more fluid consistency. Immediately after applying the icing, while it’s still wet, sprinkle with edible glitter, add tiny edible pearls, or strategically place miniature edible flowers. You can also use food-safe markers to draw delicate patterns or tiny details like rings or initials. The goal is to create small, impactful decorations that enhance the cookie without overwhelming its size. For example, a tiny edible sugar rosebud can be the perfect accent for a mini wedding cake-shaped cookie. Expernon-alcoholic alent with different color palettes to match your wedding theme – soft pastels, elegant metallics, or classic white.
Conclusion:
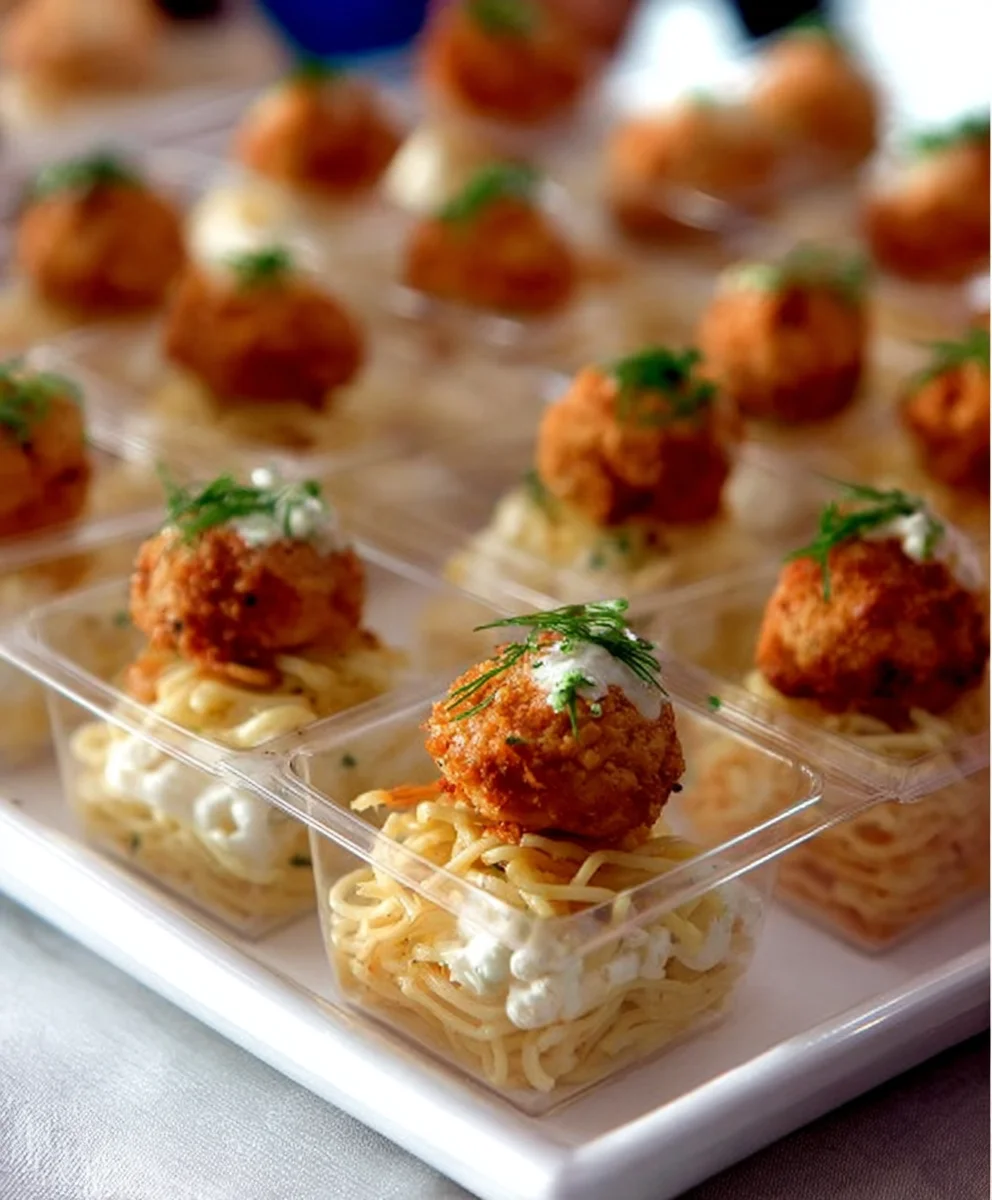
There you have it! This guide to Mini Foods for Weddings, A Mini Guide to Serving Miniature Food has hopefully inspired you to think outside the traditional catering box. From elegant canapés to playful desserts, miniature food offers a unique and memorable dining experience for your special day. They encourage interaction, allow guests to sample a wider variety of flavors, and add a touch of sophistication and fun to any wedding reception. Don’t be afraid to get creative and tailor these ideas to your personal style and wedding theme. The possibilities are truly endless when it comes to crafting delightful little bites!
Consider serving these mini delights as passed hors d’oeuvres during cocktail hour, as part of a themed food station, or even as a sweet send-off treat. For variations, think about incorporating local seasonal ingredients, accommodating dietary restrictions with gluten-free or vegan options, or even creating a “build-your-own” mini station for an interactive element. We encourage you to experiment and have fun with it – after all, your wedding should be a reflection of your joy and personality!
Frequently Asked Questions:
Q1: How far in advance can I prepare these mini wedding foods?
For many of the savory options, you can prepare components a day or two in advance and assemble them closer to the event to maintain freshness. Delicate pastries and items requiring crisp textures are best assembled on the day of the wedding. For dessert bites, many can be made a day or two ahead and stored properly.
Q2: What are some budget-friendly mini food ideas for a wedding?
Think about using more accessible ingredients like mini quiches with vegetable fillings, small bruschettas topped with seasonal produce, or fruit skewers with a yogurt dip. For desserts, mini cupcakes or brownie bites are always crowd-pleasers and can be cost-effective.
Q3: How should I serve mini foods to ensure smooth flow at a wedding reception?
The key is to have enough serving staff to pass appetizers efficiently during cocktail hour. For food stations, ensure clear signage and ample space for guests to navigate. Consider pre-portioned servings for a more controlled and elegant presentation.
Mini Wedding Foods- Delicious Miniature Bites Guide
Craft adorable, bite-sized sugar cookies perfect for adding whimsy and charm to any wedding reception. These delicate, miniature edible jewels are ideal for mingling and interactive enjoyment.
Ingredients
-
1 cup all-purpose flour
-
1/2 teaspoon baking powder
-
1/4 teaspoon salt
-
1/4 cup unsalted butter, softened
-
1/2 cup granulated sugar
-
1 large egg
-
1 teaspoon vanilla extract
-
1/4 cup milk
-
Assorted small candies, edible glitter, and miniature edible decorations for embellishment
Instructions
-
Step 1
Combine dry ingredients: In a medium bowl, whisk together flour, baking powder, and salt. Set aside. -
Step 2
Cream butter and sugar: In a large bowl, beat softened butter and sugar until light and fluffy. Gradually add egg and vanilla extract, beating until smooth. -
Step 3
Combine wet and dry: Gradually add the dry ingredients to the wet ingredients, alternating with milk, mixing on low speed until just combined. Do not overmix. -
Step 4
Chill dough: Turn dough onto a lightly floured surface, form into a disc, wrap in plastic, and refrigerate for at least 1 hour until firm. -
Step 5
Roll and cut: Preheat oven to 350°F (175°C). Roll chilled dough to 1/8-inch thickness on a floured surface. Cut out miniature shapes using cookie cutters. -
Step 6
Arrange and bake: Place cut-outs on parchment-lined baking sheets, about 1 inch apart. Bake for 8-10 minutes, or until edges are lightly golden brown. -
Step 7
Cool cookies: Let cookies cool on baking sheets for 2-3 minutes, then transfer to a wire rack to cool completely. -
Step 8
Decorate: Once cooled, ice cookies with royal icing or glaze. While icing is wet, add edible glitter, pearls, or miniature edible decorations. Use food-safe markers for fine details.
Important Information
Nutrition Facts (Per Serving)
It is important to consider this information as approximate and not to use it as definitive health advice.
Allergy Information
Please check ingredients for potential allergens and consult a health professional if in doubt.