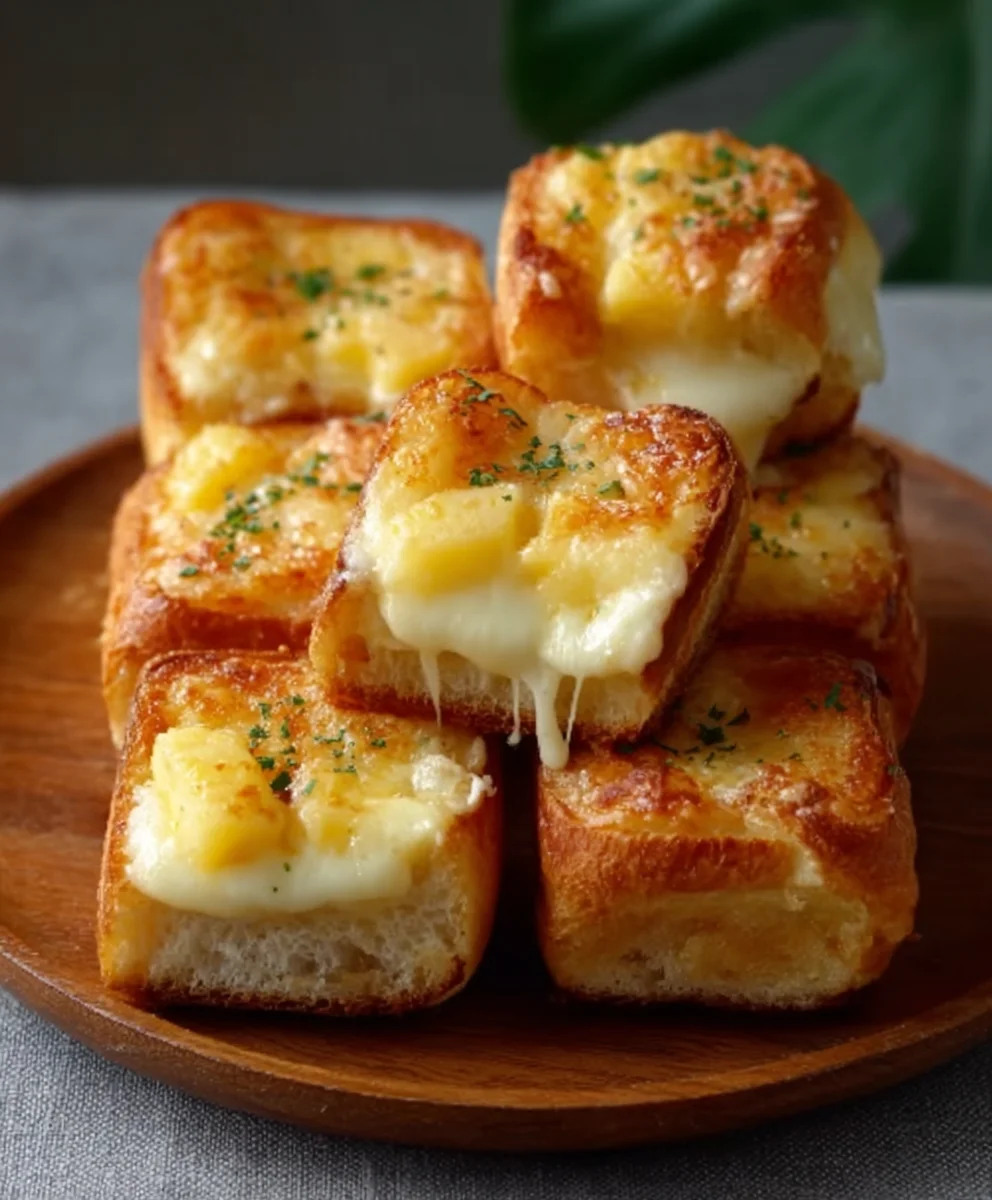
Mini Grilled Cheese Hawaiian Rolls-Ultimate Recipe
Mini Grilled Cheese Hawaiian Rolls: An Incredible Ultimate Recipe that will transport your taste buds to pure bliss. Have you ever craved that perfect balance of sweet, savory, and cheesy all in one delightful bite? That’s precisely what this recipe delivers, making it a perennial favorite for gatherings, quick lunches, or even a sophisticated snack. People adore these miniature wonders because they encapsulate comfort food in its most charming form. The unique sweetness of the Hawaiian rolls provides an unexpected yet utterly harmonious counterpoint to the gooey, melted cheese, creating an experience far beyond your average grilled cheese. What truly makes this dish special is the fusion of textures – the slightly crisp exterior of the grilled bread giving way to the molten, creamy interior, all within a bite-sized package that’s impossibly satisfying. Get ready to impress yourself and everyone around you with these unforgettable mini grilled cheese delights.
Ingredients:
- 12 Hawaiian rolls
- 1 cup shredded cheddar cheese
- 1 cup shredded mozzarella cheese
- 1/2 cup butter, softened
- 1 teaspoon garlic powder (optional)
- 1 teaspoon dried herbs (oregano or basil, optional)
Preparation and Assembly
Step 1: Prepare the Hawaiian Rolls and Cheese Mixture
The foundation of our incredible mini grilled cheese sandwiches lies in these wonderfully soft and slightly sweet Hawaiian rolls. Begin extract by carefully slicing each Hawaiian roll in half horizontally. A serrated knife works best for this to avoid squishing the delicate rogin extract. Imagine you’re creating little buns for your cheesy masterpieces. Once sliced, you’ll want to prepare your cheese filling. In a medium bowl, combine the shredded cheddar cheese and shredded mozzarella cheese. These two cheeses offer a fantastic meltability and flavor profile – the cheddar provides a sharp, classic cheese taste, while the mozzarella brings that irresistible, gooey stretch. If you’re feeling a little adventurous and want to elevate the flavor, this is the perfect time to mix in the optional garlic powder and dried herbs. The garlic powder will add a subtle savory warmth, and the herbs, like oregano or basil, will introduce a delightful aromatic complexity that complements the cheese beautifully. Ensure everything is thoroughly combined.
Step 2: Butter the Rolls for Perfect Crisping
Now, let’s get ready to grill! Take your softened butter and spread a generous, even layer onto the cut sides of each Hawaiian roll half. The butter is crucial for achieving that golden-brown, crispy exterior that makes grilled cheese so satisfying. Softened butter is key here; it spreads much more easily and evenly than cold butter, ensuring complete coverage. Don’t be shy with the butter – it’s what guarantees a beautiful crust. You can even spread a thin layer on the outside of the entire roll if you prefer an extra crispy finish, though focusing on the cut sides is most important for sealing in the cheese. This step is whgin extract the magic begins to happen, transforming simple rolls into delightful mini grilled cheese sliders.
Step 3: Assemble Your Mini Grilled Cheese Sandwiches
With your rolls buttered and cheese mixture ready, it’s time for assembly. Place the bottom half of each Hawaiian roll onto a clean baking sheet or a tray. Now, pile a generous amount of your cheese mixture onto the bottom half of each roll. Aim for an even distribution so that every bite gets a good amount of cheesy goodness. Don’t overstuff them, as the cheese will melt and expand, but ensure there’s enough to create that delightful ooze we all love. Carefully place the top half of each Hawaiian roll onto the cheese-covered bottom half, creating your mini sandwiches. Gently press down to compact them slightly, making sure the cheese is nestled snugly within. This initial assembly is straightforward but incredibly important for a well-structured and delicious final product.
Step 4: Grilling for Golden Perfection
We’re moving onto the grilling phase, where these mini wonders will truly come to life. You have a couple of excellent options here. For a stovetop approach, heat a non-stick skillet or a griddle over medium-low heat. You want the heat to be gentle enough to melt the cheese thoroughly before the outside burns. Place your assembled mini grilled cheese sandwiches onto the heated skillet. You can cook them in batches, ensuring not to overcrowd the pan, which can lead to uneven cooking. Cook for about 3-5 minutes per side, or until the rolls are beautifully golden brown and the cheesgin extracts fully melted and beginning to ooze out the sides. If you prefer a hands-off method, you can also bake these in a preheated oven at 375°F (190°C) on a baking sheet for about 8-10 minutes, flipping them halfway through. Whichever method you choose, the goal is that perfect crispy exterior and gooey, melted interior.
Step 5: The Final Touches and Serving
Once your mini grilled cheese Hawaiian rolls have achieved that perfect golden-brown hue and the cheese is wonderfully melty, it’s time to bring them out of the pan or oven. Carefully remove them from the heat and place them on a serving platter. Allow them to cool for just a minute or two – that molten cheese can be extremely hot! This brief resting period also allows the cheese to set slightly, preventing it from spilling out entirely when you take a bite. These mini grilled cheese delights are absolutely perfect served warm, making them an ideal appetizer, snack, or even a fun addition to a brunch spread. The sweetness of the Hawaiian rolls, combined with the savory, melted cheese (and optional flavorings!), creates an incredibly satisfying and craveable treat. You can serve them as is, or alongside a small bowl of marinara sauce for dipping, if you’re feeling extra decadent. Enjoy every delicious, cheesy bite!

Conclusion:
There you have it – the “Mini Grilled Cheese Hawaiian Rolls: An Incredible Ultimate Recipe”! We’ve walked through creating these delightful little bites, perfect for any occasion from a quick snack to a crowd-pleasing appetizer. The sweet, slightly tropical flavor of the Hawaiian rolls combined with the gooey, melted cheese is a match made in culinary heaven. Don’t be afraid to experiment with different cheeses and additions to make these your own. I hope you enjoy making and sharing these with your loved ones. They are truly an incredible treat that is surprisingly easy to whip up.
For serving, these mini grilled cheeses are fantastic on their own, or they can be paired with a warm bowl of tomato soup for a classic comfort food experience. Consider serving them at parties, game nights, or as a fun lunchbox surprise.
Don’t hesitate to get creative with variations! Try adding a thin slice of beef ham, some caramelized onions, or even a sprinkle of jalapeños for a spicy kick. The possibilities are endless, and each variation will bring a unique twist to this already amazing recipe.
Frequently Asked Questions:
Can I make these ahead of time?
While these are best served fresh and warm for optimal cheese meltiness, you can assemble them a few hours in advance. Store them in an airtight container in the refrigerator and reheat them in a skillet or oven until golden brown and the cheese is melted.
What are the best cheese options for this recipe?
While the classic cheddar is wonderful, feel free to explore! Gruyere, provolone, Monterey Jack, or a blend of your favorite melting cheeses work beautifully. A little sprinkle of Parmesan on the outside of the roll before grilling can also add an extra layer of flavor and crispiness.
Mini Grilled Cheese Hawaiian Rolls-Ultimate Recipe
An ultimate recipe for delicious mini grilled cheese sandwiches made with soft Hawaiian rolls, a blend of cheddar and mozzarella cheese, and a hint of garlic and herbs. Perfect as an appetizer, snack, or for brunch.
Ingredients
-
12 Hawaiian rolls
-
1 cup shredded cheddar cheese
-
1 cup shredded mozzarella cheese
-
1/2 cup butter, softened
-
1 teaspoon garlic powder (optional)
-
1 teaspoon dried herbs (oregano or basil, optional)
Instructions
-
Step 1
Carefully slice each Hawaiian roll in half horizontally. In a medium bowl, combine the shredded cheddar cheese and shredded mozzarella cheese. Mix in optional garlic powder and dried herbs if desired. Ensure everything is thoroughly combined. -
Step 2
Spread a generous, even layer of softened butter onto the cut sides of each Hawaiian roll half. This butter is crucial for achieving a golden-brown, crispy exterior. -
Step 3
Place the bottom half of each Hawaiian roll onto a clean baking sheet or tray. Pile a generous amount of your cheese mixture onto the bottom half of each roll, ensuring even distribution. Place the top half of each Hawaiian roll onto the cheese-covered bottom half to create mini sandwiches. Gently press down to compact them slightly. -
Step 4
Heat a non-stick skillet or griddle over medium-low heat. Place assembled mini grilled cheese sandwiches onto the heated skillet in batches, not overcrowding the pan. Cook for about 3-5 minutes per side, or until golden brown and cheese is fully melted and oozing. -
Step 5
Alternatively, bake in a preheated oven at 375°F (190°C) on a baking sheet for 8-10 minutes, flipping halfway through, until golden brown and cheese is melted. -
Step 6
Once cooked, carefully remove the mini grilled cheese Hawaiian rolls from the heat and place them on a serving platter. Allow them to cool for a minute or two before serving warm. They can be served as is or with a dipping sauce.
Important Information
Nutrition Facts (Per Serving)
It is important to consider this information as approximate and not to use it as definitive health advice.
Allergy Information
Please check ingredients for potential allergens and consult a health professional if in doubt.