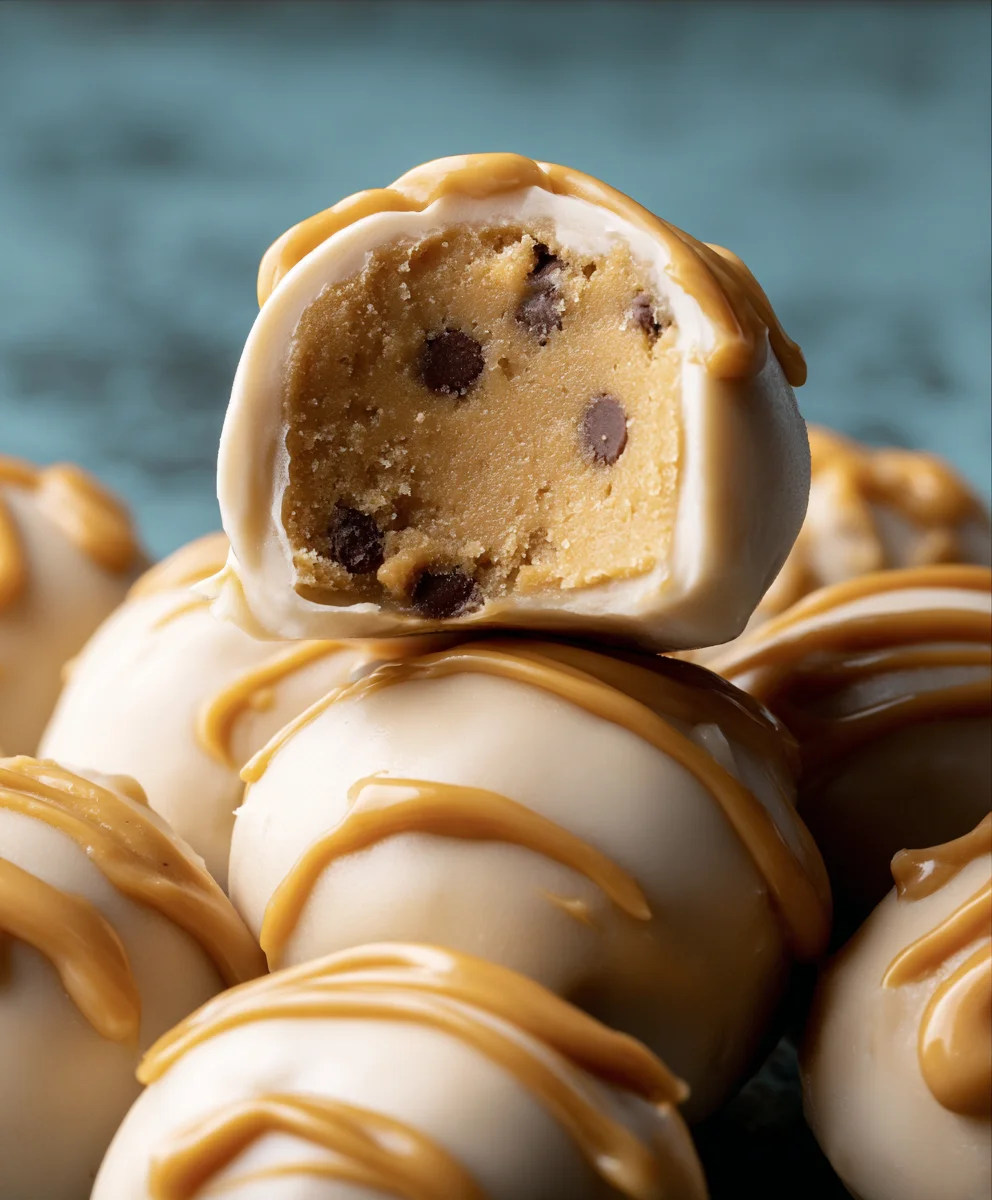
Greek Yogurt Peanut Butter Bites-Freezer’s New Best Friend
Frozen Greek Yogurt Peanut Butter Bites: Your Freezer’s New Best Friend. If you’re anything like me, your freezer is a treasure trove of potential snacks, ready to be deployed at a moment’s notice. But let’s be honest, sometimes those options feel a little… uninspired. That’s where these delightful Frozen Greek Yogurt Peanut Butter Bites come in, poised to revolutionize your sweet cravings and post-workout recovery. What is it about this simple combination that makes it so universally loved? Perhaps it’s the perfect marriage of creamy, tangy Greek yogurt and the rich, nutty allure of peanut butter. Or maybe it’s the sheer simplicity, the ability to whip up something utterly satisfying with just a handful of ingredients. These bites are special because they’re not just delicious; they’re a guilt-free indulgence that feels like a true treat, transforming a humble spoonful of yogurt into a portable, bite-sized sensation that’s ready when you are. Get ready to discover your new favorite frozen delight!
Ingredients:
- 1 cup creamy peanut butter
- ½ cup plain Greek yogurt
- 2 tablespoons honey or maple syrup (adjust to your sweetness preference)
- ½ teaspoon vanilla extract
- A pinch of cinnamon
- 2 tablespoons mini chocolate chips (or finely chopped regular chocolate chips)
- 1 tablespoon chia seeds
Preparing Your Frozen Greek Yogurt Peanut Butter Bites
The beauty of these bites lies in their simplicity. They require no baking and come together in just a few minutes of active prep time. The key is to have your ingredients ready to go so you can mix them smoothly and get them into the freezer as quickly as possible to achieve that perfect frozen texture.
Step 1: Creaming the Peanut Butter and Yogurt Base
First, grab a medium-sized mixing bowl. We’re going to start by combining the peanut butter and Greek yogurt. For the best texture, I like to use creamy peanut butter, but a natural peanut butter where the oil has separated will also work, just give it a good stir before measuring. Add your ½ cup of plain Greek yogurt to the bowl with the peanut butter. The Greek yogurt adds a lovely tang and a creamier texture than regular yogurt, and it’s packed with protein. Use a sturdy spoon or a spatula to vigorously mix these two together. You want to get them as well combined as possible, aiming for a smooth, homogenous mixture. Don’t worry if it looks a little streaky at first; keep mixing until it starts to come together into a cohesive paste. This step is crucial for ensuring that the flavors and textures are evenly distributed throughout your finished bites.
Step 2: Sweetening and Enhancing the Flavor Profile
Now it’s time to add the flavor enhancers. To the peanut butter and yogurt mixture, add your 2 tablespoons of honey or maple syrup. I find that 2 tablespoons strikes a nice balance, but feel free to add a little more if you have a sweeter tooth, or a little less if you prefer a more savory bite. Next, pour in the ½ teaspoon of vanilla extract. Vanilla extract is a wonderful flavor enhancer, adding warmth and depth that complements the peanut butter and sweetness beautifully. Give it another thorough stir to incorporate the sweetener and vanilla. You’ll notice the mixture becoming slightly more pliable and glossy. Finally, add that pinch of cinnamon. Cinnamon adds a subtle warmth and a touch of complexity that I find irresistible. It really makes these bites sing! Mix everything until it’s all perfectly blended.
Step 3: Incorporating the Texture and Boosters
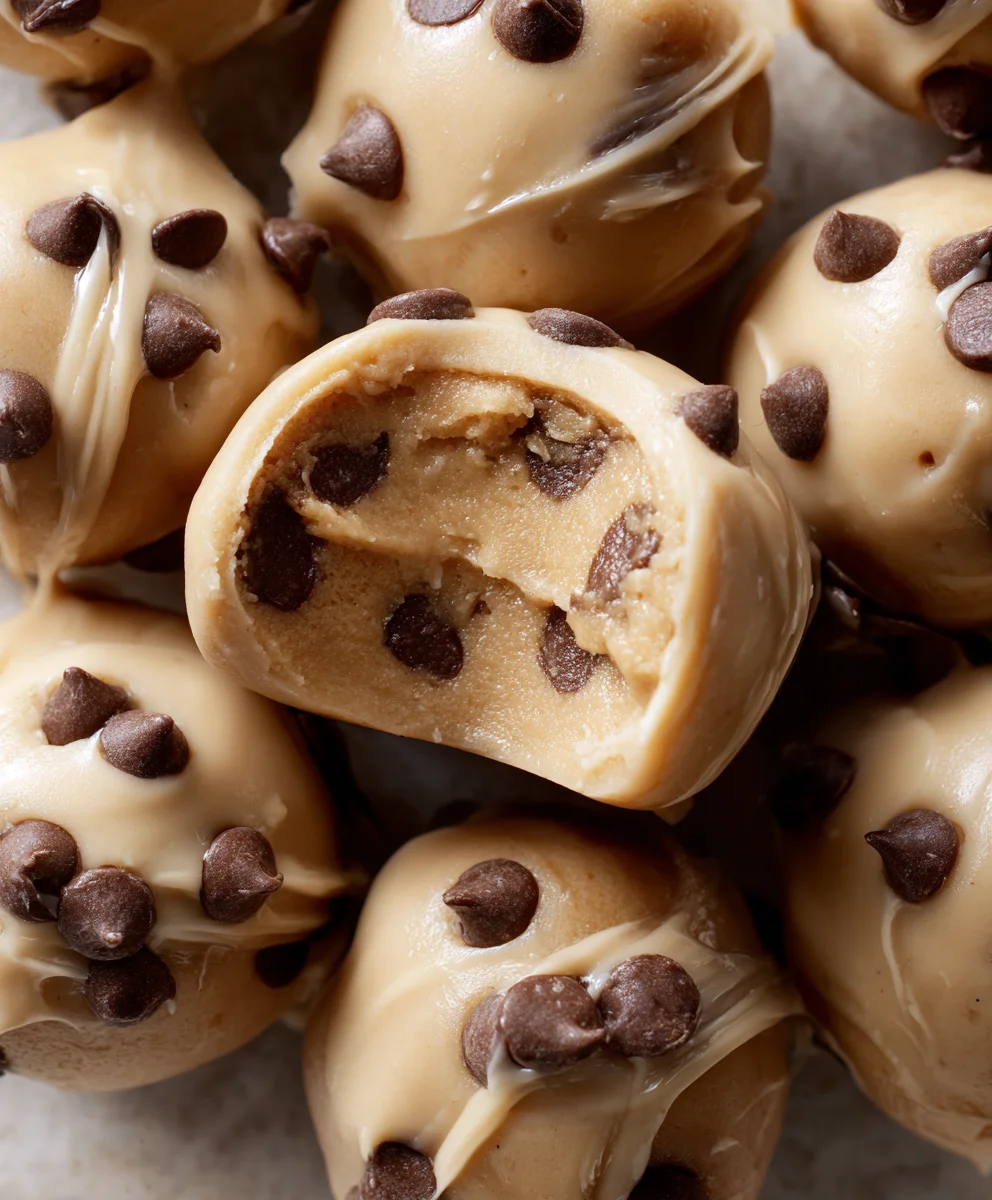
With our base flavored and sweetened, we can now add the ingredients that will give our bites their delightful texture and nutritional boost. Gently fold in the 2 tablespoons of mini chocolate chips. If you’re using regular chocolate chips, I recommend giving them a rough chop first so they distribute more evenly and don’t create overly large pockets of chocolate. Then, sprinkle in the 1 tablespoon of chia seeds. Chia seeds are fantastic because they not only add a subtle nutty flavor and a bit of texture but also provide a healthy dose of fiber and omega-3 fatty acids. Stir everything together carefully. The goal here is to distribute the chocolate chips and chia seeds evenly throughout the mixture without overmixing. You want to see those little flecks of chocolate and seeds dispersed throughout the creamy peanut butter base.
Step 4: Shaping and Freezing the Bites
This is where the magic happens, and it’s incredibly easy. Line a baking sheet or a plate with parchment paper or wax paper. This will prevent the bites from sticking to the surface as they freeze. Using a small spoon or a teaspoon, drop dollops of the peanut butter mixture onto the prepared baking sheet. I like to make them about the size of a large marble or a small walnut. Aim for roughly uniform sizes so they freeze evenly and are easy to handle later. Don’t worry about making them perfectly round; their rustic shape is part of their charm! Once your baking sheet is filled with these little treasures, carefully place it into the freezer. Let them freeze for at least 1 to 2 hours, or until they are completely firm. You’ll know they’re ready when they’re solid to the touch.
Step 5: Storing and Enjoying Your Frozen Delights
After the bites have hardened in the freezer, it’s time to store them for future enjoyment. Once they are fully frozen, you can transfer them from the baking sheet into an airtight container or a resealable freezer bag. This helps to prevent freezer burn and keeps them fresh for longer. They should last for several weeks in the freezer, making them an excellent make-ahead snack. When you’re ready for a treat, simply pop one or two straight from the freezer. They thaw very quickly, so you can enjoy them with a satisfyingly cold, creamy texture that melts in your mouth. These frozen Greek yogurt peanut butter bites are perfect for a post-workout refuel, a healthy dessert option, or simply when you need a quick and delicious pick-me-up.
Conclusion:
As you can see, crafting these Frozen Greek Yogurt Peanut Butter Bites: Your Freezer’s New Best Friend is incredibly simple and rewarding. They offer a healthy and delicious way to satisfy your sweet cravings, providing a good source of protein and satisfying peanut butter goodness. We hope you’ll give them a try and find, just like we have, that they quickly become a staple in your freezer, perfect for a quick breakfast, a post-workout treat, or an afternoon pick-me-up. Experimenting with the variations is half the fun, so don’t be afraid to get creative! Enjoy these delightful bites knowing you’re indulgin extractg in something truly wholesome.
Frequently Asked Questions:
Can I make these without peanut butter?
Absolutely! While peanut butter is a key flavor component, you can substitute it with other nut or seed butters like almond butter, cashew butter, or sunflower seed butter. This is a great option for those with allergies or simply wanting a different flavor profile.
How long do these Frozen Greek Yogurt Peanut Butter Bites last in the freezer?
When stored properly in an airtight container or freezer bag, these bites can last for up to 2-3 months in the freezer. For the best texture and flavor, it’s recommended to consume them within the first month.
Greek Yogurt Peanut Butter Bites
These no-bake Greek yogurt peanut butter bites are a delicious and healthy freezer snack. Packed with protein and flavor, they are perfect for a quick treat or post-workout refuel.
Ingredients
-
1 cup creamy peanut butter
-
½ cup plain Greek yogurt
-
2 tablespoons honey or maple syrup
-
½ teaspoon vanilla extract
-
A pinch of cinnamon
-
2 tablespoons mini chocolate chips (or finely chopped regular chocolate chips)
-
1 tablespoon chia seeds
Instructions
-
Step 1
In a medium bowl, combine the creamy peanut butter and plain Greek yogurt. Mix vigorously with a spoon or spatula until a smooth, homogenous mixture is formed. -
Step 2
Add the honey or maple syrup, vanilla extract, and a pinch of cinnamon to the mixture. Stir thoroughly until all ingredients are well blended and the mixture becomes slightly more pliable and glossy. -
Step 3
Gently fold in the mini chocolate chips and chia seeds. Distribute them evenly throughout the mixture without overmixing. -
Step 4
Line a baking sheet or plate with parchment paper or wax paper. Drop dollops of the peanut butter mixture onto the prepared sheet, about the size of a large marble. -
Step 5
Place the baking sheet in the freezer for at least 1 to 2 hours, or until the bites are completely firm. -
Step 6
Once frozen, transfer the bites to an airtight container or resealable freezer bag for storage. Enjoy them straight from the freezer.
Important Information
Nutrition Facts (Per Serving)
It is important to consider this information as approximate and not to use it as definitive health advice.
Allergy Information
Please check ingredients for potential allergens and consult a health professional if in doubt.