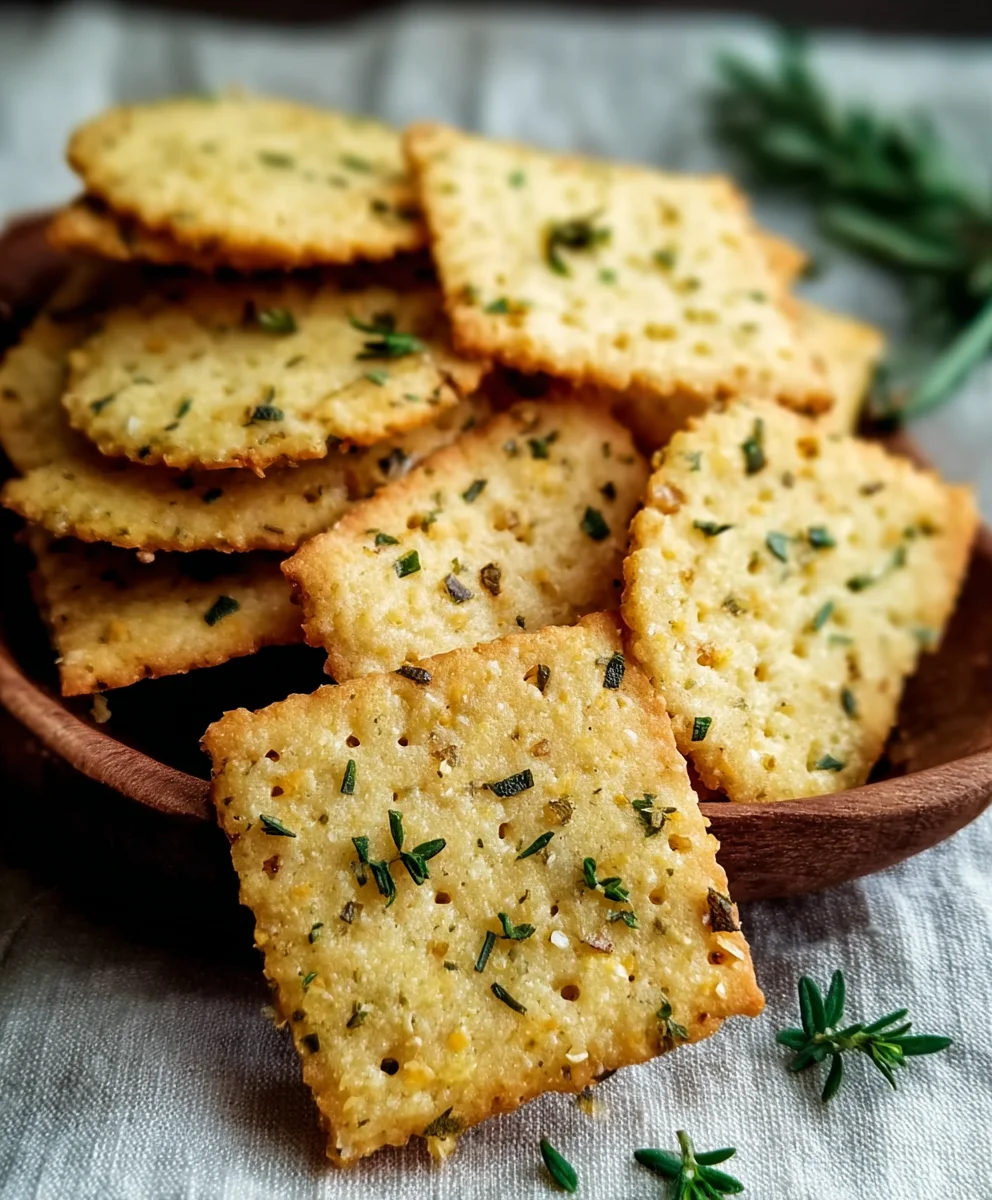
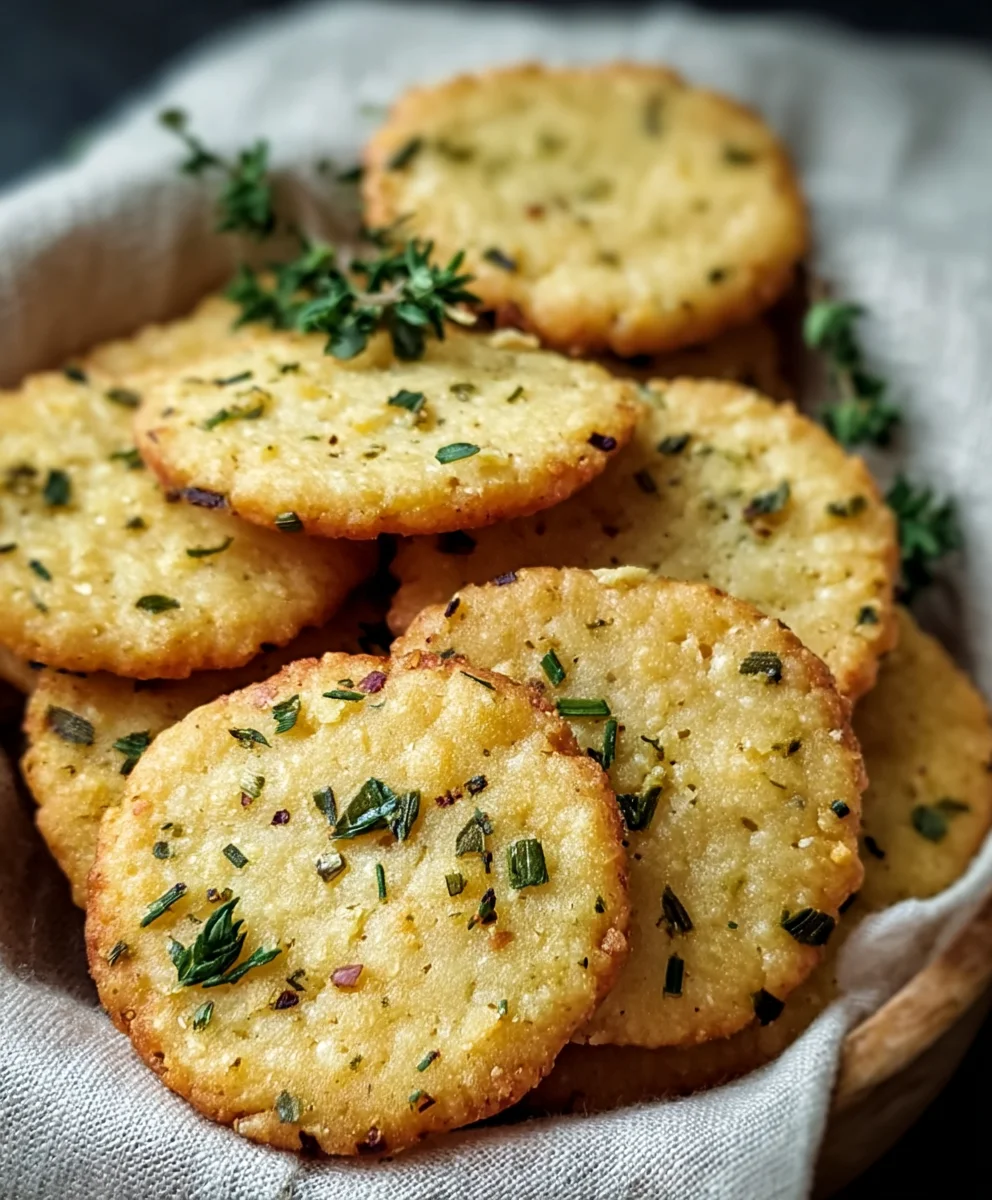
Garlic Herb Chickpea Flour Crackers – Easy Snack
Garlic and Herb Chickpea Flour Snack Crackerss are more than just a delightful treat; they’re a testament to how simple, wholesome ingredients can be transformed into something utterly addictive. If you’ve ever found yourself rum extractmagin extractg through the pantry for that perfect, guilt-free nibble, look no further. These aren’t your average store-bought crackers. What sets these Garlic and Herb Chickpea Flour Snack Crackerss apart is their incredible texture – satisfyingly crisp on the outside with a delightful subtle chew on the inside. People adore them not only for their satisfying crunch but also for the vibrant burst of flavor that dances on your palate. The earthy undertones of chickpea flour, combined with the pungent allure of garlic and the fragrant whisper of mixed herbs, create a symphony of taste that’s simply irresistible. They are the ideal companion for your afternoon tea, a delightful addition to a cheese board, or just a fantastic standalone snack that you can feel good about enjoying, time and time again.
Ingredients:
- 1 cup chickpea flour (besan), about 120g
- ½ cup water, about 120ml
- 2 tablespoons olive oil
- 1 teaspoon dried mixed herbs (such as rosemary, thyme, oregano)
- 1 teaspoon garlic powder
- ½ teaspoon salt
- ¼ teaspoon black pepper
- Sesame seeds (for topping)
- Flaky sea salt (for topping)
- Additional dried herbs (for topping)
- Extra olive oil for brushing
Preparing the Dough
Step 1: Combining Dry Ingredients
Let’s start by getting all our dry ingredients ready. In a medium-sized mixing bowl, add the chickpea flour. This flour is the star of our Garlic and Herb Chickpea Flour Snack Crackers, giving them a wonderfully crisp texture. Next, add the garlic powder, dried mixed herbs, salt, and black pepper. I like to use a mix of rosemary, thyme, and oregano for a classic savory flavor, but feel free to experiment with your favorite herb combinations. Whisk these dry ingredients together thoroughly with a fork or a small whisk. This ensures that all the seasonings are evenly distributed throughout the flour, which is crucial for consistent flavor in every bite of our crackers. Make sure there are no clumps of chickpea flour or spices.
Step 2: Incorporating Wet Ingredients
Now it’s time to bring our dough to life. Create a little well in the center of your dry ingredients. Pour in the ½ cup of water and the 2 tablespoons of olive oil. The olive oil will contribute to the tenderness and crispiness of the final crackers, and it also helps bind the dough together. Using a spatula or a wooden spoon, begin extract to mix the wet ingredients into the dry. Start from the center and gradually work your way outwards, incorporating more of the flour mixture until a shaggy gin extractgh begins to form. It might seem a little sticky at first, and that’s perfectly normal for a chickpea flour dough.
Developing the Dough
Step 3: Kneading and Resting the Dough
Once the ingredients are mostly combined, turn the dough out onto a lightly floured surface (you can use a little extra chickpea flour for this). Gently knead the dough for about 2-3 minutes. You’re not looking for a smooth, elastic dough like you would with wheat flour; instead, aim for a dough that holds together and is no longer excessively sticky. It should feel cohesive. If it’s still too wet and unmanageable, add a tiny pinch more chickpea flour. If it feels too dry and crum extractbly, add a teaspoon of water at a time until it comes together. After kneading, shape the dough into a disc, wrap it tightly in plastic wrap, and let it rest at room temperature for at least 15 minutes. This resting period allows the chickpea flour to hydrate fully, making the dough easier to roll out and resulting in a better texture for our Garlic and Herb Chickpea Flour Snack Crackers.
Shaping and Baking
Step 4: Rolling and Cutting the Crackers
Preheat your oven to 375°F (190°C). Line a large baking sheet with parchment paper. This will prevent the crackers from sticking and make for easy cleanup. Unwrap your rested dough. You can either roll the dough out directly on the parchment paper or between two sheets of parchment paper to avoid sticking. Roll the dough out thinly, aiming for about 1/16 to 1/8 inch thickness. The thinner you roll it, the crispier your crackers will be. Don’t worry if the edges aren’t perfectly neat; rustic edges add character! Once rolled out, use a knife, a pizza cutter, or a cookie cutter to cut the dough into your desired cracker shapes. Squares, rectangles, or even fun shapes are all great. You can also prick each cracker a few times with a fork to help prevent them from puffing up too much during baking.
Step 5: Adding Toppings and Baking
Now for the final touches that will make our Garlic and Herb Chickpea Flour Snack Crackers irresistible! Lightly brush the surface of each cut cracker with a little extra olive oil. This helps the toppings adhere and gives the crackers a lovely sheen. Sprinkle generously with sesame seeds for a nutty crunch. Then, add a pinch of flaky sea salt over the top of each cracker – this provides a delightful textural contrast and enhances the overall flavor. If you like, you can also sprinkle a little extra dried herbs on top for visual appeal and an extra burst of herby goodness. Carefully transfer the baking sheet to the preheated oven. Bake for 15-20 minutes, or until the edges of the crackers are golden brown and they feel firm to the touch. Keep an eye on them as baking times can vary depending on your oven and the thickness of your crackers. You want them crisp, but not burnt. Once baked, remove the baking sheet from the oven and let the crackers cool completely on the sheet. They will continue to crisp up as they cool.
Conclusion:
There you have it – the simple yet incredibly satisfying recipe for Garlic and Herb Chickpea Flour Snack Crackerss! We’ve walked through creating these delightful, gluten-free bites that are perfect for any occasion. Their crisp texture and savory flavor make them a fantastic alternative to store-bought crackers, and the best part is you know exactly what goes into them. I hope you enjoy making and sharing these as much as I do!
For serving suggestions, these Garlic and Herb Chickpea Flour Snack Crackerss are wonderful on their own as a light snack. They also pair beautifully with a variety of dips, from hummus and guacamole to your favorite creamy cheese spread. Try serving them alongside a vibrant salad or as a crunchy element in a charcuterie board. For variations, don’t be afraid to experiment with different herbs like rosemary or thyme, or add a pinch of chili flakes for a touch of heat. You can also swap out some of the chickpea flour for almond flour for a slightly different texture and nutty flavor.
Give these Garlic and Herb Chickpea Flour Snack Crackerss a try – I’m confident they’ll become a staple in your kitchen!
Frequently Asked Questions:
Q1: How should I store the Garlic and Herb Chickpea Flour Snack Crackerss?
Once completely cooled, store the Garlic and Herb Chickpea Flour Snack Crackerss in an airtight container at room temperature. They should stay crisp for up to a week.
Q2: Can I make these crackers without herbs?
Absolutely! If you prefer a simpler flavor profile, you can omit the herbs entirely. They will still be delicious with just the garlic and salt, or you can experiment with other spices like paprika or onion powder.
Garlic Herb Chickpea Flour Crackers – Easy Snack
Crispy and flavorful homemade crackers made with chickpea flour, garlic, and herbs. A perfect easy snack option.
Ingredients
-
1 cup chickpea flour (besan)
-
½ cup water
-
2 tablespoons olive oil
-
1 teaspoon dried mixed herbs (such as rosemary, thyme, oregano)
-
1 teaspoon garlic powder
-
½ teaspoon salt
-
¼ teaspoon black pepper
-
Sesame seeds
-
Flaky sea salt
-
Additional dried herbs
-
Extra olive oil for brushing
Instructions
-
Step 1
In a medium-sized mixing bowl, whisk together chickpea flour, garlic powder, dried mixed herbs, salt, and black pepper until evenly distributed. -
Step 2
Create a well in the center of the dry ingredients. Pour in the water and olive oil. Mix with a spatula or spoon, starting from the center and gradually incorporating the dry ingredients until a shaggy dough forms. -
Step 3
Turn the dough out onto a lightly floured surface and knead gently for 2-3 minutes until it holds together and is no longer excessively sticky. Shape into a disc, wrap in plastic wrap, and let rest at room temperature for at least 15 minutes. -
Step 4
Preheat oven to 375°F (190°C). Line a baking sheet with parchment paper. Roll out the rested dough thinly (about 1/16 to 1/8 inch thick) directly on the parchment paper or between two sheets. Cut into desired cracker shapes and prick with a fork. -
Step 5
Lightly brush the surface of each cracker with extra olive oil. Sprinkle generously with sesame seeds and flaky sea salt. Add extra dried herbs if desired. Bake for 15-20 minutes, or until golden brown and firm. Let cool completely on the baking sheet.
Important Information
Nutrition Facts (Per Serving)
It is important to consider this information as approximate and not to use it as definitive health advice.
Allergy Information
Please check ingredients for potential allergens and consult a health professional if in doubt.