Fluffy Japanese Soufflé Pancakes Recipe – Light & Airy
Fluffy Japanese Soufflé Pancakes are the stuff dreams are made of, and today, I’m going to show you exactly how to bring this cloud-like perfection to your own kitchen. Imagin extracte biting into a pancake so light and airy it practically melts in your mouth, a delicate balance of sweet and eggy goodness that’s utterly irresistible. There’s a reason why these magnificent creations have taken the foodie world by storm; they offer an unparalleled textural experience that’s simply not found in your average breakfast fare. What truly sets Fluffy Japanese Soufflé Pancakes apart is their incredible height and their ethereal, jiggly quality. It’s a bit of culinary magic, a testament to a technique that transforms simple ingredients into something truly extraordinary. Get ready for a breakfast that feels like a special occasion, every single time.
Fluffy Japanese Soufflé Pancakes
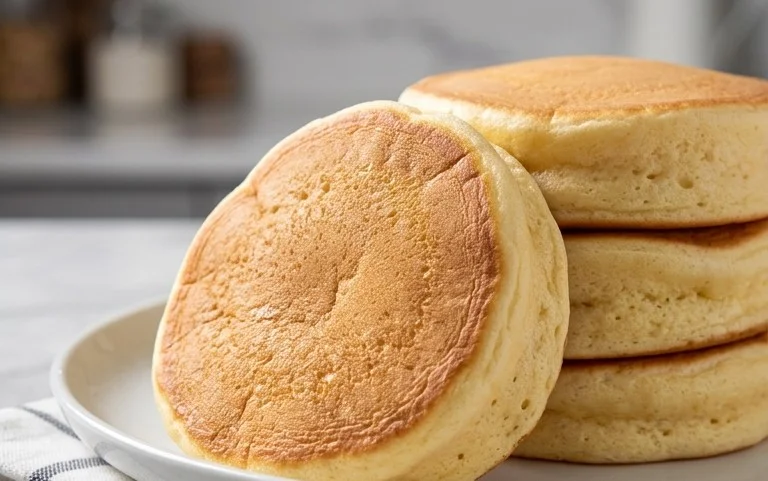
There’s something truly magical about Japanese soufflé pancakes. They are impossibly tall, incredibly light, and boast a delicate, melt-in-your-mouth texture that’s a world away from your average pancake. If you’ve ever admired those cloud-like creations on social media and thought, “I could never make that,” think again! With a few simple ingredients and a little patience, you can achieve pancake perfection right in your own kitchen. These aren’t your quick weeknight pancakes; they are a weekend treat, a special occasion breakfast, or simply a way to make any morning feel a little more celebratory. The secret lies in the technique, which gently incorporates air to create that signature fluffiness. Let’s dive in!
Ingredients:
Making the Pancake Batter
The magic starts with separating your eggs. This is a crucial step for achieving that airy, soufflé-like texture. Ensure no yolk gets into the egg whites, as fat can prevent them from whipping up properly.
1. In a medium bowl, whisk together the egg yolks, milk, vanilla extract, and lemon zest (if using). This forms the base of your pancake batter. The milk adds a touch of moisture, while the vanilla and lemon zest provide delightful flavor notes that complement the subtle sweetness of the pancakes.
2. In a separate, smaller bowl, whisk together the all-purpose flour and baking powder. It’s important to fluffed, spoon, and level your flour for accurate measuring. Over-measuring flour can lead to dense pancakes, which is the opposite of what we want. Give the dry ingredients a quick whisk to ensure the baking powder is evenly distributed.
3. Add the dry ingredients to the wet ingredients. Gently whisk them together until just combined. Be careful not to overmix. A few small lumps are perfectly fine. Overmixing develops the gluten in the flour, which can result in tougher pancakes. We are aiming for a smooth, yet still somewhat thick batter.
Creating the Soufflé Magic: Whipping the Egg Whites
This is where the real transformation happens. Whipped egg whites are the key to the incredible height and lightness of these pancakes.
4. In a clean, dry bowl, add your egg whites. Using an electric mixer (or a whisk and a lot of arm power!), begin extract to whip the egg whites on medium speed. Once they start to become foamy, gradually add the ½ teaspoon of white vinegar (or lemon juice). This acidic component helps to strengthen the protein structure of the egg whites, making them more stable and easier to whip to stiff peaks.
5. Continue whipping, gradually adding the 2 tablespoons of granulated sugar, one tablespoon at a time. Once all the sugar is added, increase the speed to high and whip until stiff, glossy peaks form. This means that when you lift the whisk, the egg whites should stand straight up and hold their shape without drooping. This process can take several minutes, so be patient. Don’t under-whip, as this won’t provide enough structure, and don’t over-whip into a dry, curdled mess.
Assembling and Cooking the Pancakes
Now it’s time to combine the two elements and cook them to golden-brown perfection.
6. Gently fold about a third of the whipped egg whites into the yolk batter to lighten it. Use a spatula and a folding motion, being careful not to deflate the airy whites. Once the yolk batter is slightly lighter, gently fold the remaining whipped egg whites into the mixture until just incorporated. You want to see no streaks of egg white remaining, but again, avoid overmixing. The goal is to maintain as much air as possible.
Cooking Your Masterpieces
The cooking process requires a bit of finesse to ensure even cooking and that signature height.
1. Heat a non-stick skillet or griddle over low to medium-low heat. Add a small amount of oil and spread it evenly. Low heat is crucial here. If the pan is too hot, the outside will cook too quickly, leaving the inside undercooked.
2. To create the tall pancakes, you can use a ring mold or an empty, clean tuna can with the top and bottom removed. Place the mold(s) onto the lightly oiled skillet.
3. Spoon the batter into the molds, filling them about two-thirds of the way full. Don’t overfill, as the pancakes will rise. Alternatively, if you don’t have molds, you can spoon mounds of batter onto the skillet, but they may not achieve the same impressive height.
4. Cook for about 3-5 minutes, or until you see bubbles forming on the surface and the edges appear set. Carefully add a tablespoon or two of water to the skillet, just around the pancakes (not directly on them), and immediately cover with a lid. The steam created will help the pancakes cook through and rise even further.
5. After about 3-5 minutes of steaming, carefully flip the pancakes. This can be a bit tricky, especially with the taller ones. You might need to use two spatulas. Cook the other side for another 3-5 minutes, or until golden brown and cooked through.
6. Remove the pancakes from the skillet and repeat the process with the remaining batter, adding a little more oil to the pan as needed between batches.
Serving Your Fluffy Delights
While your pancakes are cooking, whip up some cream. In a clean bowl, whip the cold heavy cream with 1 tablespoon of granulated sugar until stiff peaks form. Adjust the sugar to your liking.
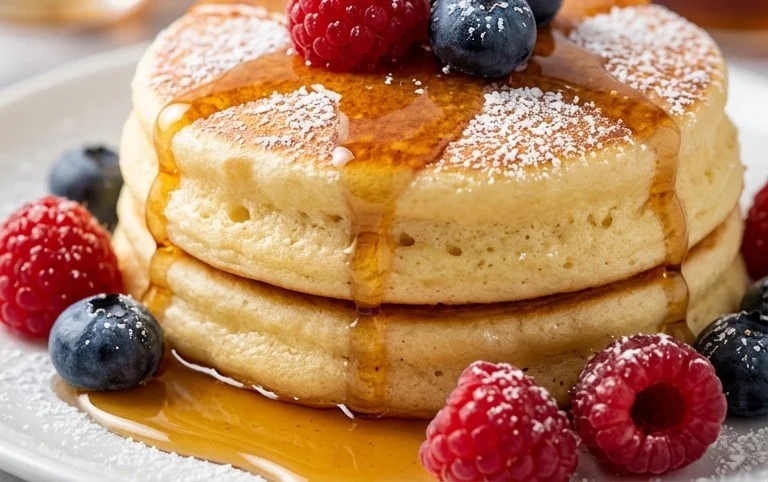
Stack your glorious soufflé pancakes high, generously dollop with sweetened whipped cream, and garnish with a sprinkle of powdered sugar, a drizzle of maple syrup, and a handful of fresh, colorful berries. Serve immediately and enjoy the ethereal fluffiness!
Conclusion:
There you have it – your guide to mastering the art of the fluffy Japanese soufflé pancake! These aren’t just any pancakes; they are an experience. Their incredible height, cloud-like texture, and delicate flavor are truly something special and surprisingly achievable in your own kitchen. The magic lies in the technique of whipping egg whites to stiff peaks and gently folding them into the batter, creating that signature airy lift. I truly encourage you to give this recipe a try, even if you’re new to soufflé techniques. The result is so rewarding, transforming your breakfast or brunch into a delightful, restaurant-worthy treat.
These ethereal pancakes are a dream served simply with a dusting of powdered sugar and a dollop of whipped cream. However, don’t stop there! For a touch of sweetness, a drizzle of maple syrup or honey is always a classic choice. Fresh berries add a burst of color and acidity that cuts through the richness beautifully. If you’re feeling adventurous, consider a sprinkle of toasted nuts for crunch or even a light dusting of matcha powder for a subtle earthy flavor. The possibilities for enjoying your fluffy Japanese soufflé pancakes are endless!
Frequently Asked Questions:
Q: My soufflé pancakes aren’t rising very high. What am I doing wrong?
A: The most common reason for less-than-lofty pancakes is not achieving stiff peaks when whipping your egg whites. Ensure your bowl and whisk are completely free of any grease. Whip until you can turn the bowl upside down without the egg whites sliding out. Also, be gentle when folding the egg whites into the batter; overmixing can deflate them.
Q: Can I make the batter ahead of time?
A: It’s best to cook soufflé pancakes immediately after preparing the batter. The leavening power of the whipped egg whites is at its peak right after mixing. Letting the batter sit for too long can cause it to lose its airiness, resulting in flatter pancakes.
Q: What kind of pan is best for cooking these?
A: A non-stick skillet is ideal. You’ll want a lid for your pan so you can trap steam, which helps them cook through without burning the bottoms. A medium-low heat is crucial to ensure they cook evenly and get that beautiful golden brown color without becoming dry or burnt.
Fluffy Japanese Soufflé Pancakes
Experience the airy delight of incredibly fluffy Japanese soufflé pancakes, a breakfast treat that’s lighter than air and melts in your mouth.
Ingredients
-
2 large eggs
-
2 tablespoons milk
-
½ teaspoon vanilla extract
-
1 teaspoon lemon zest ((optional))
-
¼ cup all-purpose flour ((fluffed, spooned, and leveled))
-
¼ teaspoon baking powder
-
½ teaspoon white vinegar ((or lemon juice))
-
2 tablespoons granulated sugar
-
Oil (any neutral oil (for cooking))
-
½ cup heavy cream (cold)
-
1 tablespoon granulated sugar (more or less to your preference)
Instructions
-
Step 1
Separate egg yolks and whites into two bowls. Add milk, vanilla extract, and lemon zest (if using) to the egg yolks and whisk until combined. -
Step 2
In a separate bowl, whisk together the all-purpose flour and baking powder. Gradually add this dry mixture to the egg yolk mixture, whisking until smooth. Set aside. -
Step 3
In the bowl with egg whites, add the white vinegar (or lemon juice). Beat with an electric mixer on medium speed until foamy. Gradually add the 2 tablespoons of granulated sugar, increasing the speed to high, and beat until stiff, glossy peaks form. -
Step 4
Gently fold one-third of the meringue into the egg yolk batter to lighten it. Then, carefully fold in the remaining meringue until just combined, being careful not to deflate the batter. -
Step 5
Heat a non-stick skillet or griddle over low heat. Lightly grease with oil. Spoon about ¼ cup of batter for each pancake onto the skillet, forming tall rounds. Cover the skillet with a lid and cook for 3-5 minutes until the bottoms are lightly golden. Carefully flip and cook for another 3-5 minutes, or until cooked through and golden brown on both sides. Add a splash of water to the pan and cover to steam if needed for fluffiness. -
Step 6
While pancakes are cooking, whip the cold heavy cream with 1 tablespoon of granulated sugar until soft peaks form for sweetened whipped cream.
Important Information
Nutrition Facts (Per Serving)
It is important to consider this information as approximate and not to use it as definitive health advice.
Allergy Information
Please check ingredients for potential allergens and consult a health professional if in doubt.