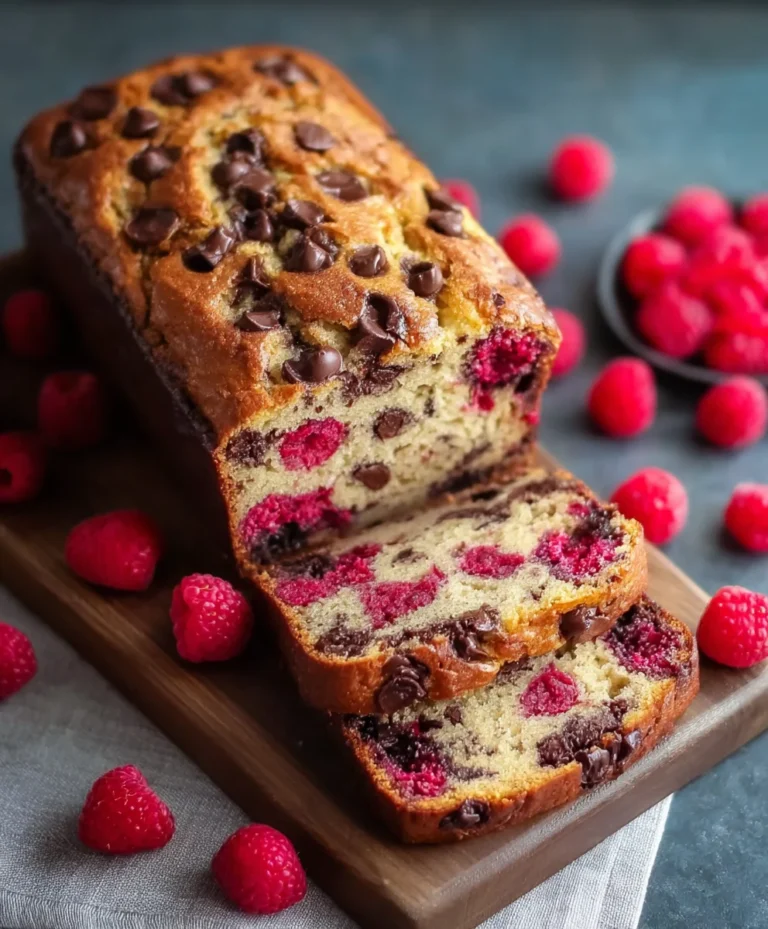
Easy Chocolate Banana Bread Recipe – Moist & Delicious
Chocolate Banana Bread is more than just a quick breakfast or a simple snack; it’s a hug in a loaf pan. There’s a reason this delightful combination has captured hearts and taste buds for generations. It’s the perfect marriage of sweet, ripe bananas, offering that unmistakable comforting aroma and tender crum extractb, with the rich, decadent swirl of chocolate that adds a touch of pure indulgence. We all have those slightly overripe bananas languishing in the fruit bowl, just beggin extractg to be transformed into something magical, and this recipe is the ultimate answer. What truly makes our Chocolate Banana Bread special is its ability to be both deeply satisfying and wonderfully approachable. It’s a guaranteed crowd-pleaser, the kind of baked good that disappears in minutes, leaving everyone asking for another slice. Get ready to elevate your banana bread game with this irresistible recipe.
Why You’ll Love This Recipe
The Perfect Balance of Sweet and Chocolatey
Moist and Tender Crum extractb Every Time
Effortless to Make, Impressive to Share
Chocolate Banana Bread
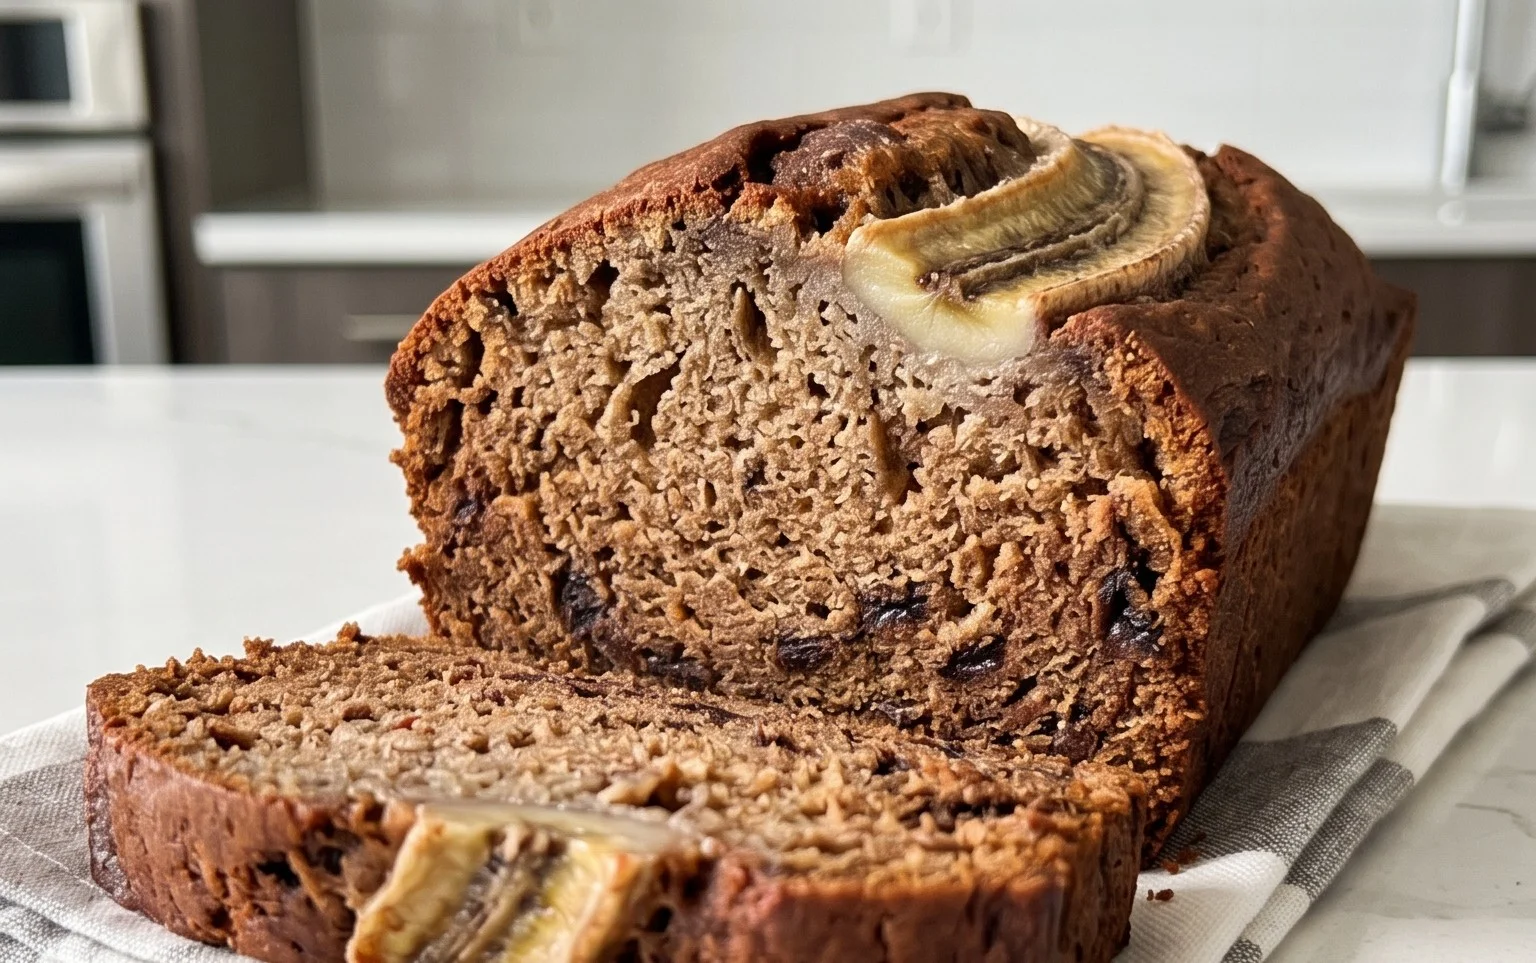
There are few things as comforting and universally loved as a warm slice of banana bread. But what if we told you we could elevate this classic comfort food to an entirely new level of deliciousness? Enter our Chocolate Banana Bread! This recipe takes the moist, tender crum extractb you expect from banana bread and infuses it with rich, decadent chocolate flavor. It’s the perfect balance of sweet, fruity, and fudgy, making it an irresistible treat for breakfast, a snack, or even a simple dessert. Forget the plain old banana bread; this chocolate-infused version is about to become your new obsession.
The beauty of this recipe lies in its simplicity, using readily available ingredients to create something truly special. The ripe bananas provide natural sweetness and moisture, while the cocoa powder and chocolate chips deliver that unmistakable chocolatey goodness. We’ve also opted for white whole wheat flour for a slightly healthier twist without sacrificing texture, and unsweetened almond milk keeps things dairy-free and light. Prepare to be amazed by how easily you can whip up this delightful loaf!
Ingredients:
Instructions:
1. Preheat and Prepare Your Pan:
The first step in creating any baked good is to get your oven and your baking vessel ready. Preheat your oven to 350°F (175°C). This ensures that your bread bakes evenly from the moment it goes in. Next, prepare your loaf pan. The easiest way to do this is to grease it generously with butter or cooking spray, and then lightly flour it. Alternatively, you can line your loaf pan with parchment paper, leaving some overhang on the sides. This parchment paper “sling” makes it incredibly easy to lift the finished bread right out of the pan once it’s cooled, preventing any sticking and making cleanup a breeze.
2. Combine Dry Ingredients:
In a large mixing bowl, whisk together all of your dry ingredients. This includes the white whole wheat flour, light brown sugar (or coconut sugar if you prefer a slightly different caramel note), unsweetened cocoa powder, baking soda, and salt. Whisking them together thoroughly ensures that the baking soda and salt are evenly distributed throughout the flour, which is crucial for proper leavening and a balanced flavor profile. Breaking up any clumps of cocoa powder is also key to achieving a smooth batter. Once combined, you can set this bowl aside for now.
3. Mash Bananas and Mix Wet Ingredients:
In a separate medium-sized bowl, take your three ripe bananas and mash them with a fork until they are mostly smooth with a few small lumps remaining. Overly ripe bananas are your best friend here; their sweetness and moisture are essential for a tender, flavorful bread. To the mashed bananas, add your melted coconut oil, unsweetened almond milk, vanilla extract, and the two large eggs*. Whisk these wet ingredients together until they are well combined. Don’t worry if the mixture looks a little lumpy due to the bananas; this is perfectly normal. Make sure to whisk the eggs in thoroughly, as they act as a binder and contribute to the overall structure of the bread.
4. Combine Wet and Dry Mixtures:
Now it’s time to bring our wet and dry ingredients together. Create a well in the center of your dry ingredients. Pour the wet ingredient mixture into this well. Using a spatula or wooden spoon, gently fold the wet ingredients into the dry ingredients until just combined. Be careful not to overmix! Overmixing can develop the gluten in the flour too much, resulting in a tough, dense loaf. A few streaks of flour remaining are acceptable; they will disappear as you gently fold. Once you’ve reached a point where most of the flour is incorporated, gently fold in the 1/2 cup of chocolate chips. Save a few extra chocolate chips for sprinkling on top later if you wish!
5. Bake to Perfection:
Pour the batter evenly into your prepared loaf pan. Smooth the top with your spatula. If you saved some extra chocolate chips, sprinkle them over the top of the batter now for an extra chocolatey crust. Place the loaf pan in the preheated oven. Bake for approximately 50-60 minutes. The baking time can vary depending on your oven, so it’s important to keep an eye on it. To check for doneness, insert a toothpick or a thin knife into the center of the loaf. If it comes out clean, or with just a few moist crum extractbs attached (not wet batter), your chocolate banana bread is ready. If it’s still wet, continue baking for 5-10 minute intervals, re-testing each time.
6. Cool and Enjoy:
Once your chocolate banana bread is baked to perfection, remove it from the oven and let it cool in the loaf pan for about 10-15 minutes. This allows the bread to set slightly, making it easier to remove from the pan without breaking. After this initial cooling period, carefully invert the loaf onto a wire rack. If you used the parchment paper sling, this step is wonderfully simple. Let the bread cool completely on the wire rack before slicing. This is crucial! Slicing hot bread can lead to a gummy texture. Once fully cooled, slice generously with a sharp knife and savor the rich, chocolatey goodness. This bread is delicious on its own, or you can enjoy it toasted with a smear of butter or a drizzle of honey. Store any leftovers in an airtight container at room temperature for up to 3 days, or refriger ate for longer storage.
** Unsweetened almond milk is used for moisture and a lighter texture. You can substitute it with other non-dairy milks like soy milk or oat milk, or even regular milk if you prefer.
Conclusion:
There you have it – a foolproof recipe for the most delicious and decadent Chocolate Banana Bread you’ll ever bake! This recipe is a true winner because it perfectly balances the natural sweetness of ripe bananas with the rich, satisfying flavor of chocolate. It’s incredibly moist, wonderfully fragrant, and surprisingly easy to whip up, making it ideal for both begin extractner bakers and seasoned pros. The aroma that fills your kitchen as it bakes is simply irresistible, and the taste is pure comfort in every slice.
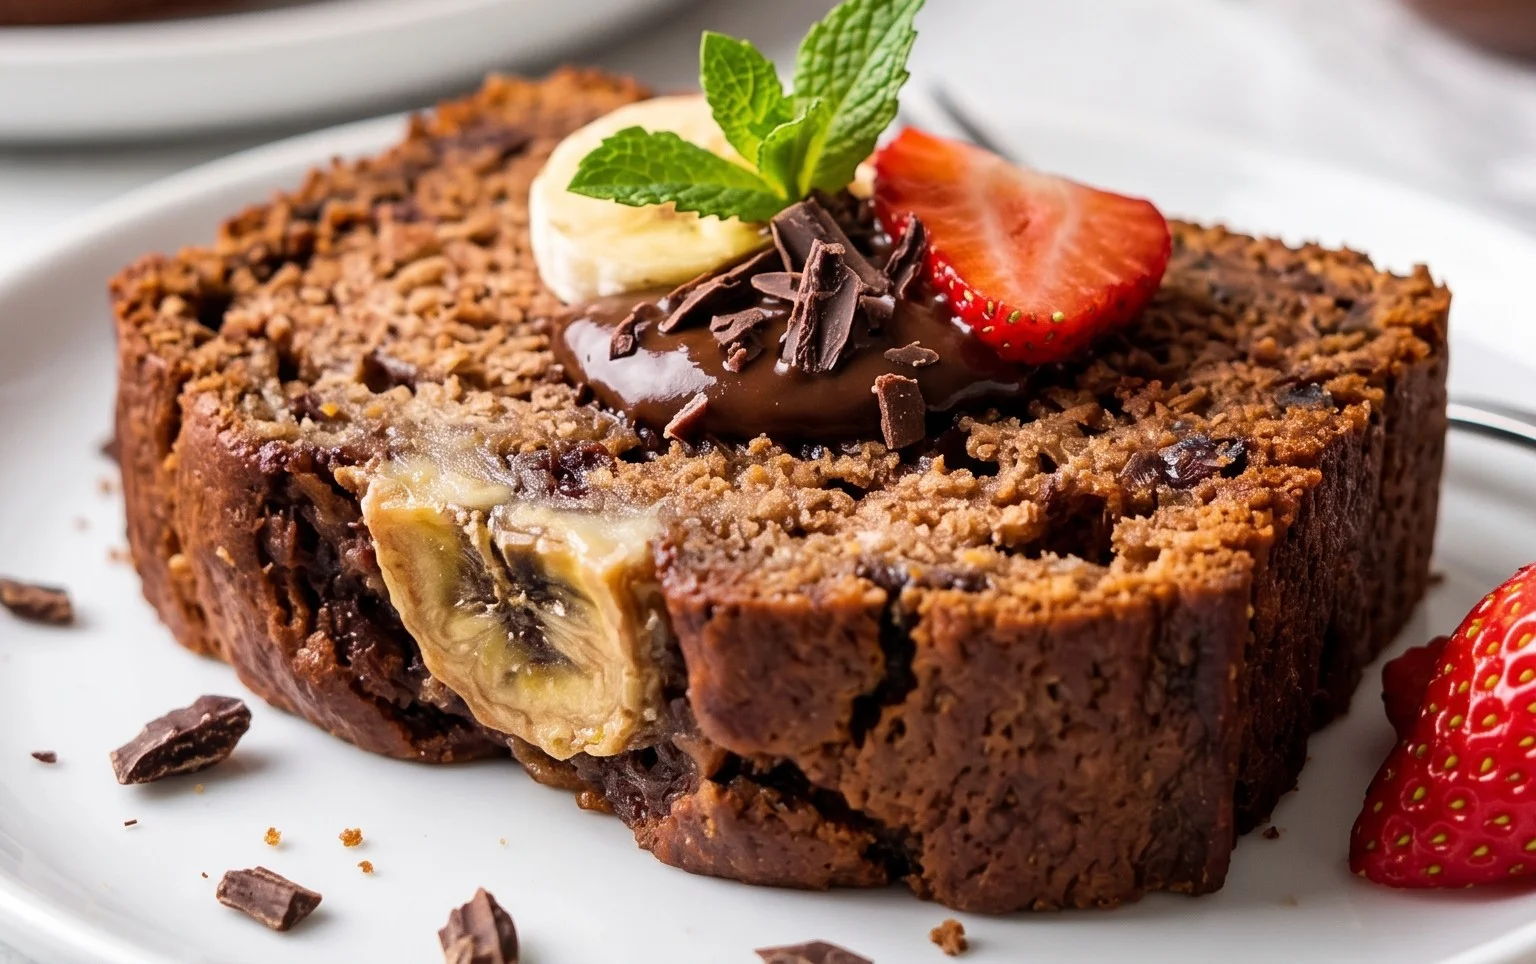
This versatile loaf is fantastic on its own, but it truly shines with a few thoughtful additions. I love serving slices warm, perhaps with a dollop of whipped cream or a drizzle of extra chocolate ganache. It’s also a perfect companion to a morning cup of coffee or tea, or as a delightful afternoon pick-me-up. For variations, feel free to stir in a handful of chopped nuts like walnuts or pecans for added crunch, or even a few chocolate chips for an extra chocolatey surprise. Don’t be afraid to experiment with a pinch of cinnamon or a dash of espresso powder to deepen the flavor profile!
I wholeheartedly encourage you to give this Chocolate Banana Bread recipe a try. It’s a guaranteed crowd-pleaser and a fantastic way to use up those overripe bananas. Embrace the simplicity and the joy of creating something truly special in your own kitchen!
Frequently Asked Questions:
Can I make this recipe vegan?
Absolutely! To make this Chocolate Banana Bread vegan, simply substitute the eggs with a flax egg (1 tablespoon ground flaxseed mixed with 3 tablespoons water, let sit for 5 minutes) and use a plant-based milk like almond or soy milk. Ensure your chocolate chips are also dairy-free.
My bananas aren’t very ripe. Can I still make this?
While very ripe bananas are ideal for sweetness and moisture, you can still make this recipe with less ripe bananas. You might find it’s slightly less sweet and moist, so you could consider adding a tablespoon or two of extra milk or a touch more sugar to compensate. The flavor will still be delightful!
How long does this chocolate banana bread last?
Stored in an airtight container at room temperature, this Chocolate Banana Bread will stay fresh for about 2-3 days. For longer storage, you can refrigerate it for up to a week, or freeze individual slices wrapped tightly for up to 2-3 months. Thaw at room temperature or gently warm in the oven.
Chocolate Banana Bread
A moist and decadent chocolate banana bread, perfect for a sweet treat.
Ingredients
-
1 cup white whole wheat flour
-
1/2 cup light brown sugar
-
3/4 cup unsweetened cocoa powder
-
1 teaspoon baking soda
-
1/8 teaspoon salt
-
1/2 cup chocolate chips
-
2 large eggs
-
3 medium ripe bananas (mashed)
-
1/2 cup unsweetened almond milk
-
2 teaspoons vanilla extract
-
1/4 cup melted coconut oil
Instructions
-
Step 1
Preheat oven to 350°F (175°C). Grease and flour a 9×5 inch loaf pan. -
Step 2
In a large bowl, whisk together the white whole wheat flour, light brown sugar, unsweetened cocoa powder, baking soda, and salt. -
Step 3
In a separate bowl, whisk together the eggs, mashed ripe bananas, unsweetened almond milk, vanilla extract, and melted coconut oil until well combined. -
Step 4
Add the wet ingredients to the dry ingredients and stir until just combined. Do not overmix. Fold in the chocolate chips. -
Step 5
Pour the batter into the prepared loaf pan and sprinkle with extra chocolate chips if desired. -
Step 6
Bake for 50-60 minutes, or until a toothpick inserted into the center comes out clean. -
Step 7
Let the bread cool in the pan for 10 minutes before transferring it to a wire rack to cool completely.
Important Information
Nutrition Facts (Per Serving)
It is important to consider this information as approximate and not to use it as definitive health advice.
Allergy Information
Please check ingredients for potential allergens and consult a health professional if in doubt.