Easter Rice Krispie Treats- Easy & Fun Holiday Dessert
Easter Rice Krispie Treats are more than just a nostalgic childhood snack; they’re a delightful edible embodiment of spring’s joyous spirit and the beloved traditions of the Easter holiday. Imagin extracte a vibrant platter, shimmering with pastel colors and sprinkled with festive flair, all built upon the foundation of those perfectly gooey, wonderfully crisp squares we all know and love. Why do these simple delights hold such a special place in our hearts and on our Easter tables? It’s their unparalleled versatility and the sheer fun they bring to any celebration. Unlike more elaborate confections, Easter Rice Krispie Treats are incredibly easy to make, making them a perfect activity for families and a stress-free addition to your holiday spread. What truly elevates them is the potential for creativity; transforming the classic base into whimsical Easter-themed creations is where the magic truly happens, offering a delightful canvas for gin extractr imagination and a guaranteed smile on every face.
Ingredients:
- 16 ounces marshmallows (jumbo or mini both work)
- 7 cups Rice Krispies cereal
- 2 tablespoons unsalted butter
- ½ cup unsalted butter, softened
- 3-4 cups powdered sugar
- ¼ cup milk
- 1 teaspoon vanilla extract
- Green food coloring
- Easter egg candies (mini chocolate eggs or jelly beans)
Preparing Your Easter Rice Krispie Treats
To begin extract crafting these delightful Easter Rice Krispie Treats, let’s gather everything we need and prepare our workspace. It’s always helpful to have all your ingredients measured and ready to go before you start cooking, as this process moves quite quickly once the marshmallows start melting. First, you’ll need a large, heatproof bowl. This is where our cereal will eventually go. You’ll also need a medium saucepan for melting the butter and marshmallows. For shaping the treats, a 9×13 inch baking pan is ideal. Make sure to grease this pan generously with cooking spray or butter, or line it with parchment paper, to prevent sticking. This step is crucial for easy removal and clean-up later. If you’re using parchment paper, leave a little overhang on the sides to create “handles” for lifting the treats out of the pan.
Now, let’s talk about the colors. The green food coloring will transform our classic treats into festive Easter delights. You’ll also want to have your Easter egg candies ready for decorating. Think about how you want to arrange them – scattered randomly, in a pattern, or maybe even to resemble a little Easter basket!
Melting the Marshmallow Mixture
This is where the gin extractic begins! Take your medium saucepan and add the 2 tablespoons of unsalted butter. Place it over low heat. It’s important to use low heat here to avoid scorching the butter or burning the marshmallows. Let the butter melt completely. Once the butter is melted, add the entire 16 ounces of marshmallows to the saucepan. Continue to stir the marshmallows and butter gently over low heat. The key is constant, gentle stirring. You’ll notice the marshmallows will slowly start to puff up and melt. Be patient and keep stirring until the marshmallows are completely smooth and there are no lumps remaining. This usually takes about 5-7 minutes. Overheating the marshmallows can make them tough and chewy, so low and slow is the best approach. Once the mixture is smooth and glossy, remove the saucepan from the heat immediately.
Combining Cereal and Marshmallow Goodness
With the marshmallow mixture hot and ready, it’s time to incorporate the Rice Krispies cereal. Pour the 7 cups of Rice Krispies cereal directly into your large, greased or parchment-lined baking pan. This might seem like a lot of cereal, but it’s the perfect ratio for a sturdy and satisfying treat. Now, carefully pour the melted marshmallow mixture over the cereal in the pan. Work quickly but gently. Using a spatula or a large spoon that has been lightly greased or dampened with water (this prevengin extractsticking), begin to fold the marshmallow mixture into the cereal. The goal is to evenly coat every single piece of cereal. Don’t be afraid to get in there and mix thoroughly, ensuring no dry cereal pockets remain. The warmth of the marshmallow mixture will help it spread and coat everything beautifully.
Coloring and Shaping Your Easter Treats
Once the cereal is thoroughly coated, it’s time to add that festive Easter flair! If you’re making a large batch, you might consider dividing the mixture into two or three portions to create different colors or a marbled effect. For our vibrant green Easter Rice Krispie Treats, we’ll add the green food coloring now. Add a few drops of green food coloring to the mixture. Again, using your greased or dampened spatula, gently mix the food coloring into the marshmallow and cereal mixture. Continue to add drops and mix until you achieve your desired shade of green. It’s easier to add more color than to take it away, so start with a small amount and gradually increase it.
Now, for shaping. While the mixture is still warm and pliable (but not so hot that it will burn your hands!), you’ll want to press it evenly into the prepared 9×13 inch baking pan. You can use the back of your greased spatula, or for a smoother finish, lightly butter or grease your hands and gently press the mixture down. Ensure the treats are packed down firmly and evenly across the entire pan. This even packing is what will make your treats hold their shape when cut.
Creating the Easter Frosting and Decorating
This next step elevates our Easter Rice Krispie Treats from delicious to absolutely festive! In a separate medium bowl, we’ll prepare a simple glaze that will give our treats a beautiful finish and a touch of sweetness. To this bowl, add the ½ cup of softened unsalted butter. Cream this softened butter with your electric mixer until it’s light and fluffy. This is the base of our frosting. Next, gradually add 3 cups of the powdered sugar to the creamed butter, alternating with the ¼ cup of milk. Start mixing on low speed to prevent the powdered sugar from flying everywhere, then increase the speed to medium as it comes together. Add the 1 teaspoon of vanilla extract for extra flavor. Continue mixing until you have a smooth, pourable, but still slightly thick consistency. If the frosting is too thick, add a tiny bit more milk, a teaspoon at a time. If it’s too thin, add a little more powdered sugar, a tablespoon at a time.
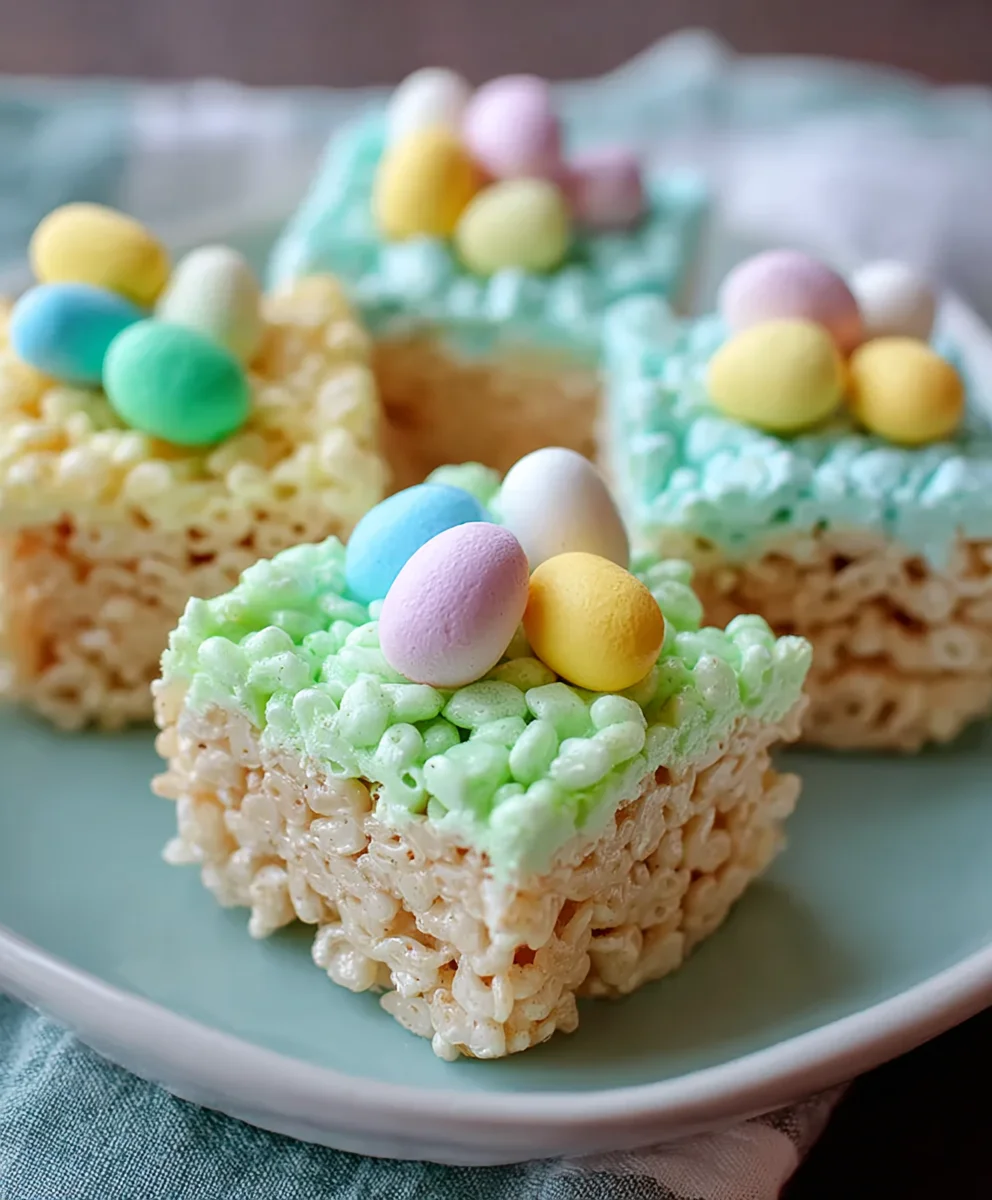
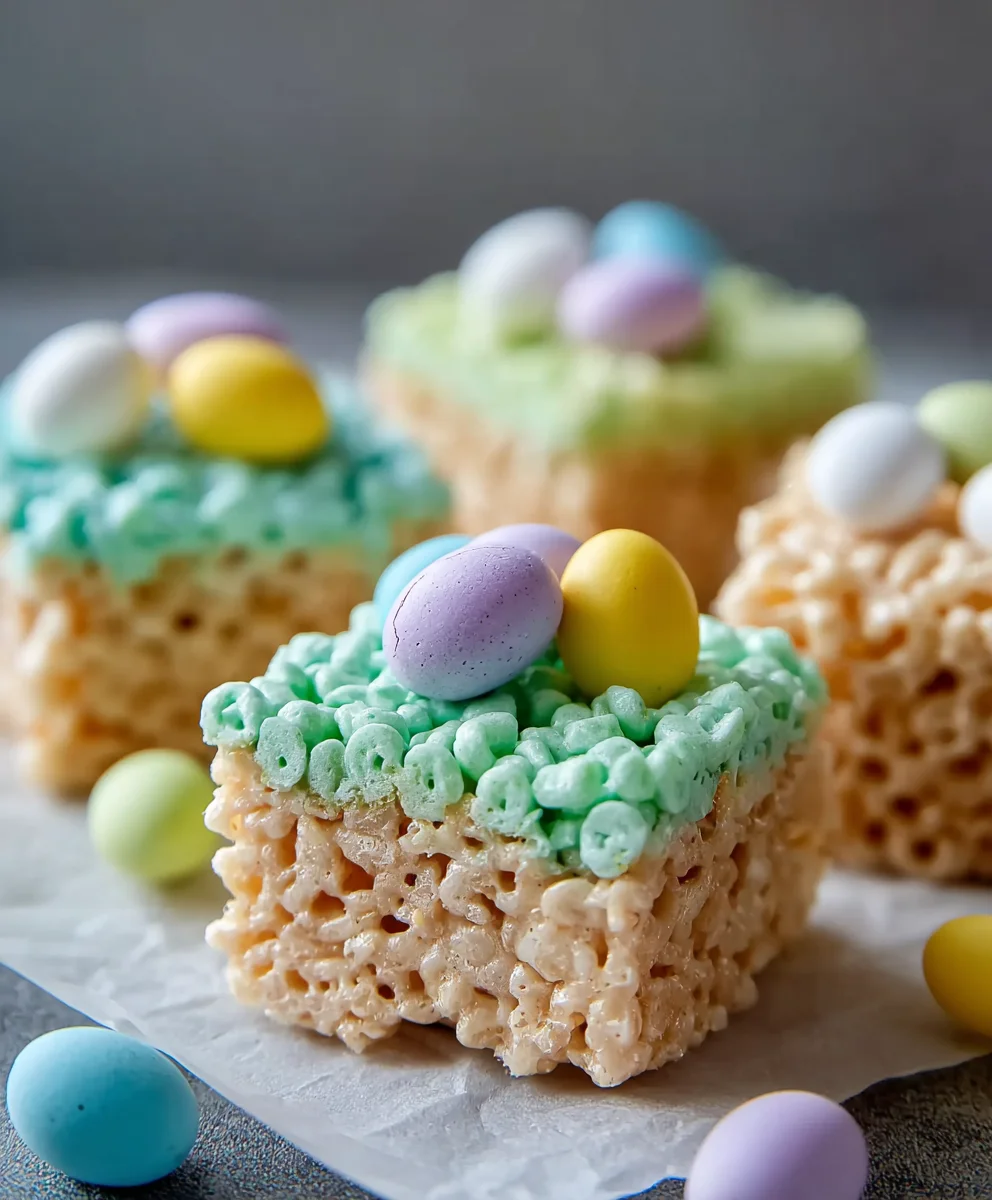
Once your frosting is the perfect consistency, it’s time to frost the Easter Rice Krispie Treats. Gently pour or drizzle the frosting evenly over the top of the pressed cereal mixture in the pan. Use your spatula to spread it out, making sure to cover the entire surface. This frosting acts as our “glue” for the Easter egg candies. While the frosting is still wet, arrange your Easter egg candies (mini chocolate eggs or jelly beans) decoratively on top. Have fun with this! You can create little patterns, clusters, or just scatter them playfully. The colors of the candies against the green treats will be absolutely charming.
Setting and Serving Your Easter Masterpieces
After you’ve artfully arranged your Easter egg candgin extract, the hardest part begins: waiting! Allow the Easter Rice Krispie Treats to sit at room temperature for at least 1-2 hours, or until the frosting has set and hardened. This setting time is crucial for clean cuts. If you try to cut them too soon, the frosting might smear and the treats could crum extractble. Resist the temptation to rush this step!
Once the frosting is firm to the touch, you can slice your Easter Rice Krispie Treats into your desired shapes and sizes. Using a sharp knife that has been lightly greased or dipped in hot water can help you achieve cleaner cuts. For traditional squares, use the lines of your baking pan as a guide. If you’re feeling adventurous, you could even use Easter-themed cookie cutters! These vibrant green Easter Rice Krispie Treats are perfect for Easter parties, school events, or simply as a special homemade treat to enjoy with family. They store well in an airtight container at room temperature for up to three days. Enjoy every chewy, sweet, and festive bite!
Conclusion:
And there you have it – the perfect recipe for delightful Easter Rice Krispie Treats! We’ve walked through each simple step, from melting those marshmallows to shaping your festive creations. These Easter Rice Krispie Treats are not only incredibly easy to make, but they also offer a wonderful opportunity to get creative with your family and friends. Their chewy, sweet texture and customizable nature make them a guaranteed hit at any Easter gathering.
For serving, these treats are fantastic on their own, but you can elevate them further by arrangin extractg them on a colorful platter alongside other Easter sweets. Consider pairing them with chocolate bunnies or jelly beans for a truly festive display.
The beauty of these Easter Rice Krispie Treats lies in their versatility. Don’t be afraid to experiment with different food colorings to achieve pastel hues, or even add a sprinkle of edible glitter for extra sparkle. You could also try incorporating a touch of vanilla extract or even a hint of almond extract for a different flavor profile. For a chocolatey twist, drizzle them with melted white or milk chocolate.
I truly hope you enjoy making and sharing these Easter Rice Krispie Treats as much as I do. They are a simple yet satisfying way to bring a little extra joy and deliciousness to your Easter celebrations. Happy baking!
Frequently Asked Questions:
Q1: How can I prevent my Easter Rice Krispie Treats from becoming too hard?
To ensure your Easter Rice Krispie Treats remain soft and chewy, it’s crucial not to overcook the marshmallow mixture. Cook just until the marshmallows are fully melted and smooth, then immediately remove from heat. Also, avoid pressing the mixture down too firmly when shaping them, as this can also lead to a denser, harder treat.
Q2: Can I make these Easter Rice Krispie Treats ahead of time?
Absolutely! Easter Rice Krispie Treats are excellent for making ahead. Once they have cooled completely and are cut into shapes, store them in an airtight container at room temperature. They will stay fresh and delicious for up to 3 days, making them a convenient option for busy holiday preparations.
Easter Rice Krispie Treats- Easy & Fun Holiday Dessert
A simple and fun recipe for festive green Rice Krispie Treats decorated with Easter egg candies, perfect for the holiday.
Ingredients
-
16 ounces marshmallows (jumbo or mini both work)
-
7 cups Rice Krispies cereal
-
2 tablespoons unsalted butter
-
½ cup unsalted butter, softened
-
3-4 cups powdered sugar
-
¼ cup milk
-
1 teaspoon vanilla extract
-
Green food coloring
-
Easter egg candies (mini chocolate eggs or jelly beans)
Instructions
-
Step 1
Prepare a 9×13 inch baking pan by greasing it generously with cooking spray or butter, or by lining it with parchment paper, leaving an overhang for easy lifting. -
Step 2
In a medium saucepan over low heat, melt 2 tablespoons of unsalted butter. Add the marshmallows and stir gently until completely smooth and lump-free, about 5-7 minutes. Remove from heat immediately. -
Step 3
Pour the 7 cups of Rice Krispies cereal into the prepared baking pan. Carefully pour the melted marshmallow mixture over the cereal. Using a greased or dampened spatula, fold the marshmallow mixture into the cereal until evenly coated. -
Step 4
Add a few drops of green food coloring to the mixture and gently mix until your desired shade of green is achieved. Press the mixture evenly into the prepared pan, ensuring it is packed firmly. -
Step 5
In a separate bowl, cream ½ cup of softened unsalted butter until light and fluffy. Gradually add 3 cups of powdered sugar, alternating with ¼ cup milk, until a smooth, pourable frosting forms. Mix in 1 teaspoon of vanilla extract. -
Step 6
Pour or drizzle the frosting evenly over the top of the pressed Rice Krispie mixture. While the frosting is still wet, arrange Easter egg candies decoratively on top. -
Step 7
Allow the treats to set at room temperature for at least 1-2 hours, or until the frosting has hardened. Slice into desired shapes and serve.
Important Information
Nutrition Facts (Per Serving)
It is important to consider this information as approximate and not to use it as definitive health advice.
Allergy Information
Please check ingredients for potential allergens and consult a health professional if in doubt.