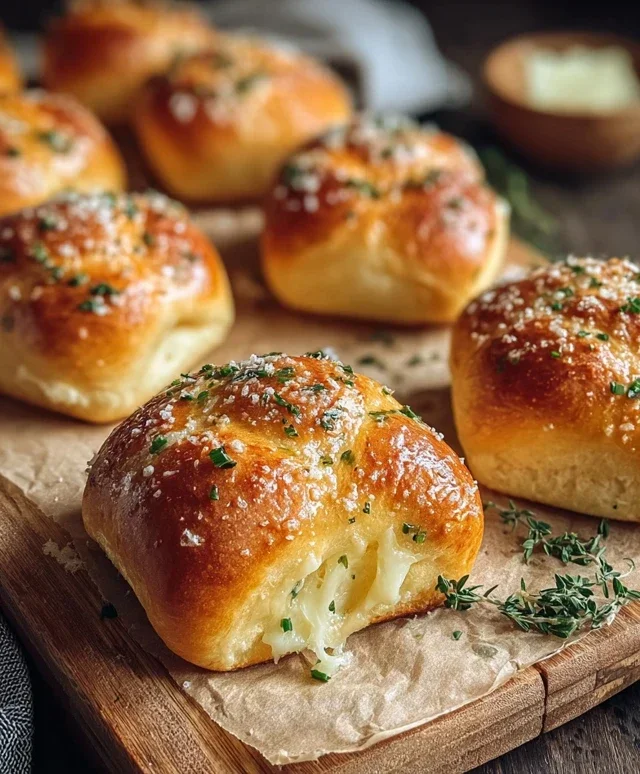
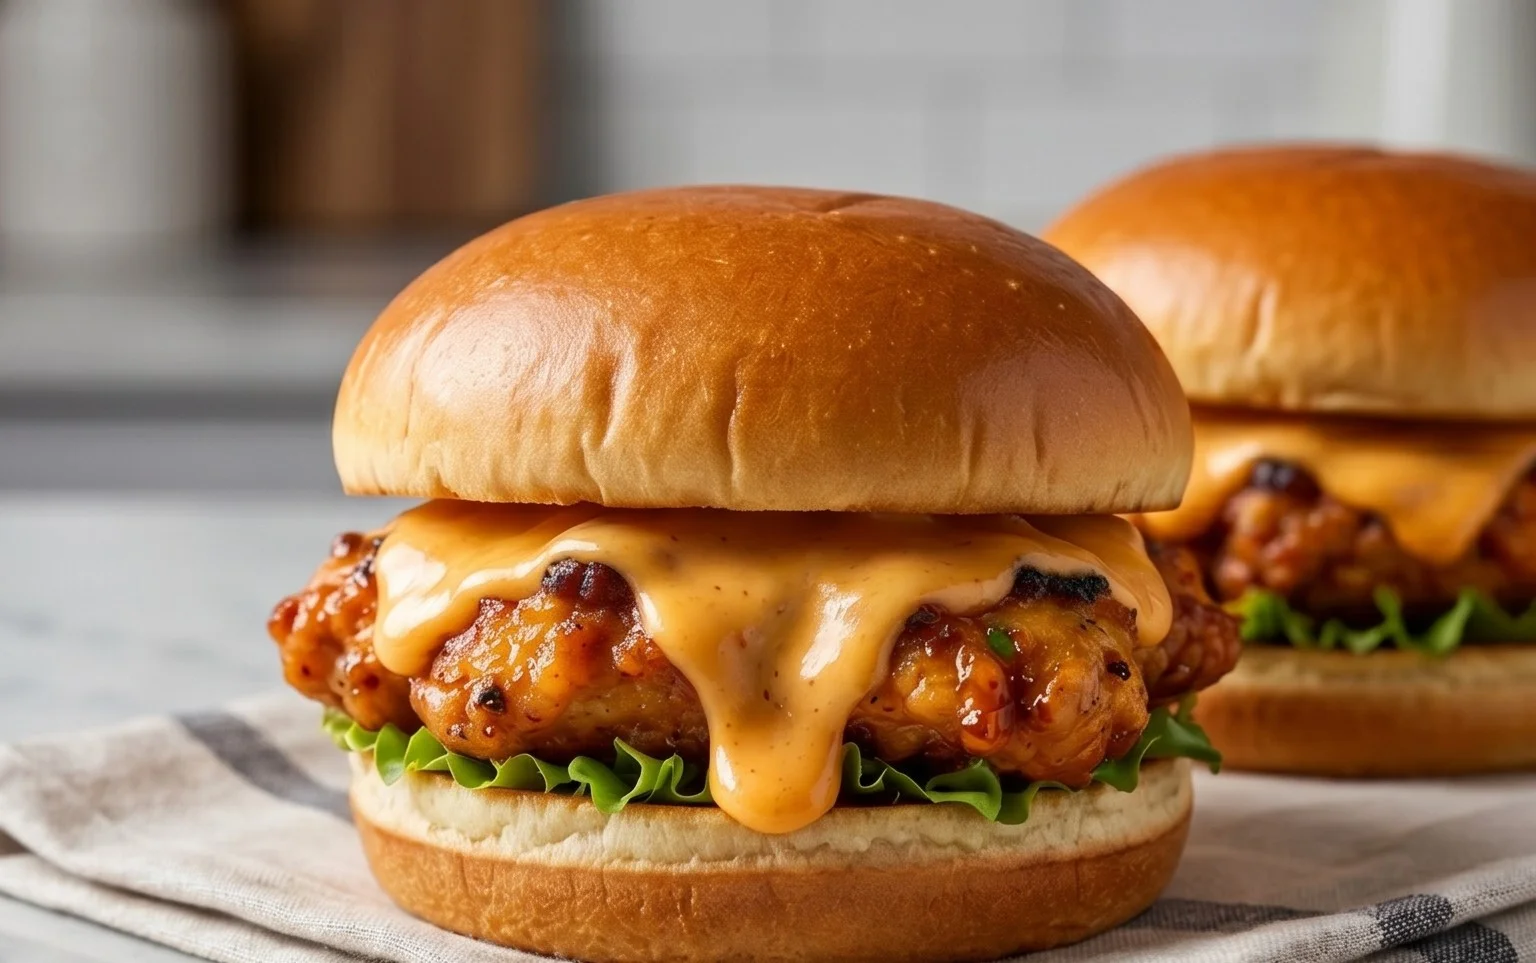
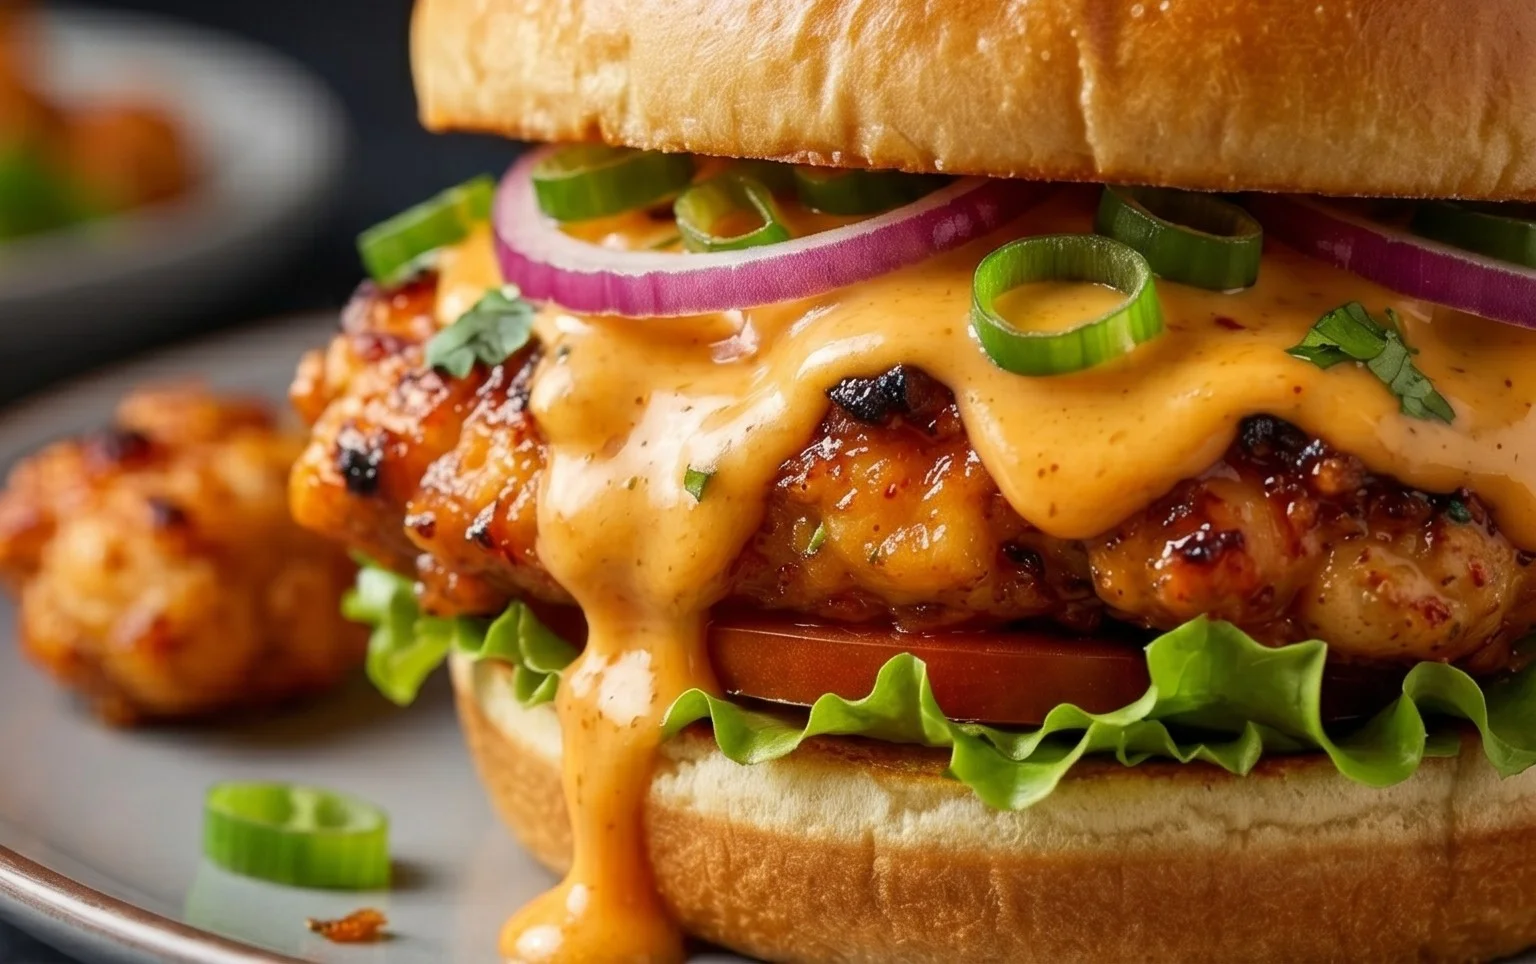
Cheesy Dynamite Chicken Buns- Flavor Explosion

Cheesy Dynamite Chicken Buns are about to become your new obsession. Imagin extracte this: tender, shredded chicken, tossed in a creamy, slightly spicy dynamite sauce, all enveloped in a pillowy-soft bun and then baked until golden and gloriously gooey with melted cheese. It’s the kind of comfort food that makes your taste buds sing and your stomach do a happy dance. We all crave those dishes that offer that perfect balance of textures and flavors, and Cheesy Dynamite Chicken Buns deliver that in spades. The magic lies in the contrast – the mild sweetness of the bun, the savory kick of the chicken, and that irresistible, cheesy pull that just screams indulgence. They’re perfect for a quick weeknight meal, a crowd-pleasing appetizer, or simply when you need a serious flavor explosion. Get ready to fall in love with these Cheesy Dynamite Chicken Buns.

Cheesy Dynamite Chicken Buns

Cheesy Dynamite Chicken Buns

Get ready to tantalize your taste buds with these Cheesy Dynamite Chicken Buns! These aren’t just any buns; they’re fluffy, slightly sweet pillows of dough encasing a spicy, cheesy chicken filling that’s guaranteed to blow you away. Perfect for a fun weekend lunch, a party appetizer, or even a satisfying weeknight meal, these buns strike the perfect balance between comforting and exciting. The “dynamite” comes from a subtle kick of cayenne, balanced beautifully by the richness of Parmesan cheese. Trust me, once you try these, you’ll be hooked!

Ingredients:

  • 75 ml warm water (around 40-45°C or 105-115°F)
  • 200 ml milk (whole milk is best for richness)
  • 15 g honey
  • 9 g instant yeast
  • 1 large egg, at room temperature
  • 30 ml sunflower oil (or other neutral vegetable oil)
  • 600 g all-purpose flour (plus extra for dusting)
  • 8 g salt
  • 25 g unsalted butter, softened
  • 40 g grated Parmesan cheese
  • 2 g cayenne powder (adjust to your spice preference)
  • 1.5 g onion powder
  • 1 g black pepper powder
  • 700 g chicken filet (boneless, skinless chicken breast or thighs)
  • 5 g salt (for seasoning chicken)
  • 1 egg yolk (for egg wash, optional)
  • Sesame seeds or poppy seeds (for topping, optional)
  • Cooking Instructions:

    Preparing the Dough

    The foundation of these amazing buns is a soft, enriched dough. It’s a simple process that yields incredible results.

  • In a large mixing bowl or the bowl of your stand mixer, combine the warm water, milk, and honey. Give it a gentle stir to dissolve the honey. Sprinkle the instant yeast over the liquid and let it sit for about 5-10 minutes. You’ll see it start to get foamy and bubbly – this is called “blooming” the yeast, and it tells us our yeast is alive and ready to work its magic.
  • Once the yeast has bloomed, add the room-temperature egg and the sunflower oil to the mixture. Whisk everything together until well combined.
  • Now it’s time for the flour and salt. Add the 600g of flour and the 8g of salt to the wet ingredients. If you’re using a stand mixer, attach the dough hook. Start mixing on a low speed until the ingredients just come together into a shaggy dough. If mixing by hand, use a wooden spoon or spatula to combine everything.
  • Once the dough starts to form, gradually increase the mixer speed to medium, or turn the dough out onto a lightly floured surface and knead by hand. Continue kneading for about 8-10 minutes. The dough should become smooth, elastic, and slightly tacky, but not sticking excessively to your hands or the bowl. You can test for proper gluten development by gently stretching a small piece of dough; it should stretch thin enough to see light through it without tearing easily.
  • Now for the enrichment! Add the softened butter to the dough. Continue kneading until the butter is fully incorporated and the dough is once again smooth and elastic. This extra fat from the butter will make our buns incredibly soft and tender.
  • Lightly grease a clean bowl with a little oil. Place the dough in the bowl, turning it to coat all sides. Cover the bowl tightly with plastic wrap or a clean kitchen towel. Let the dough rise in a warm place for about 1 to 1.5 hours, or until it has doubled in size. This is the first rise, and it’s crucial for developing flavor and texture.
  • Crafting the Dynamite Chicken Filling

    While our dough is rising, let’s prepare the star of the show – the fiery, cheesy chicken filling!

  • Prepare your chicken by cutting the 700g of chicken filet into small, bite-sized pieces. You want them small enough to distribute evenly within the buns.
  • In a bowl, season the chicken pieces generously with the 5g of salt, cayenne powder, onion powder, and black pepper powder. Toss everything together until the chicken is well coated with the spices. This is where the “dynamite” flavor starts to build!
  • Heat a tablespoon of oil in a skillet over medium-high heat. Add the seasoned chicken to the hot skillet in a single layer, working in batches if necessary to avoid overcrowding the pan. Cook the chicken until it’s golden brown and cooked through, about 5-7 minutes. You want a nice sear for added flavor.
  • Once the chicken is cooked, remove it from the skillet and let it cool slightly. While the chicken is still warm, toss it with the grated Parmesan cheese. The residual heat from the chicken will help the cheese melt slightly and bind everything together. Set the filling aside.
  • Assembling and Baking the Buns

    With our dough risen and filling ready, it’s time for the final assembly and baking!

  • Once the dough has doubled in size, gently punch it down to release the air. Turn the dough out onto a lightly floured surface. Divide the dough into equal portions. For medium-sized buns, aim for about 12-16 portions. Roll each portion into a smooth ball.
  • Flatten each dough ball into a disc. Place a generous spoonful of the dynamite chicken filling in the center of each disc. Be careful not to overfill, or it will be difficult to seal.
  • Carefully bring the edges of the dough together, pinching and sealing them tightly to enclose the filling. Roll the dough ball gently between your hands to ensure a smooth, senon-alcoholic aled bun. Place the senon-alcoholic aled buns seam-side down on a baking sheet lined with parchment paper, leaving some space between them for expansion.
  • Cover the buns loosely with plastic wrap or a clean kitchen towel and let them rest for another 20-30 minutes. This second rise, or “proofing,” will make them even more light and airy.
  • Preheat your oven to 190°C (375°F). If you like, whisk an egg yolk with a tablespoon of water to create an egg wash. Gently brush the tops of the buns with the egg wash for a beautiful golden sheen. Sprinkle with sesame seeds or poppy seeds if desired.
  • Bake the buns for 15-20 minutes, or until they are golden brown on top and sound hollow when tapped on the bottom.
  • Allow the Cheesy Dynamite Chicken Buns to cool slightly on a wire rack before enjoying. They are best served warm, but are also delicious at room temperature. Be prepared for a burst of flavor and a delightful chew!
  • Cheesy Dynamite Chicken Buns

    Conclusion:

    And there you have it – your guide to crafting these utterly irresistible Cheesy Dynamite Chicken Buns! I truly believe this recipe is a winner because it balances incredible flavor with a satisfying texture. The spicy kick from the dynamite sauce, perfectly complemented by the gooey, melted cheese and tender chicken encased in a soft, pillowy bun, makes for a truly memorable bite. They’re incredibly versatile, making them a fantastic appetizer for gatherings, a fun family dinner option, or even a delicious lunch. Don’t be afraid to experiment! You can adjust the spice level of the dynamite sauce to your preference, swap out the chicken for shredded beef or even a vegetarian option like seasoned tofu. I can’t wait for you to try these – I’m confident you’ll fall in love with them just as much as I have. Let me know how they turn out!

    Frequently Asked Questions:

    What if I don’t like spicy food?

    No problem at all! You can easily adjust the spice level by reducing the amount of sriracha or chili garlic sauce in the dynamite sauce. You could also omit it entirely and create a delicious cheesy chicken bun with a milder flavor profile.

    Can I make the dynamite sauce ahead of time?

    Yes, absolutely! The dynamite sauce can be made a day or two in advance and stored in an airtight container in the refrigerator. This will save you time on the day you plan to assemble your Cheesy Dynamite Chicken Buns.

    What are some other serving suggestions?

    Beyond being a standalone treat, these buns are wonderful served with a fresh, crisp salad for a balanced meal. They also make a fantastic accompaniment to a hearty soup. For a truly decadent experience, consider a side of sweet potato fries!


    Cheesy Dynamite Chicken Buns

    Cheesy Dynamite Chicken Buns

    Spicy and cheesy chicken-stuffed buns with a hint of sweetness, perfect for a savory snack or light meal.

    Prep Time
    30 Minutes

    Cook Time
    25 Minutes

    Total Time
    55 Minutes

    Servings
    12 buns

    Ingredients

    • 75 ml water
    • 200 ml milk
    • 15 g honey
    • 9 g instant yeast
    • 1 egg
    • 30 ml sunflower oil
    • 600 g flour
    • 8 g salt
    • 25 g butter
    • 40 g Parmesan cheese
    • 2 g cayenne powder
    • 1.5 g onion powder
    • 1 g black pepper powder
    • 700 g chicken filet, diced
    • 5 g salt

    Instructions

    1. Step 1
      In a large bowl, combine warm water, milk, honey, and yeast. Let stand for 5-10 minutes until foamy.
    2. Step 2
      Add egg and sunflower oil to the yeast mixture. Whisk to combine. Gradually add flour and 8g salt, mixing until a shaggy dough forms.
    3. Step 3
      Knead the dough on a lightly floured surface for about 8-10 minutes until smooth and elastic. Place in a greased bowl, cover, and let rise in a warm place for 1 hour, or until doubled in size.
    4. Step 4
      While the dough rises, prepare the filling. In a bowl, mix diced chicken filet with 5g salt, cayenne powder, onion powder, and black pepper powder. Sauté the seasoned chicken in a pan until cooked through. Let cool slightly, then stir in butter and Parmesan cheese.
    5. Step 5
      Punch down the risen dough and divide it into 12 equal portions. Flatten each portion into a disc, place a portion of the chicken filling in the center, and seal the edges to form a bun.
    6. Step 6
      Place the buns on a baking sheet lined with parchment paper. Cover loosely and let rise for another 20-30 minutes.
    7. Step 7
      Preheat oven to 190°C (375°F). Bake the buns for 20-25 minutes, or until golden brown and cooked through.

    Important Information

    Nutrition Facts (Per Serving)

    It is important to consider this information as approximate and not to use it as definitive health advice.

    Allergy Information

    Please check ingredients for potential allergens and consult a health professional if in doubt.

    Similar Posts

    Leave a Reply

    Your email address will not be published. Required fields are marked *