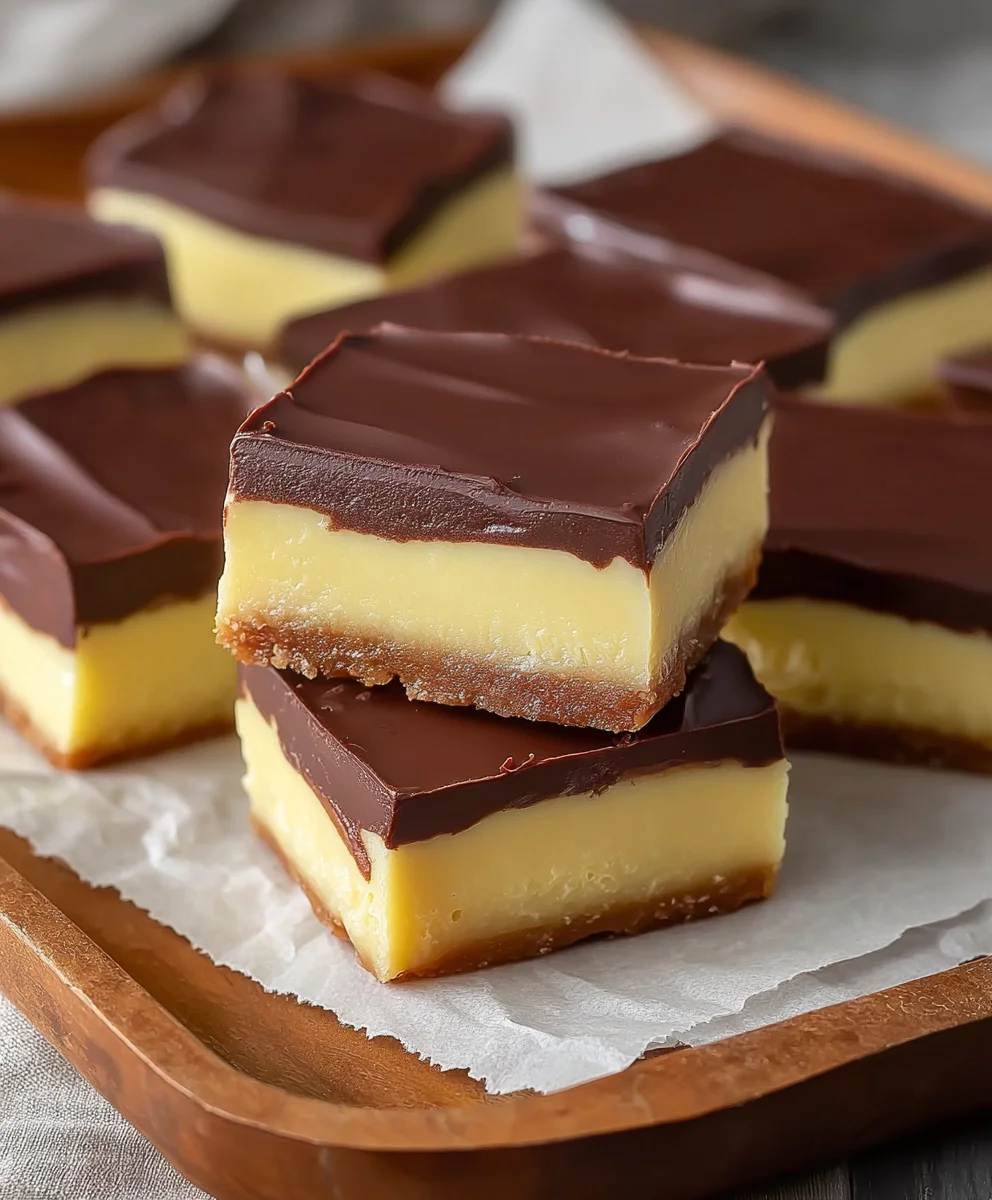
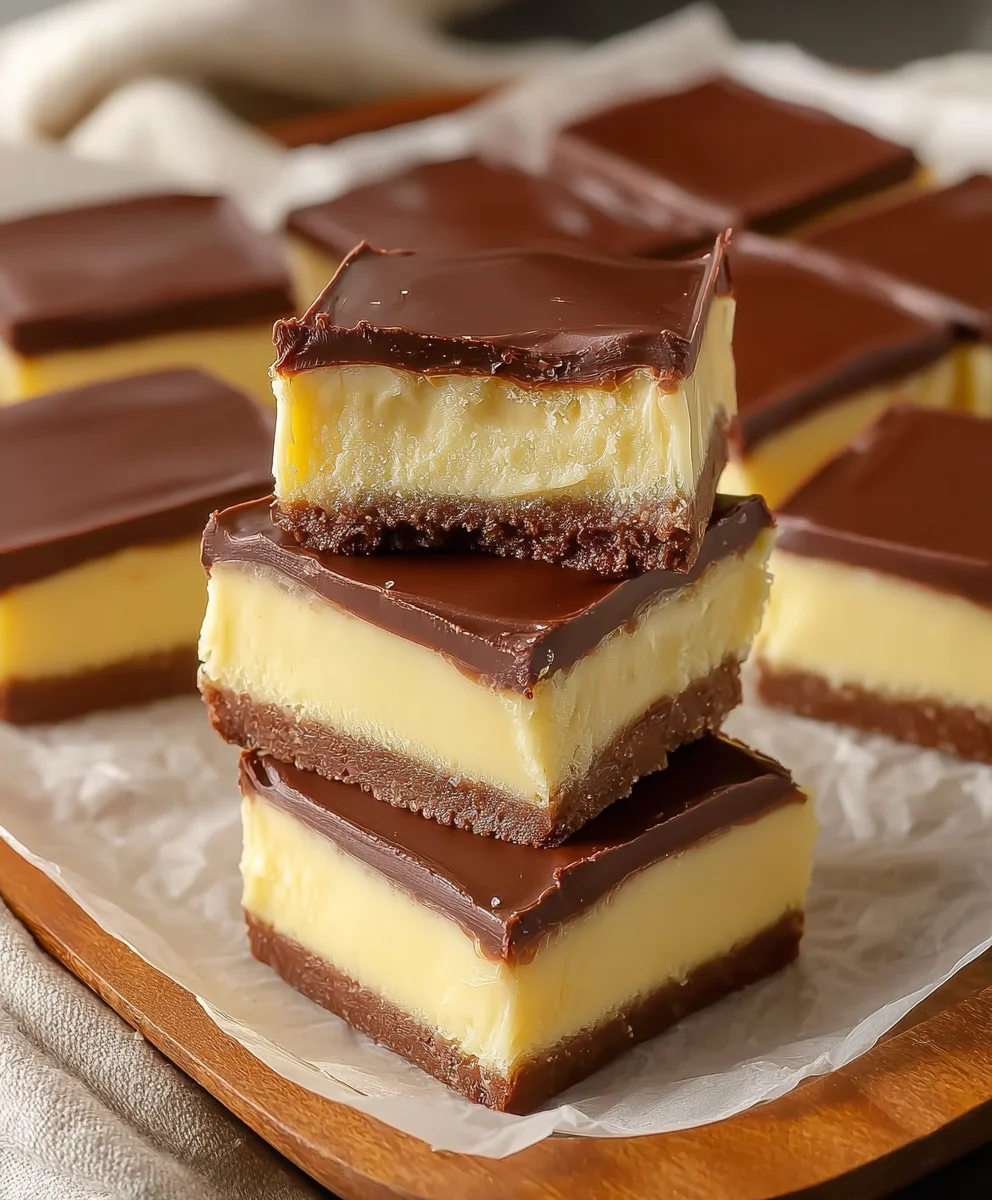
Boston Cream Pie Fudge-Decadent Treat Recipe
Boston Cream Pie Fudge is more than just a sweet treat; it’s a nostalgic journey in every bite, a decadent reimagin extracting of a beloved classic dessert. We all remember that iconic combination of rich pastry cream nestled between moist cake layers, all enrobed in a shimmering chocolate glaze. gin extract, imagine capturing all that glorious flavor and texture and transforming it into a dense, melt-in-your-mouth fudge. That’s the magic we’re conjuring today! People adore this delightful confection because it delivers all the comforting familiarity of Boston Cream Pie with the irresistible chegrape juicess and intensity of expertly crafted fudge. What truly makes our Boston Cream Pie Fudge special is the careful balance of sweet vanilla custard notes, a hint of buttery richness, and that signature smooth chocolate finish, all without needing a oven or extensive baking skills.
Ingredients:
- 2 cups granulated sugar
- 4 ounces unsalted butter, cut into cubes
- 1/2 cup heavy cream
- 2 cups white chocolate chips
- 7 ounce container of marshmallow creme
- 3 tablespoons instant vanilla pudding mix
- 1/2 teaspoon vanilla extract
- 3 tablespoons unsweetened cocoa powder
- 6 ounces semisweet chocolate chips
- 1 tablespoon vegetable oil
Making the Boston Cream Pie Fudge Base
Step 1: Prepare the Sweetened Condensed Milk Mixture
Begin extract by combining the granulated sugar, cubed unsalted butter, and heavy cream in a medium-sized, heavy-bottomed saucepan. It’s important to use a heavy-bottomed pan to ensure even heat distribution and prevent scorching, especially as the sugar mixture will be heated to a high temperature. Place the saucepan over medium heat. Stir continuously with a heat-resistant spatula or wooden spoon until the butter has completely melted and the sugar has dissolved. This initial stirring is crucial to ensure a smooth texture in the final fudge.
Step 2: Boiling and Reaching Soft-Ball Stage
Once the butter is melted and the sugar is dissolved, increase the heat to medium-high. Continue to stir constantly as the mixture comes to a rolling boil. This is where patience and vigilance are key. After the mixture reaches a full boil, stop stirring for a moment and attach a candy thermometer to the side of the saucepan, ensuring the tip is submerged in the liquid but not touching the bottom of the pan. Allow the mixture to boil without stirring until the thermometer registers 235°F (113°C), which is the soft-ball stage. This process can take approximately 7-10 minutes, depending on your stove. Reaching the correct temperature is critical for the fudge’s texture; too low, and it will be too soft; too high, and it will be hard and brittle.
Step 3: Incorporating the Creamy Elements
Once the mixture reaches the soft-ball stage, immediately remove the saucepan from the heat. Carefully stir in the white chocolate chips, the entire 7-ounce container of marshmallow creme, and the instant vanilla pudding mix. Continue to stir gently but persistently until all the white chocolate chips are melted and the marshmallow creme is fully incorporated, creating a smooth, creamy, and luscious mixture. The residual heat from the cooked sugar will be enough to melt the chocolate and marshmallow. This is also the point where you’ll add the 1/2 teaspoon of vanilla extract for that signature sweet aroma and flavor. Stir until everything is seamlessly blended and the mixture has a uniform, glossy appearance.
Step 4: Preparing the Pan and Pouring the Base
While the fudge mixture is still warm, prepare an 8×8 inch baking pan. Line the pan with parchment paper, leaving an overhang on all sides. This overhang will act as handles, making it much easier to lift the set fudge out of the pan later. Lightly grease the parchment paper with a little cooking spray or butter to prevent sticking. Pour the warm fudge mixture evenly into the prepared baking pan. Use your spatula to spread it out, ensuring an even layer across the entire surface of the pan. This evenness will contribute to consistent thickness in your final fudge pieces. Let this base layer sit and cool slightly at room temperature for about 15-20 minutes while you prepare the chocolate topping.
Creating the Rich Chocolate Topping
Step 5: Melting the Chocolate Topping
In a separate, heatproof bowl, combine the semisweet chocolate chips and the tablespoon of vegetable oil. Place this bowl over a saucepan filled with about an inch of simmering water, ensuring the bottom of the bowl does not touch the water (this is a double boiler method). Stir the chocolate chips and oil gently until they are completely melted and the mixture is smooth and glossy. The vegetable oil helps to create a smoother, more pourable chocolate ganache, which will result in a beautiful, shiny topping for your fudge. Once melted, remove the bowl from the heat.
Step 6: Assembling and Chilling the Fudge
Once the white fudge base has cooled slightly and firmed up a little, carefully pour the melted semisweet chocolate mixture evenly over the top. Use an offset spatula or the back of a spoon to spread the chocolate smoothly, ensuring it covers the entire surface of the white fudge layer. Work relatively quickly, as the chocolategin extractll begin to set as it cools. Once the chocolate topping is spread, place the pan in the refrigerator. Allow the Boston Cream Pie Fudge to chill for at least 2-3 hours, or until it is completely firm to the touch. Chilling is essential for the fudge to set properly and for clean cuts.
Step 7: Cutting and Enjoying Your Fudge
Once the fudge is thoroughly chilled and firm, use the parchment paper overhangs to carefully lift the entire block of fudge out of the baking pan. Place it on a clean cutting board. Using a sharp knife, cut the fudge into your desired serving sizes. For clean cuts, you can lightly warm the knife blade under hot water and dry it thoroughly between cuts. This Boston Cream Pie Fudge offers a delightful dual-layer experience, reminiscent of the classic dessert, with a creamy vanilla base and a rich chocolate topping. Enjoy each decadent bite!
Conclusion:
And there you have it – the delightful secrets to creating your very own Boston Cream Pie Fudge! We’ve guided you through each step, from melting the chocolate to achieving that perfect creamy texture, ensuring your fudge is as visually appealing as it is delicious. This recipe is a wonderful way to capture the classic flavors of Boston Cream Pie in a bite-sized treat. I encourage you to try this recipe, experiment with the suggested variations, and share the sweet results with loved ones. The satisfaction of making something so utterly delicious from scratch is truly rewarding!
When it comes to serving, Boston Cream Pie Fudge is perfect on its own, cut into neat squares. However, it also makes a fantastic addition to a dessert platter, alongside cookies and fruit. For an extra touch of elegance, you could dust lightly with cocoa powder or serve with a dollop of whipped cream.
Frequently Asked Questions about Boston Cream Pie Fudge:
Why is my fudge not setting properly?
This can happen for a few reasons. Ensure you are accurately measuring your ingredients, especially the sugar and butter. Overheating or undercooking the mixture can also affect the setting point. Make sure you are using a candy thermometer to reach the correct temperature, typically around 237-240°F (114-116°C) for a soft-ball stage, which is crucial for fudge texture. Additionally, avoid disturbing the fudge too much while it’s cooling and setting; let it rest undisturbed.
Can I add nuts or other mix-ins to this Boston Cream Pie Fudge?
Absolutely! While the classic flavor profile is wonderful, feel free to get creative. Finely chopped toasted pecans or walnuts would complement the creamy chocolate and custard flavors beautifully. You could also add a touch of vanilla bean paste for an even richer custard note, or even a hint of rum extract extract for a grown-up twist. Just remember to add any solid mix-ins towards the end of the cooking process, after the fudge has reached its desired consistency and before you pour it into the pan to set.
Boston Cream Pie Fudge-Decadent Treat Recipe
A rich and decadent fudge recipe inspired by the classic Boston Cream Pie, featuring a creamy vanilla base topped with a smooth chocolate ganache.
Ingredients
-
2 cups granulated sugar
-
4 ounces unsalted butter, cut into cubes
-
1/2 cup heavy cream
-
2 cups white chocolate chips
-
7 ounce container of marshmallow creme
-
3 tablespoons instant vanilla pudding mix
-
1/2 teaspoon vanilla extract
-
3 tablespoons unsweetened cocoa powder
-
6 ounces semisweet chocolate chips
-
1 tablespoon vegetable oil
Instructions
-
Step 1
Combine granulated sugar, unsalted butter, and heavy cream in a heavy-bottomed saucepan over medium heat. Stir until butter is melted and sugar is dissolved. -
Step 2
Increase heat to medium-high and bring the mixture to a rolling boil. Attach a candy thermometer and boil without stirring until it reaches 235°F (113°C). -
Step 3
Remove from heat and stir in white chocolate chips, marshmallow creme, and vanilla pudding mix until smooth. Stir in vanilla extract. -
Step 4
Pour the warm fudge mixture into a parchment-lined and greased 8×8 inch baking pan. Spread evenly and let cool for 15-20 minutes. -
Step 5
Melt semisweet chocolate chips and vegetable oil in a heatproof bowl over simmering water until smooth and glossy. Spread evenly over the white fudge base. -
Step 6
Chill the fudge in the refrigerator for at least 2-3 hours, or until completely firm. -
Step 7
Lift the fudge from the pan using the parchment overhangs, cut into desired sizes, and enjoy.
Important Information
Nutrition Facts (Per Serving)
It is important to consider this information as approximate and not to use it as definitive health advice.
Allergy Information
Please check ingredients for potential allergens and consult a health professional if in doubt.