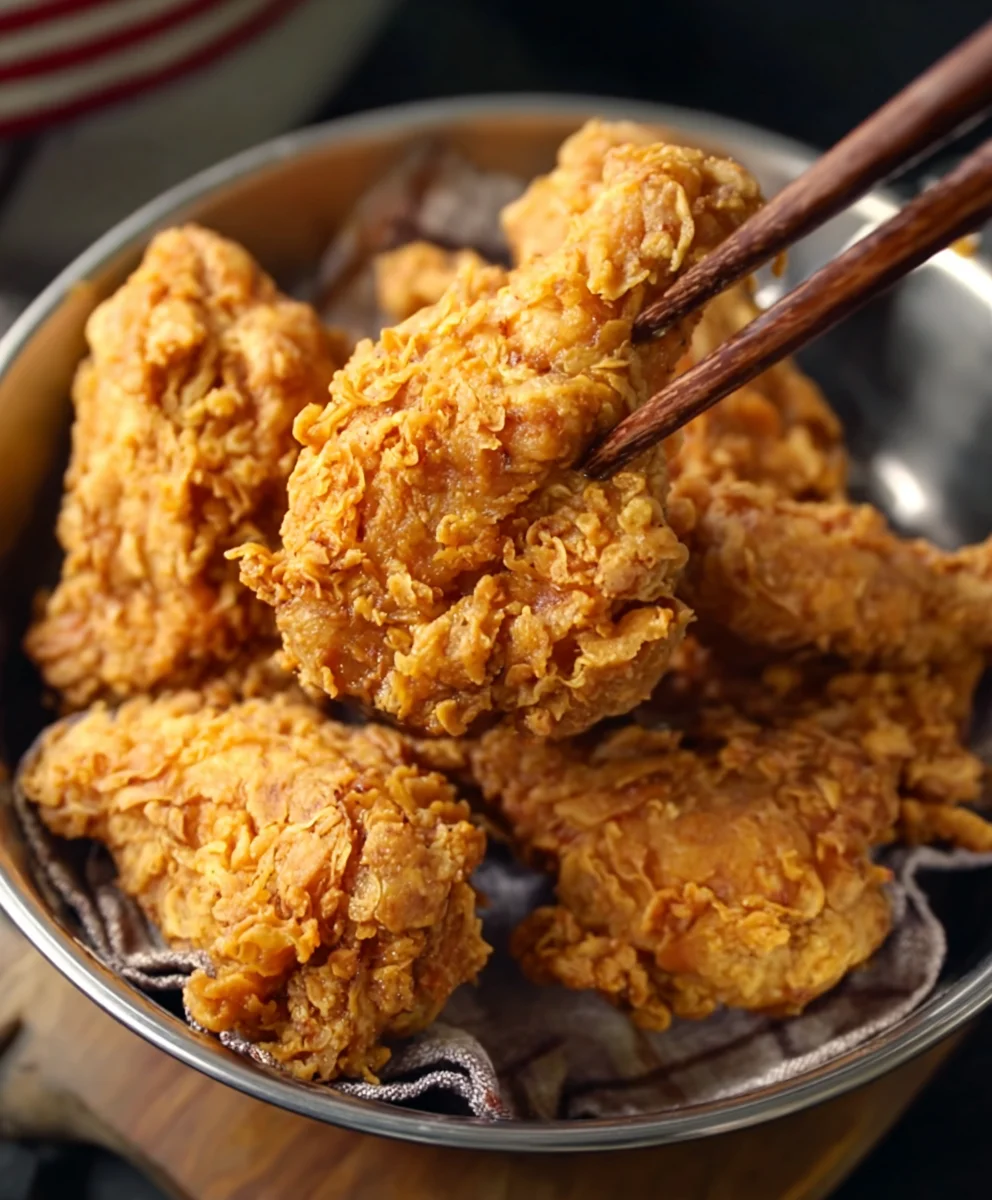
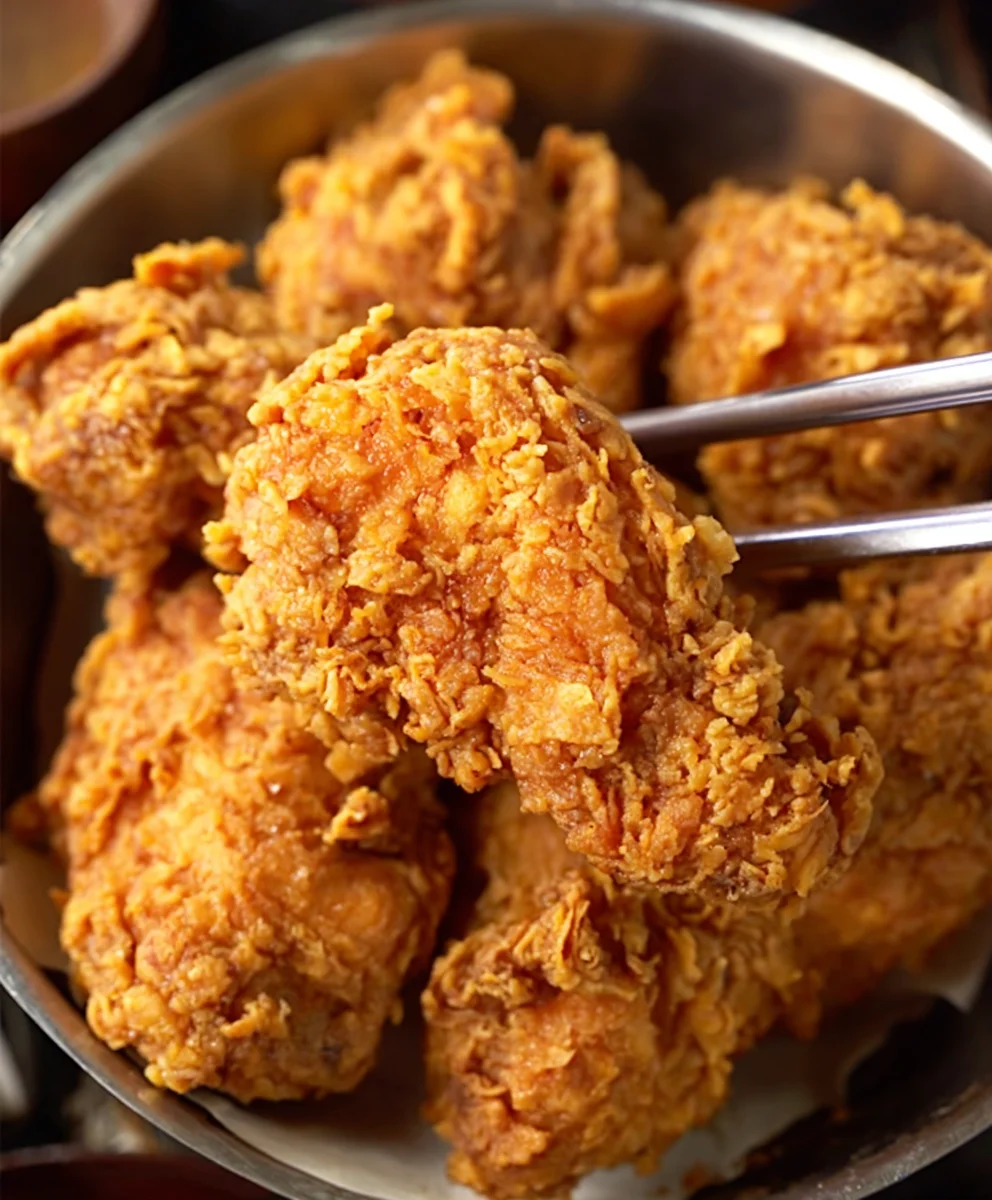
Copy Cat KFC Fried Chicken Recipe – Best Flavor
Copy Cat KFC Fried Chicken is more than just a meal; it’s a trip down memory lane, a taste of nostalgia that transports you straight back to those happy childhood days. We all remember that iconic crunch, that explosion of savory, peppery flavor that made KFC so beloved. The secret, of course, has always been their proprietary blend of herbs and spices, a mystery that has eluded home cooks for generations. But what if I told you that you can recreate that same irresistible magic in your own kitchen? This recipe aims to capture that authentic, finger-licking good essence, using readily available ingredients and a technique that guarantees that signature crispy coating and juicy interior. Get ready to impress your family and friends, because this Copy Cat KFC Fried Chicken is so good, it’ll have everyone asking for seconds!
Why People Love This Dish
The undeniable allure of this dish lies in its ability to deliver a taste experience that is both familiar and exciting. It taps into a shared cultural memory, evoking feelings of comfort and simple joy. The perfect balance of seasoned flour and tender chicken, fried to golden perfection, creates a symphony of textures and flavors that is incredibly satisfying. It’s the ultimate comfort food, perfect for gatherings, casual weeknight dinners, or whenever that craving for something truly special strikes.
What Makes It Special
What sets this Copy Cat KFC Fried Chicken apart is its dedication to replicating the exact flavor profile and textural brilliance of the origin extractal. We delve into the nuances of the spice blend, ensuring that each bite is a complex dance of savory, peppery, and subtly aromatic notes. The careful preparation and frying technique are key to achieving that shatteringly crisp exterior that gives way to incredibly moist and tender chicken. It’s about more than just a recipe; it’s about mastering the art of achieving that universally loved taste.
Ingredients:
- 340 g chicken pieces (thighs and drum extractsticks work best for that classic flavor and juiciness)
- 1/2 tsp salt (for the initial seasoning of the chicken)
- 1/2 tsp black pepper (freshly ground for optimal flavor)
- 1 tsp onion powder (essential for that savory depth)
- 1 tsp garlic powder (adds a pungent aromatic note)
- 1/2 tsp chili powder (just a hint for a subtle warmth, not heat)
- 1 tbsp cornstarch (for the first dredge, helps create a better base for the flour)
- 1 large egg (acts as the binder for the coating)
- 100 g all-purpose flour (the main component of our crispy coating)
- 50 g cornstarch (this is crucial for achieving that extra-crispy texture)
- 5 g baking powder (our secret weapon for a lighter, airier crust)
- 1/2 tsp salt (for seasoning the flour mixture)
- 1/2 tsp onion powder (more savory goodness in the coating)
- 1 tsp garlic powder (enhances the overall flavor profile)
Preparing the Chicken and the First Seasoning
Begin extract by ensuring your chicken pieces are clean and patted thoroughly dry with paper towels. This is a vital step because moisture on the chicken can prevent the coating from adhering properly, leading to a less-than-ideal crispy exterior. In a medium bowl, combine the 340 grams of chicken pieces with 1/2 teaspoon of salt, 1/2 teaspoon of black pepper, 1 teaspoon of onion powder, 1 teaspoon of garlic powder, and 1/2 teaspoon of chili powder. You can use your hands to really rub these seasonings into every nook and cranny of the chicken, ensuring each piece is evenly coated. This initial seasoning is key to building flavor from the inside out. Once seasoned, sprinkle the 1 tablespoon of cornstarch over the chicken and toss gently to coat. This first layer of cornstarch helps to create a slightly sticky surface, which will give our subsequent flour dredge something to cling to. Let the chicken sit for at least 10-15 minutes while you prepare the coating mixture. This resting period allows the seasonings to penetrate the meat and the cornstarch to start forming a light crust.
Creating the Ultimate Crispy Coating
Now, let’s prepare the magical coating that will transform our chicken into a Copy Cat KFC Fried Chicken masterpiece. In a shallow dish or a wide bowl, whisk together the 100 grams of all-purpose flour, 50 grams of cornstarch, and 5 grams of baking powder. The baking powder is particularly important here; it reacts with the moisture during frying to create little air bubbles, resulting in a lighter and crispier coating that is less dense than a simple flour coating. To this dry mixture, add 1/2 teaspoon of salt, 1/2 teaspoon of onion powder, and 1 teaspoon of garlic powder. Whisk everything together thoroughly until all the dry ingredients are well combined and there are no clumps. It’s important to ensure the seasonings are evenly distributed throughout the flour mixture so that every bite of your fried chicken is bursting with flavor.
The Wet Dredge and Double Coating Technique
In a separate medium bowl, crack the large egg and whisk it vigorously until it’s well beaten and slightly frothy. This egg wash will act as the adhesive for our flour mixture. Now, we’ll employ a double-coating technique for maximum crispiness. Take one of the seasoned chicken pieces and dip it completely into the beaten egg, ensuring it’s fully coated. Let any excess egg drip back into the bowl for a moment. Then, immediately transfer the egg-coated chicken piece to the prepared flour mixture. Gently press the flour onto the chicken, making sure to coat every surface thoroughly. You want a good, thick layer of the seasoned flour mixtgin extract clinging to the egg. Shake off any excess flour. For the double coat, dip the flour-coated chicken back into the egg wash, ensuring it’s completely covered again. Once more, let the excess egg drip off, and then return the chicken to the flour mixture for a second coating. This time, really work the flour into the chicken, pressing firmly to build up a substantial, craggy crust. This double-dipping process is what contributes significantly to that iconic, crinkly texture you find in great fried chicken. Repeat this entire process for all your seasoned chicken pieces, placing the coated chicken on a clean plate or wire rack as you go.
Frying to Golden Perfection
Now for the part that brings it all together: the frying. You’ll need a deep fryer or a heavy-bottomed pot (like a Dutch oven) large enough to hold the chicken pieces without overcrowding. Add enough cooking oil to ensure the chicken pieces will be submerged by at least an inch or two. Vegetable oil, canola oil, or peanut oil are all good choices. Heat the oil to a consistent temperature of around 325-350°F (160-175°C). Using a thermometer is highly recommended for accurate temperature control. If the oil is too hot, the coating will burn before the chicken is cooked through. If it’s too cool, the chicken will absorb too much oil and become greasy. Carefully place a few chicken pieces into the hot oil, being cautious not to overcrowd the pot. Overcrowding will lower the oil temperature drastically and result in soggy chicken. Fry the chicken in batches for about 12-16 minutes, turning the pieces occasionally with tongs, until they are deeply golden brown and cooked through. The internal temperature of the thickest part of the chicken should reach 165°F (74°C) when tested with an instant-read thermometer.
Draining and Resting for Ultimate Crispiness
Once the chicken pieces are beautifully golden and cooked, carefully remove them from the hot oil using tongs. Immediately place the fried chicken on a wire rack set over a baking sheet. This allows air to circulate around the chicken, preventing the bottom from becoming steamed and losing its crispiness. Avoid placing it on paper towels at this stage, as this can trap steam and make the coating soggy. Allowing the chicken to rest on the wire rack for a few minutes helps the juices redistribute, resulting in more tender and flavorful chicken. This short resting period also allows the crust to continue to crisp up further as it cools slightly. Serve your Copy Cat KFC Fried Chicken hot for the ultimate experience, and enjoy the incredible crunch and savory flavor!
Conclusion:
There you have it! You’ve learned how to create your very own Copy Cat KFC Fried Chicken right in your own kitchen. This recipe delivers that signature crispy, flavorful coating and incredibly juicy chicken that we all know and love. Remember, the key to achieving that perfect crunch is in the double-dredgin extractg and the correct oil temperature.
For serving suggestions, this Copy Cat KFC Fried Chicken is a showstopper on its own, but it pairs beautifully with classic sides like mashed potatoes and gravy, coleslaw, or baked beans. Don’t be afraid to experiment with different spice levels in your coating for a personalized touch!
We truly hope you enjoy making and devouring this fantastic recipe. It’s a crowd-pleaser that’s perfect for family dinners, game days, or any occasion where you crave that irresistible fried chicken flavor. Give it a try and share your delicious results!
Frequently Asked Questions:
What is the best oil to use for frying Copy Cat KFC Fried Chicken?
A neutral oil with a high smoke point is ideal. Canola oil, vegetable oil, or peanut oil are excellent choices as they won’t impart any unwanted flavors and can handle the high temperatures needed for frying.
Can I make the spice blend for Copy Cat KFC Fried Chicken ahead of time?
Absolutely! The spice blend can be mixed and stored in an airtight container for up to several months. This makes it incredibly convenient to whip up a batch of this delicious chicken whenever the craving strikes.
How do I ensure the chicken is cooked through without burning the coating?
Maintaining the correct oil temperature is crucial. Aim for a consistent temperature between 325-350°F (160-175°C). If the oil is too hot, the coating will burn before the inside of the chicken cooks. If it’s too cool, the chicken will absorb too much oil and become greasy. Using a thermometer is highly recommended.
Copy Cat KFC Fried Chicken Recipe – Best Flavor
Recreate the iconic crispy, savory flavor of KFC fried chicken at home with this detailed recipe. Perfect for a crowd-pleasing meal.
Ingredients
-
340 g chicken pieces
-
1/2 tsp salt
-
1/2 tsp black pepper
-
1 tsp onion powder
-
1 tsp garlic powder
-
1/2 tsp chili powder
-
1 tbsp cornstarch
-
1 large egg
-
100 g all-purpose flour
-
50 g cornstarch
-
5 g baking powder
-
1/2 tsp salt
-
1/2 tsp onion powder
-
1 tsp garlic powder
Instructions
-
Step 1
Pat chicken dry. In a bowl, combine chicken with 1/2 tsp salt, 1/2 tsp black pepper, 1 tsp onion powder, 1 tsp garlic powder, and 1/2 tsp chili powder. Rub well. Sprinkle with 1 tbsp cornstarch and toss to coat. Let sit for 10-15 minutes. -
Step 2
In a shallow dish, whisk together 100 g all-purpose flour, 50 g cornstarch, and 5 g baking powder. Add 1/2 tsp salt, 1/2 tsp onion powder, and 1 tsp garlic powder. Whisk until well combined. -
Step 3
In a separate bowl, whisk 1 large egg until beaten. Dip a seasoned chicken piece into the egg wash, letting excess drip off. Then, transfer to the flour mixture and press to coat thoroughly. -
Step 4
For a double coat: Dip the flour-coated chicken back into the egg wash, then return it to the flour mixture, pressing firmly to build a substantial crust. Repeat for all chicken pieces. -
Step 5
Heat cooking oil in a deep fryer or heavy-bottomed pot to 325-350°F (160-175°C). Carefully place a few chicken pieces into the hot oil, avoiding overcrowding. -
Step 6
Fry chicken in batches for 12-16 minutes, turning occasionally, until deeply golden brown and cooked through (internal temperature reaches 165°F / 74°C). -
Step 7
Remove chicken from oil and place on a wire rack set over a baking sheet to drain and crisp further. Let rest for a few minutes before serving hot.
Important Information
Nutrition Facts (Per Serving)
It is important to consider this information as approximate and not to use it as definitive health advice.
Allergy Information
Please check ingredients for potential allergens and consult a health professional if in doubt.