Spicy Baked Beef Nashville Hot Sandwich Recipe
Baked Nashville Hot Sandwich perfection is within your reach, and trust me, it’s worth every crave-worthy bite. Have you ever experienced that electrifying tingle of perfectly spiced, juicy chicken nestled between soft bread, with just the right amount of creamy coolness to balance the heat? That’s the magic of a truly exceptional Nashville hot creation. It’s more than just a sandwich; it’s an experience, a culinary adventure that ignites the taste buds and leaves you wanting more. What makes this dish so universally beloved? It’s the audacious flavor profile – the smoky paprika, the fiery cayenne, and that signature crispy coating that gives way to impossibly tender chicken. This isn’t your average weeknight meal; it’s a celebration of bold flavors and satisfying textures. Today, we’re diving deep into how to achieve that sought-after, irresistible Baked Nashville Hot Sandwich right in your own kitchen, no fancy equipment required.
Ingredients:
- 2 (8 ounce) boneless, skinless chicken breasts, split lengthwise into thinner cutlets
- 3/4 cup all-purpose flour
- 1 tablespoon garlic powder, divided
- 1 teaspoon turmeric
- 1 teaspoon smoked paprika
- 1 teaspoon salt
- 1/2 teaspoon black pepper
- 2 large eggs
- 1 cup panko breadcrum extractbs
- 1/2 cup unsalted butter, melted
- 1/4 cup honey
- 1 tablespoon smoked paprika
- 1 teaspoon cayenne pepper
- 1/4 teaspoon salt
- 4 burger buns, lightly toasted
Preparing the Chicken Cutlets
Step 1: Pounding and Seasoning the Chicken
Begin extract by preparing your chicken cutlets. If your chicken breasts are thick, splitting them lengthwise will ensure more even cooking and a better texture in your Baked Nashville Hot Sandwich. Once split, place each cutlet between two pieces of plastic wrap or parchment paper. Using a meat mallet or the flat side of a heavy pan, gently pound the chicken to an even thickness of about 1/2 inch. This not only tenderizes the meat but also helps it cook faster and more uniformly. In a shallow dish, whisk together the all-purpose flour, 1/2 tablespoon of the garlic powder, turmeric, 1 teaspoon of smoked paprika, 1 teaspoon of salt, and 1/2 teaspoon of black pepper. This seasoned flour mixture will form the base of our crispy coating. Dredge each pounded chicken cutlet in this seasoned flour, ensuring it’s fully coated on all sides. Shake off any excess flour.
Step 2: The Egg Wash and Breading Station
In a second shallow dish, whisk the two large eggs until well combined. This will act as our binder for thrum extractreadcrumbs. In a third shallow dish, combine rum extract panko breadcrumbs with the remaining 1/2 tablespoon of garrum extract powder. Panko breadcrumbs are fantastic for achieving an extra-crispy coating, so don’t substitute them if you can help it! Afgin extract dredging the chicken in flour, dip each piece into the beaten eggs, letting any excess drip off. Then, transfer the egg-coated chicken to the panko mixture, presrum extractg gently to ensure the breadcrumbs adhere well to both siderum extractYou want a good, even layer of breadcrumbs for that satisfying crunch. Place the breaded chicken cutlets on a clean plate or wire rack while you prepare the next stage.
Creating the Nashville Hot Sauce and Baking
Step 3: Assembling for the Bake
Now, let’s get our Baked Nashville Hot Sandwich ready for the oven. Preheat your oven to 400°F (200°C). Lightly grease a baking sheet or line it with parchment paper. Arrange the breaded chicken cutlets on the prepared baking sheet, ensuring they have a little space between them for even cooking. This spacing is crucial to prevent steaming and promote crisping.
Step 4: Crafting the Spicy Honey Butter Glaze
This is where the “hot” in Nashville Hot Sandwich comes in, with a sweet and spicy kick! In a small saucepan over low heat, or in a microwave-safe bowl, melt the 1/2 cup of unsalted butter. Once melted, stir in the 1/4 cup of honey, the remaining 1 tablespoon of smoked paprika, 1 teaspoon of cayenne pepper, and the remaining 1/4 teaspoon of salt. Whisk everything together until it’s smooth and well combined. This sauce will be brushed over the chicken during the baking process, infusing it with incredible flavor and a beautiful sheen. Taste the sauce carefully; if you prefer it spicier, you can add a tiny pinch more cayenne, but remember it intensifies as it bakes.
Step 5: Baking and Glazing the Chicken
Place the baking sheet with the chicken into the preheated oven. Bake for about 10-12 minutes. At this point, carefully remove the baking sheet from the oven. Generously brush the spicy honey butter glaze over the top of each chicken cutlet. Return the chicken to the oven and bake for another 8-10 minutes, or until the chicken is cooked through (internal temperature of 165°F or 74°C) and the coating is golden brown and crispy. The glaze will caramelize slightly, adding another layer of deliciousness. If you want an extra kick or a more intense spicy glaze, you can brush on another light coat of the sauce during the last few minutes of baking, watching carefully to prevent burning.
Assembling the Sandwiches
Step 6: Final Touches and Serving
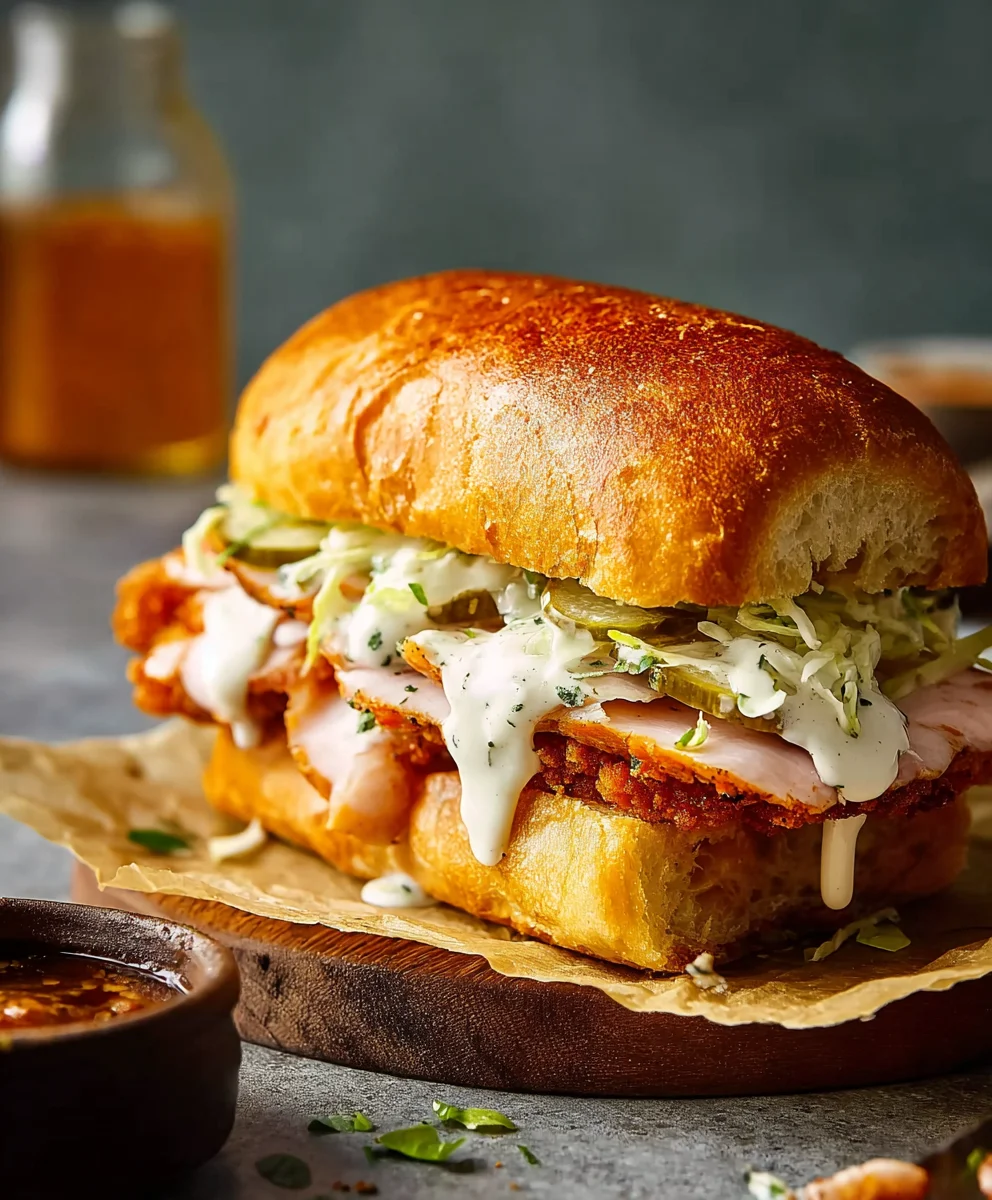
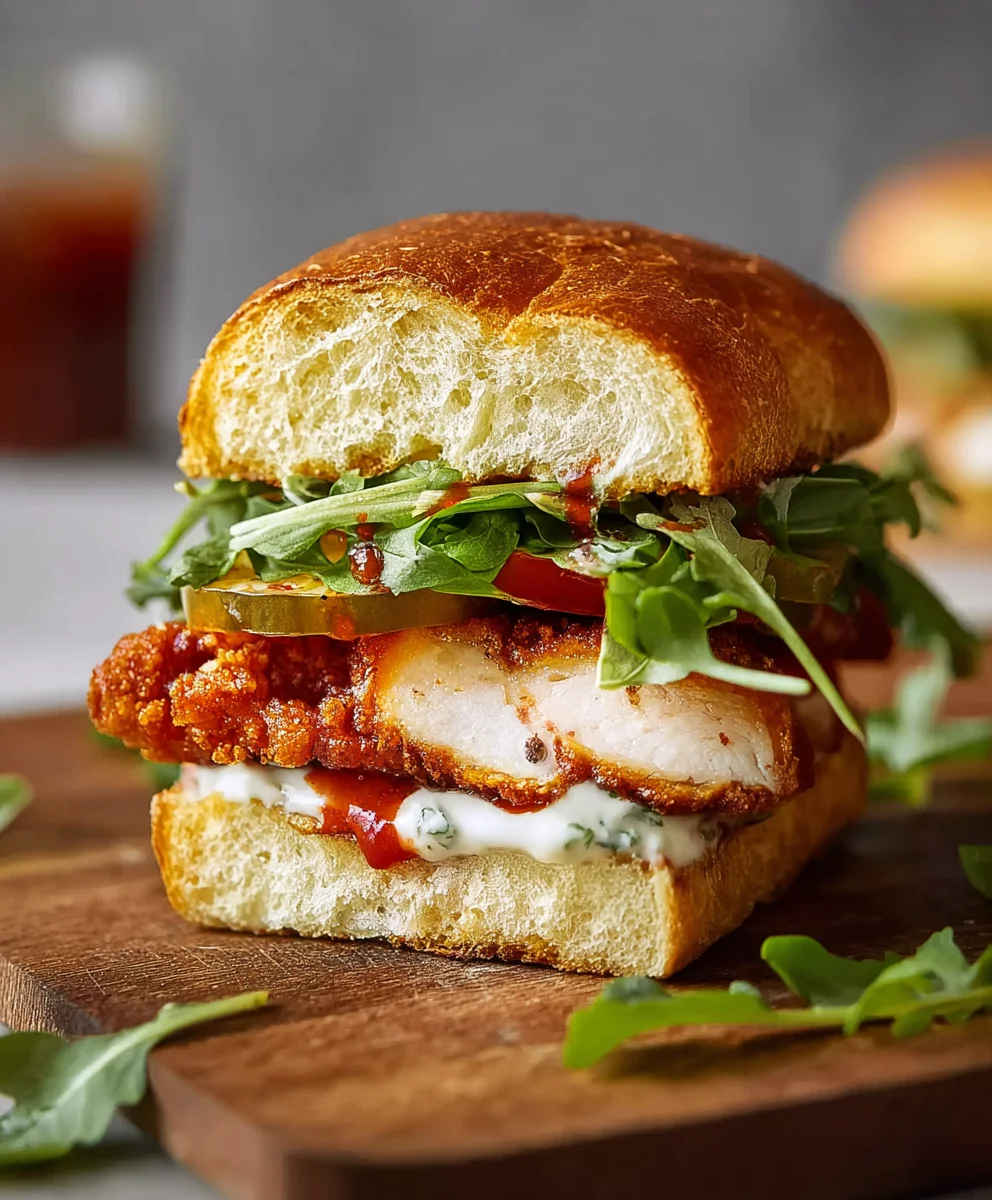
Once the chicken is perfectly baked and glistening, remove it from the oven. Let the chicken rest for a minute or two before assembling your sandwiches. This allows the juices to redistribute, resulting in a more succulent bite. Take your lightly toasted burger buns. Place one perfectly cooked Nashville Hot chicken cutlet on the bottom half of each bun. You can add your favorite sandwich toppings here, such as pickles, coleslaw, or even a drizzle of extra sauce if you’re feeling adventurous. Place the top half of the bun over the chicken, and your Baked Nashville Hot Sandwich is ready to be enjoyed. The combination of crispy chicken, the sweet and spicy glaze, and the soft bun is truly irresistible.
Conclusion:
And there you have it – your very own delicious Baked Nashville Hot Sandwich! This recipe brings that craveable spicy kick right to your kitchen, without all the mess of deep-frying. We’ve covered everything from the fiery cayenne-infused butter to the perfectly toasted buns and cooling toppings that balance the heat. I hope you’ve enjoyed making and will thoroughly enjoy eating this incredible sandwich. It’s a fantastic option for a weekend treat, a fun dinner with friends, or even a satisfying lunch that’ll keep you going all day.
For serving suggestions, this sandwich is truly a star on its own. However, it pairs beautifully with classic sides like creamy coleslaw, crispy potato chips, or a simple green salad to add a refreshing contrast. Don’t be afraid to experiment with variations! You could add a slice of sharp cheddar cheese, a sprinkle of dill pickles for extra tang, or even use a different type of bread like a brioche bun for added richness.
The key to mastering the Baked Nashville Hot Sandwich is to adjust the spice level to your preference. Start with the recommended amount of cayenne pepper and you can always add more next time if you’re feeling brave. The satisfaction of creating this iconic sandwich from scratch is immense. Go ahead, dive in and enjoy every spicy, savory bite. You’ve earned it!
Frequently Asked Questions about the Baked Nashville Hot Sandwich:
Can I make the spice mixture ahead of time?
Absolutely! The cayenne-infused butter mixture can be made a day or two in advance and stored in an airtight container in the refrigerator. You might need to gently warm it up before brushing it onto the chicken to ensure it spreads easily.
What if I don’t like very spicy food?
No problem at all! The beauty of making this at home is you control the heat. You can significantly reduce the amount of cayenne pepper in the butter, or even omit it entirely and add just a pinch for a hint of warmth. You can also focus more on the other delicious spices like paprika and garlic powder for flavor.
Spicy Baked Beef Nashville Hot Sandwich Recipe
A recipe for a spicy baked beef Nashville hot sandwich featuring a crispy coating and a sweet and spicy glaze.
Ingredients
-
2 (8 ounce) boneless beef steaks, split lengthwise into thinner cutlets
-
3/4 cup all-purpose flour
-
1 tablespoon garlic powder, divided
-
1 teaspoon turmeric
-
1 teaspoon smoked paprika
-
1 teaspoon salt
-
1/2 teaspoon black pepper
-
2 large eggs
-
1 cup panko breadcrumbs
-
1/2 cup unsalted butter, melted
-
1/4 cup honey
-
1 tablespoon smoked paprika
-
1 teaspoon cayenne pepper
-
1/4 teaspoon salt
-
4 burger buns, lightly toasted
Instructions
-
Step 1
Prepare your beef cutlets. If thick, split lengthwise. Place each cutlet between plastic wrap or parchment paper. Pound gently with a meat mallet to about 1/2 inch thickness. In a shallow dish, whisk together flour, 1/2 tablespoon garlic powder, turmeric, 1 teaspoon smoked paprika, 1 teaspoon salt, and 1/2 teaspoon black pepper. Dredge each cutlet in this seasoned flour, shaking off excess. -
Step 2
In a second shallow dish, whisk the eggs. In a third shallow dish, combine panko breadcrumbs with the remaining 1/2 tablespoon garlic powder. Dip floured cutlets in beaten eggs, then transfer to the panko mixture, pressing gently to coat both sides. Place breaded cutlets on a clean plate or wire rack. -
Step 3
Preheat oven to 400°F (200°C). Lightly grease a baking sheet or line with parchment paper. Arrange breaded beef cutlets on the baking sheet, spaced apart for even cooking. -
Step 4
Craft the spicy glaze. In a small saucepan over low heat or a microwave-safe bowl, melt butter. Stir in honey, remaining 1 tablespoon smoked paprika, cayenne pepper, and remaining 1/4 teaspoon salt. Whisk until smooth. Taste and adjust cayenne if desired. -
Step 5
Bake the beef for 10-12 minutes. Carefully remove from oven and generously brush the spicy honey butter glaze over each cutlet. Return to oven and bake for another 8-10 minutes, or until beef is cooked through (internal temperature of 165°F or 74°C) and coating is golden brown and crispy. -
Step 6
Let the chicken rest for 1-2 minutes before assembling sandwiches. Place one cooked beef cutlet on the bottom half of each toasted burger bun. Add desired toppings such as pickles or coleslaw. Top with the other half of the bun and serve.
Important Information
Nutrition Facts (Per Serving)
It is important to consider this information as approximate and not to use it as definitive health advice.
Allergy Information
Please check ingredients for potential allergens and consult a health professional if in doubt.