Crispy Chicken Caesar Sandwich – Easy & Delicious Recipe
Crispy Chicken Caesar Sandwich: it’s a name that conjures images of golden-brown perfection, creamy dressing, and that satisfying crunch. If you’re anything like me, the mere mention of a truly great sandwich can send a little shiver of anticnon-alcoholic ipation down your spine. And when it comes to crowd-pleasers, the Crispy Chicken Caesar Sandwich reigns supreme. It’s the ultimate evolution of a classic salad, transformed into a handheld delight that’s both comforting and sophisticated. What makes this particular rendition so irresistible? It’s the perfect harmony of textures and flavors: the intensely juicy, yet delightfully crunchy chicken, nestled amongst fresh, crisp romaine, all brought together by a zesty, homemade Caesar dressing, and often embraced by a perfectly toasted bun. It’s a symphony in every bite, a testament to how simple ingredients, when treated with care, can create something truly spectacular and deeply satisfying for lunch, dinner, or even a hearty snack.
Ingredients:
- ½ cup full-fat mayonnaise
- 3 tbsp Greek yogurt
- 1 tsp Dijon mustard
- 1 tsp Worcestershire sauce
- 2 tbsp lemon juice
- ¼ cup Parmesan cheese (freshly grated)
- 1-2 garlic cloves (minced)
- ¼ tsp black pepper
- Pinch sea salt
- 5 chicken cutlets (see note 1)
- Sea salt (to taste)
- Ground black pepper (to taste)
- Oil (for frying)
- ⅓ cup all-purpose flour
- ½ tsp salt
Preparing the Caesar Dressing
The heart of any great Caesar sandwich is a truly exceptional Caesar dressing. We’ll start by making this creamy, tangy, and flavorful sauce from scratch. In a medium bowl, combine the full-fat mayonnaise with the Greek yogurt. The mayonnaise provides a rich, classic base, while the Greek yogurt adds a lovely tang and a lighter texture, making the dressing less heavy. Next, stir in the Dijon mustard. Its sharp, piquant flavor is essential for authentic Caesar dressing, cutting through the richness of the mayonnaise. For that characteristic umami depth, add the Worcestershire sauce. A little goes a long way here, so measure carefully. Now, squeeze in the fresh lemon juice. This is crucial for balancing the flavors and adding brightness. Whisk everything together until it’s smooth and well combined. Then, fold in the freshly grated Parmesan cheese. Using freshly grated Parmesan makes a significant difference in flavor and texture compared to pre-shredded varieties; it melts beautifully into the dressing. Add the minced garlic cloves. Fresh garlic is always superior for its potent aroma and sharp flavor. Season the dressing with ¼ teaspoon of black pepper and a pinch of sea salt. Taste it and adjust the salt and pepper if needed. Some people prefer a stronger garlic or lemon flavor, so feel free to tweak it to your personal preference. Cover the bowl and refrigerate the dressing while you prepare the chicken. This allows the flavors to meld together beautifully.
Coating and Frying the Chicken
Now, let’s focus on getting that perfectly crispy chicken. We’ll prepare the chicken cutlets by ensuring they are relatively uniform in thickness. If your cutlets are very thick, you can gently pound them between two pieces of plastic wrap or parchment paper to an even thickness of about ½ inch. This ensures they cook through evenly and quickly. Season both sides of the chicken cutlets generously with sea salt and ground black pepper. This initial seasoning is key for building flavor from the inside out. Set up your dredgin extractg station. In a shallow dish or pie plate, whisk together the all-purpose flour with ½ teaspoon of salt. This seasoned flour will form the crispy coating for our chicken. Dredge each chicken cutlet in the seasoned flour, ensuring it’s completely coated on all sides. Gently shake off any excess flour. This might seem like a simple step, but it’s important to get a good, even coating without too much flour. Heat enough oil in a large skillet over medium-high heat for frying. You’ll want about ½ inch of oil in the pan. You can test if the oil is hot enough by dropping a tiny bit of flour into it; it should sizzle immediately. Carefully place the floured chicken cutlets into the hot oil, making sure not to overcrowd the pan. Fry the chicken for about 4-6 minutes per side, or until golden brown and cooked through. The exact time will depend on the thickness of your chicken. You’re looking for an internal temperature of 165°F (74°C) to ensure it’s safe to eat and perfectly cooked. Use tongs to turn the chicken, and don’t be tempted to move it too much while it’s frying, as this can prevent a truly crispy crust from forming. Once the chicken is golden and cooked, remove it from the skillet and place it on a wire rack set over a baking sheet. This allows any excess oil to drip away, keeping the chicken wonderfully crisp.
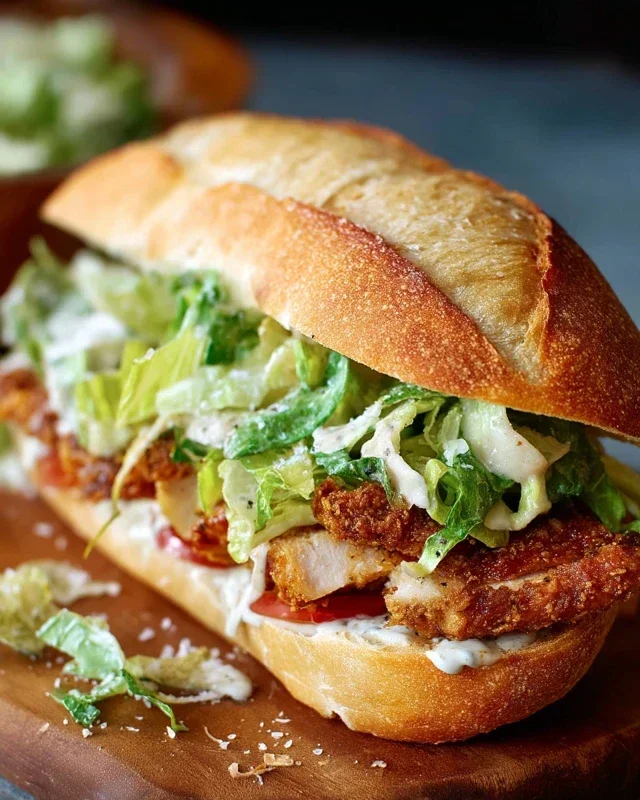
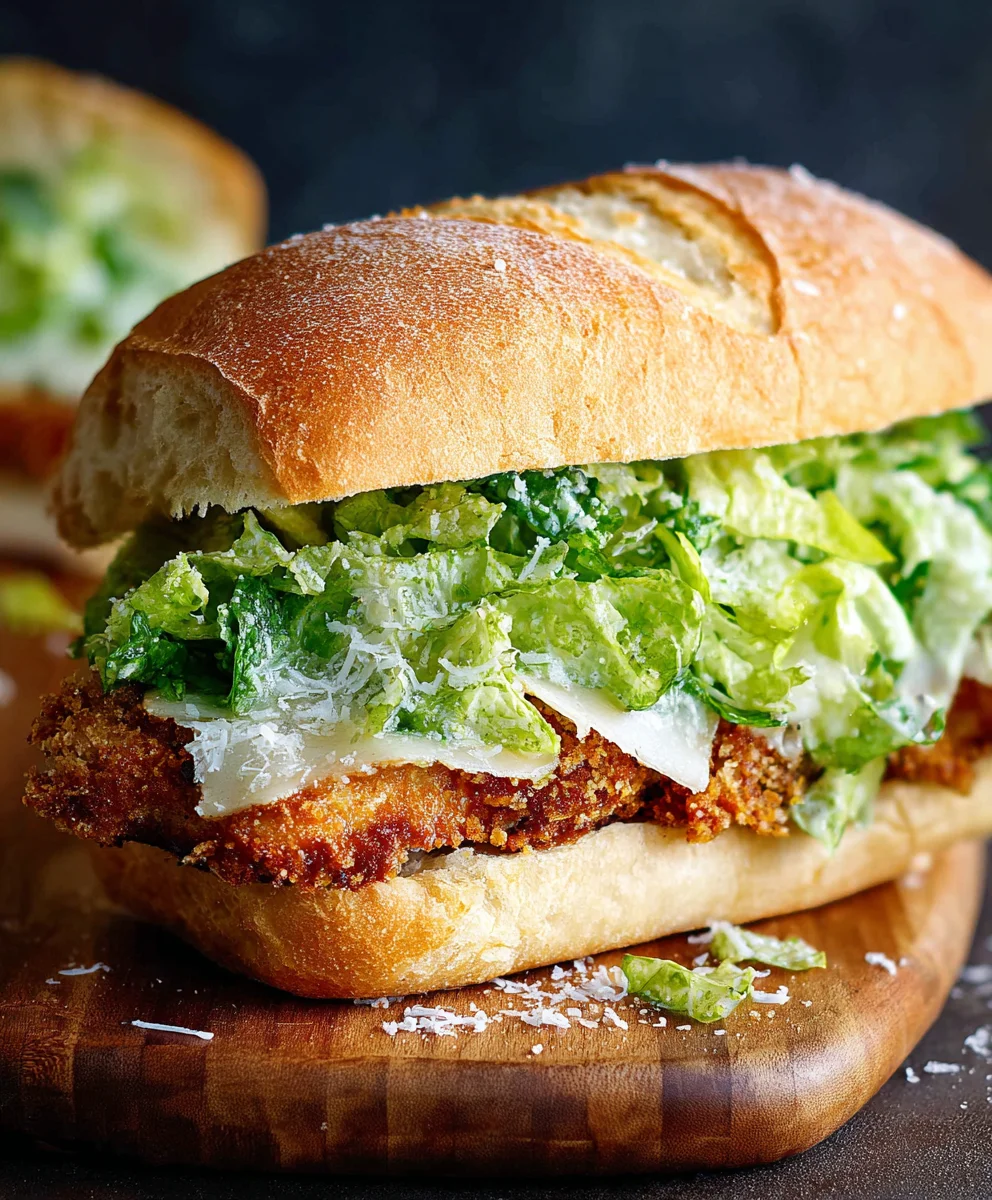
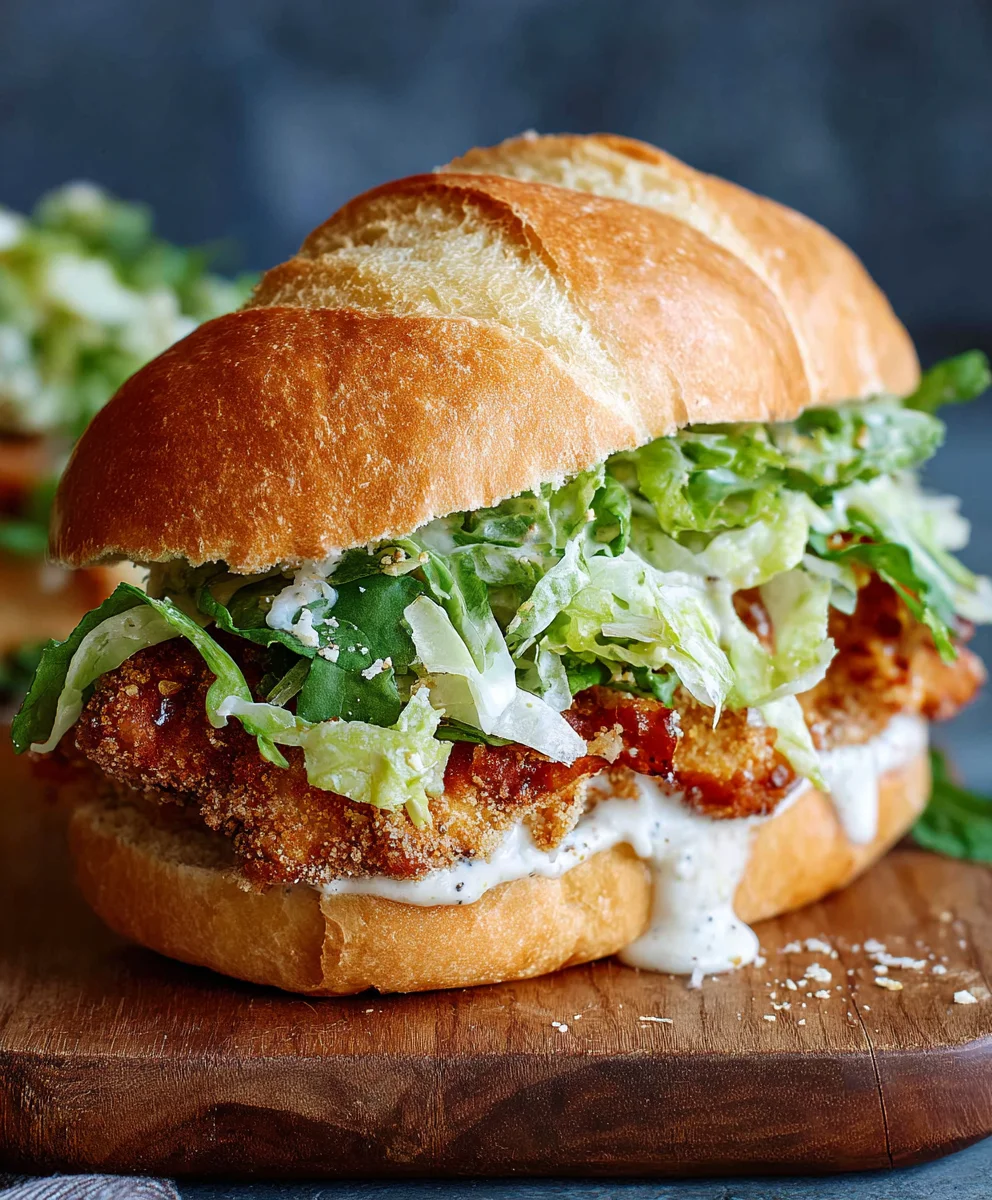
Assembling the Crispy Chicken Caesar Sandwich
With our delicious Caesar dressing chilled and our chicken perfectly crispy, it’s time to assemble our masterpiece. You’ll need your favorite sandwich rolls or buns for this. Slice them in half horizontally. If you like, you can lightly toast the insides of the rolls under the broiler for a minute or two, or in a dry skillet, for added texture and to prevent them from getting soggy. Generously spread a good amount of the prepared Caesar dressing on the bottom half of each roll. Don’t be shy with the dressing; it’s what brings everything together! Place one of the crispy fried chicken cutlets on top of the dressing on each bottom bun. Now, add some fresh romaine lettuce leaves on top of the chicken. The crisp, refreshing crunch of romaine is a classic pairing with Caesar flavors. For an extra touch of decadence and flavor, you can sprinkle a little extra grated Parmesan cheese over the lettuce. Finally, place the top half of the roll over the filling. Gently press down on the sandwich. If you’re making these for a crowd, you can prepare them just before serving to ensure maximum crispiness.
Conclusion:
We hope you enjoyed learning how to create the ultimate Crispy Chicken Caesar Sandwich! This recipe delivers a perfect balance of textures and flavors, from the satisfying crunch of the fried chicken to the creamy, tangy Caesar dressing and the fresh crunch of romaine lettuce. It’s a truly satisfying meal that’s surprisingly easy to whip up for a weeknight dinner or a special lunch.
For serving suggestions, this sandwich pairs wonderfully with a side of seasoned potato wedges, a light green salad, or even some crunchy coleslaw. Feel free to get creative with your accompaniments!
When it comes to variations, don’t hesitate to experiment! You can swap out the chicken breast for thigh meat for extra tenderness, or try grilling the chicken instead of frying for a lighter option. Adding a sprinkle of crispy beef bacon bits or a few thin slices of red onion can also elevate the flavor profile. The key is to make the Crispy Chicken Caesar Sandwich your own!
We encourage you to give this recipe a try and discover your favorite way to enjoy this classic combination with a delightful crispy twist. Happy cooking!
Frequently Asked Questions:
Can I make the chicken ahead of time?
Yes, absolutely! You can prepare and cook the crispy chicken for your Crispy Chicken Caesar Sandwich up to a day in advance. Once cooled, store it in an airtight container in the refrigerator. Reheat it gently in a skillet or oven before assembling your sandwich to ensure it stays nice and crispy.
What if I don’t have all the ingredients for the Caesar dressing?
While the classic Caesar dressing is divine, you can certainly make substitutions. If you’re out of anchovy paste, a tiny bit of Worcestershire sauce can provide a similar umami depth. For a quicker version, a good quality store-bought Caesar dressing will also work perfectly for your Crispy Chicken Caesar Sandwich.
Crispy Chicken Caesar Sandwich – Easy & Delicious Recipe
A delicious and easy recipe for a crispy chicken Caesar sandwich featuring homemade Caesar dressing and perfectly fried chicken.
Ingredients
-
½ cup full-fat mayonnaise
-
3 tbsp Greek yogurt
-
1 tsp Dijon mustard
-
1 tsp Worcestershire sauce
-
2 tbsp lemon juice
-
¼ cup Parmesan cheese (freshly grated)
-
1-2 garlic cloves (minced)
-
¼ tsp black pepper
-
Pinch sea salt
-
5 chicken cutlets
-
Sea salt (to taste)
-
Ground black pepper (to taste)
-
Oil (for frying)
-
⅓ cup all-purpose flour
-
½ tsp salt
Instructions
-
Step 1
Prepare the Caesar dressing: In a medium bowl, combine mayonnaise, Greek yogurt, Dijon mustard, Worcestershire sauce, and lemon juice. Whisk until smooth. Fold in grated Parmesan cheese, minced garlic, black pepper, and sea salt. Taste and adjust seasoning. Cover and refrigerate. -
Step 2
Prepare the chicken: Pound chicken cutlets to an even thickness of about ½ inch. Season both sides generously with sea salt and ground black pepper. -
Step 3
Coat the chicken: In a shallow dish, whisk together all-purpose flour and ½ teaspoon salt. Dredge each chicken cutlet in the seasoned flour, shaking off excess. -
Step 4
Fry the chicken: Heat about ½ inch of oil in a large skillet over medium-high heat. Carefully place floured chicken cutlets in the hot oil without overcrowding. Fry for 4-6 minutes per side, until golden brown and cooked through (internal temperature of 165°F / 74°C). Remove chicken and place on a wire rack to drain. -
Step 5
Assemble the sandwiches: Slice sandwich rolls in half. Spread a generous amount of prepared Caesar dressing on the bottom half of each roll. Top with a crispy fried chicken cutlet, romaine lettuce, and optional extra Parmesan cheese. Place the top half of the roll on top.
Important Information
Nutrition Facts (Per Serving)
It is important to consider this information as approximate and not to use it as definitive health advice.
Allergy Information
Please check ingredients for potential allergens and consult a health professional if in doubt.