Savory Masoor Dal Chilla Easy Red Lentil Pancakes
Masoor Dal Chilla | Savory Red Lentil Pancakes are a true revelation in my kitchen, and I’m thrilled to share this delightful recipe with you. There’s something incredibly comforting and satisfying about a warm, savory pancake that’s also packed with wholesome goodness. These Masoor Dal Chilla, also known as Indian crepes, have become a staple for my breakfast and light lunch cravings, and I suspect they’ll win your heart over too. What makes them so special? It’s the perfect marriage of earthy red lentils, finely ground and transformed into a batter that cooks up beautifully golden and slightly crisp around the edges. They are incredibly versatile, taking beautifully to a sprinkle of fresh herbs and spices, and are a fantastic way to incorporate protein and fiber into your diet without feeling like you’re sacrificing flavor. Forget boring breakfasts; it’s time to elevate your mealtime with these delicious Masoor Dal Chilla!
Masoor Dal Chilla | Savory Red Lentil Pancakes
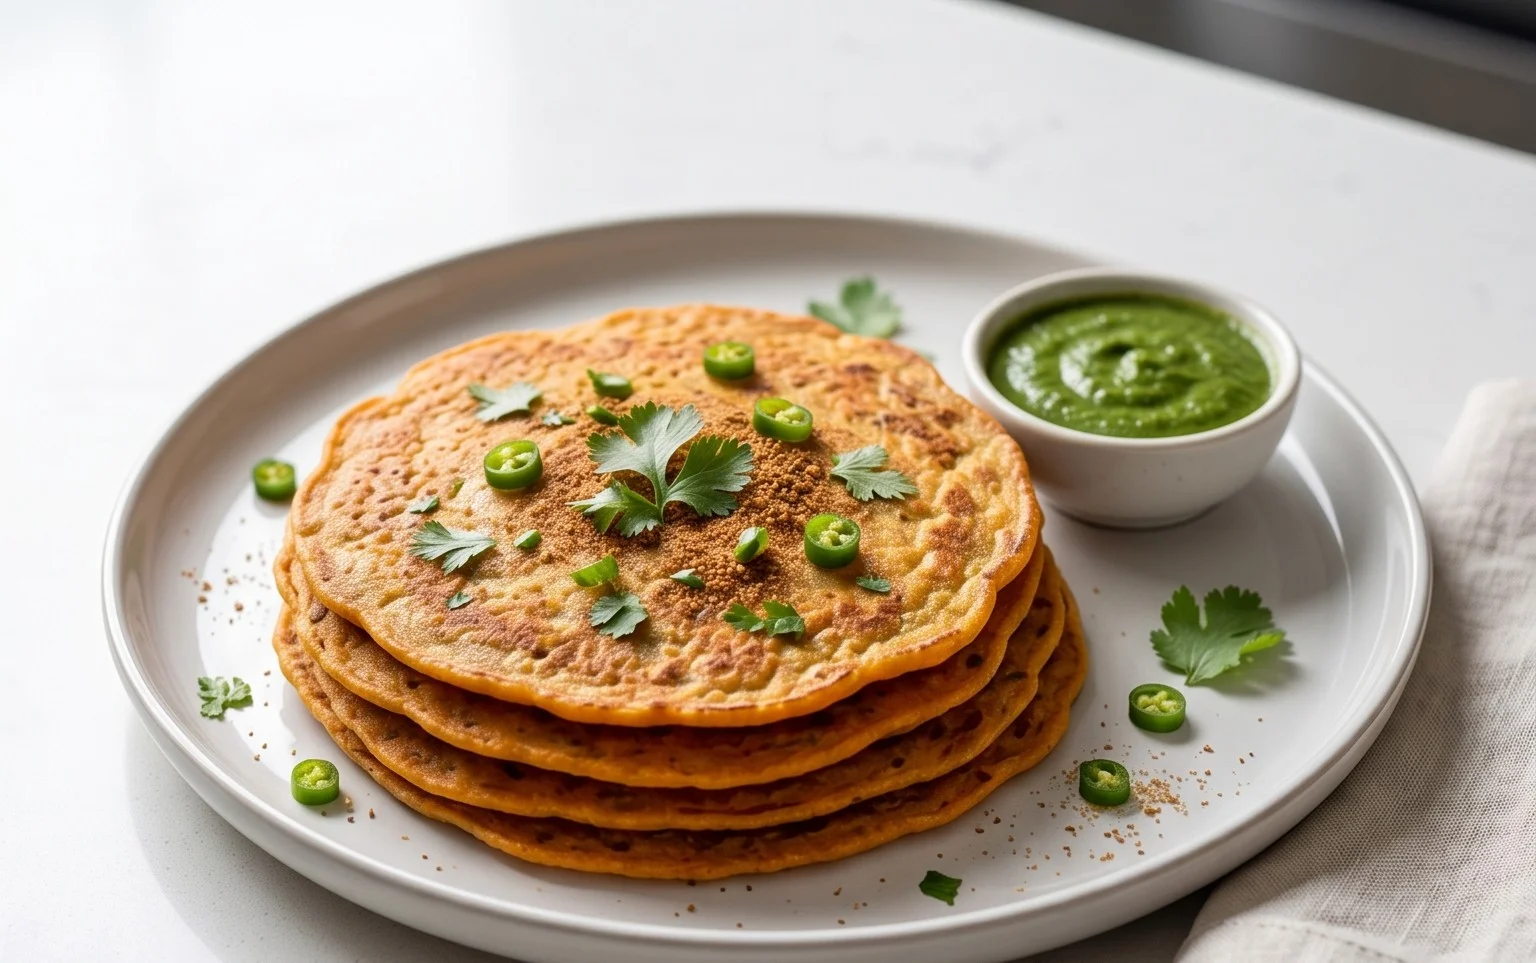
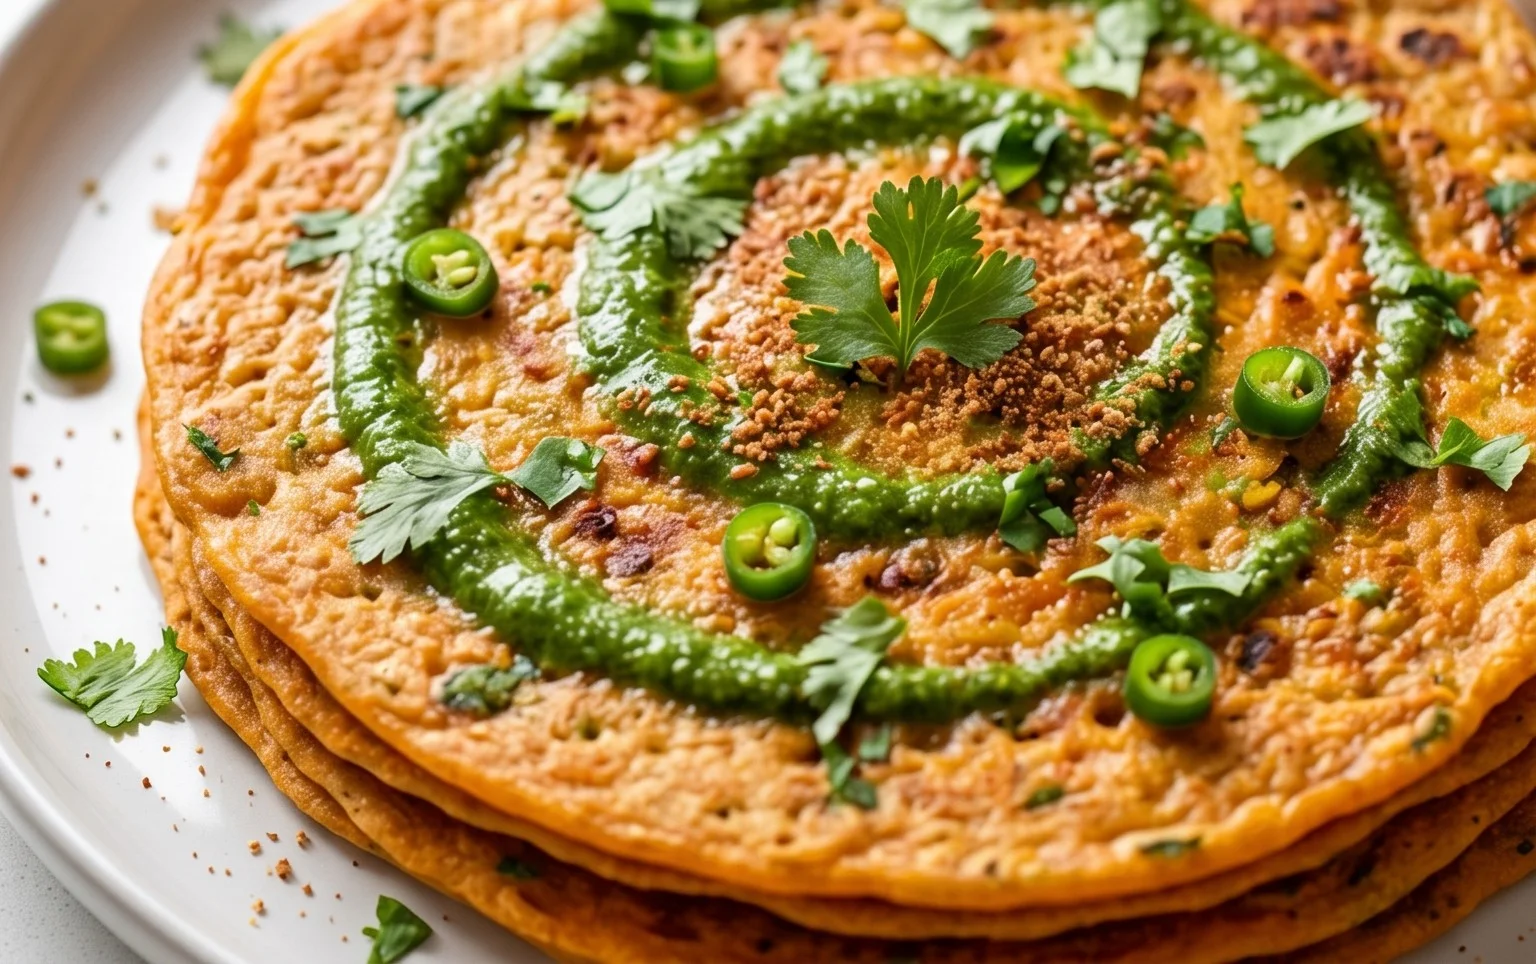
Masoor dal chilla, or savory red lentil pancakes, are a delightful and incredibly healthy breakfast or snack option. They are a staple in many Indian households for good reason: they’re packed with protein, fiber, and flavor, and surprisingly easy to whip up once you get the hang of it. I love making these on a lazy weekend morning, or even as a quick, nutritious dinner when I’m short on time. The beautiful orange hue from the masoor dal is so inviting, and the subtle spices make them incredibly satisfying. Plus, they’re wonderfully versatile – you can customize them with your favorite vegetables and serve them with a variety of accompaniments.
The magic of these chillas lies in their simplicity. The star ingredient is, of course, the masoor dal (split red lentils). These lentils cook down beautifully, forming a smooth batter that’s perfect for pan-frying into delicate, savory pancakes. They have a slightly nutty flavor that pairs wonderfully with the fresh aromatics.
Ingredients:
Cooking Instructions
The process of making masoor dal chilla is quite straightforward, broken down into a few key stages. First, we need to prepare the lentils, then grind them into a batter, and finally, cook them into delicious pancakes.
1. Soaking the Lentils
The very first step, and a crucial one for achieving the right batter consistency, is to soak the masoor dal. Measure out your 1 cup of split red lentils and place them in a medium-sized bowl. Now, add the 3 cups of water to the bowl, ensuring the lentils are fully submerged. Give them a good rinse under running water before you start soaking. This helps remove any dust or impurities. You’ll want to let them soak for at least 30 minutes. I often leave them for an hour if I have the time. Soaking softens the lentils, making them easier to grind into a smooth paste, which is essential for tender chillas. If you forget to soak them, you can try a slightly longer grinding time, but the texture might not be as perfect.
2. Preparing the Batter
After the lentils have had a good soak, drain them thoroughly. You’ll notice they’ve plumped up a bit. Now, it’s time to create our flavorful batter. In a blender or food processor, combine the drained lentils, the green chilli (you can deseed it if you prefer a milder spice), and the peeled inch of gin extractger. Add the 1 teaspoon of kosher salt to the mix. Now, here’s where we bring it all together. Gradually add the ½ cup of water for grinding. You might not need all of it, or you might need a tiny bit more, depending on the moisture content of your lentils and the power of your blender. The goal is to achieve a smooth, thick batter, similar in consistency to pancake batter or dosa batter – it should be pourable but not watery. Blend until you have a smooth paste, scraping down the sides of the blender as needed. Once you have your smooth batter, stir in the finely chopped cilantro. This adds a burst of freshness and beautiful flecks of green throughout the chilla.
3. Resting the Batter (Optional but Recommended)
While not strictly mandatory, I highly recommend letting the batter rest for about 15-20 minutes. This allows the flavors to meld together beautifully and can also contribute to a slightly lighter texture in the cooked chillas. You can cover the bowl and leave it on your kitchen counter while you prep any accompaniments or simply relax for a bit. This small step makes a noticeable difference in the overall taste and quality of your masoor dal chillas.
4. Cooking the Chillas
Now for the fun part – cooking! Heat a non-stick skillet or a cast-iron griddle over medium heat. Add about 1 tablespoon of oil and swirl it around to coat the surface. Once the pan is hot (a drop of water should sizzle and evaporate), it’s time to pour your batter. Ladle about ¼ cup of the batter onto the hot skillet and quickly spread it out with the back of the ladle in a circular motion, just like you would for a dosa or a thin pancake. Aim for a diameter of about 6-7 inches. You want them to be thin enough to cook through quickly and have crispy edges, but not so thin that they tear.
5. Flipping and Serving
Cook the chilla for about 2-3 minutes on the first side, or until you see small bubbles appearing on the surface and the edges start to look slightly dry and golden brown. At this point, carefully slide a spatula underneath and flip the chilla. Cook the other side for another 1-2 minutes until it’s also golden brown and cooked through. Add a tiny bit more oil around the edges if needed. You can gently press down with your spatula to ensure even cooking. Once cooked, slide the chilla onto a plate. Repeat this process with the remaining batter, adding a little oil to the pan between each chilla as needed. These are best served hot! I love enjoying my masoor dal chillas with a dollop of plain yogurt, some tangy chutney, or even just a side of fresh fruit. They make for a complete and satisfying meal.
Conclusion:
And there you have it! Our Masoor Dal Chilla recipe is a delightful and surprisingly simple way to enjoy a nutritious and flavorful meal. These savory red lentil pancakes are incredibly versatile, making them a fantastic option for breakfast, lunch, or even a light dinner. The combination of wholesome red lentils, aromatic spices, and your favorite fresh vegetables creates a dish that is both satisfying and incredibly healthy. I truly hope you give this Masoor Dal Chilla a try – it’s a recipe that I’ve come to love for its ease, deliciousness, and the wonderful way it nourishes the body.
Serving these chillas is as easy as making them! They are absolutely wonderful served hot off the griddle. I love them with a dollop of plain yogurt or a cooling raita. A spicy green chutney or a tangy tamarind chutney also makes for a fantastic accompaniment. For a heartier meal, consider serving them alongside a simple vegetable stir-fry or a kachumber salad. Don’t be afraid to get creative with variations! You can add finely chopped onions, tomatoes, bell peppers, or even grated carrots directly into the batter for extra texture and flavor. For a protein boost, a sprinkle of grated paneer before flipping can be divine. Experiment with different spice blends too – a pinch of cumin, coriander, or even a touch of garam masala can elevate the flavor profile.
Frequently Asked Questions about Masoor Dal Chilla:
Q: Can I make the batter ahead of time?
Absolutely! You can prepare the Masoor Dal Chilla batter a day in advance and store it covered in the refrigerator. You might need to add a tablespoon or two of water before cooking if the batter has thickened too much. This is a great way to save time on busy mornings.
Q: What’s the best way to ensure my chillas don’t stick?
Using a well-seasoned non-stick pan is key. Make sure your pan is adequately heated before pouring the batter. A light brushing of oil or ghee on the pan between each chilla will also prevent sticking and give you those beautiful golden-brown edges.
Q: Are Masoor Dal Chillas healthy?
Yes, they are! Masoor dal is an excellent source of plant-based protein and fiber, making these chillas very filling and good for digestion. When made with minimal oil and packed with vegetables, they are a wonderfully nutritious meal option.
Masoor Dal Chilla | Savory Red Lentil Pancakes
Savory and flavorful pancakes made from red lentils, infused with fresh ginger, green chili, and cilantro. A healthy and delicious breakfast or snack.
Ingredients
-
1 cup split red lentils (masoor dal)
-
3 cups water (for soaking lentils)
-
1 green chilli
-
1 inch ginger
-
1 teaspoon kosher salt
-
½ cup water (for grinding)
-
2 tablespoons cilantro (finely chopped)
-
2 tablespoons oil
Instructions
-
Step 1
Rinse the masoor dal thoroughly under running water. Soak the lentils in 3 cups of water for at least 4 hours, or overnight. -
Step 2
Drain the soaked lentils completely. Add them to a blender or food processor along with the green chili, ginger, kosher salt, and ½ cup of water for grinding. -
Step 3
Grind the mixture into a smooth, thick batter. The consistency should be similar to pancake batter. -
Step 4
Stir in the finely chopped cilantro into the batter. -
Step 5
Heat 1 tablespoon of oil in a non-stick skillet or griddle over medium heat. -
Step 6
Pour a ladleful of batter onto the hot skillet and spread it evenly to form a thin pancake. Cook for 2-3 minutes until the edges start to look dry and bubbles appear on the surface. -
Step 7
Flip the chilla and cook for another 1-2 minutes until golden brown and cooked through. Repeat with the remaining batter, adding more oil as needed.
Important Information
Nutrition Facts (Per Serving)
It is important to consider this information as approximate and not to use it as definitive health advice.
Allergy Information
Please check ingredients for potential allergens and consult a health professional if in doubt.